4a) Setting Up SSH & Remmina
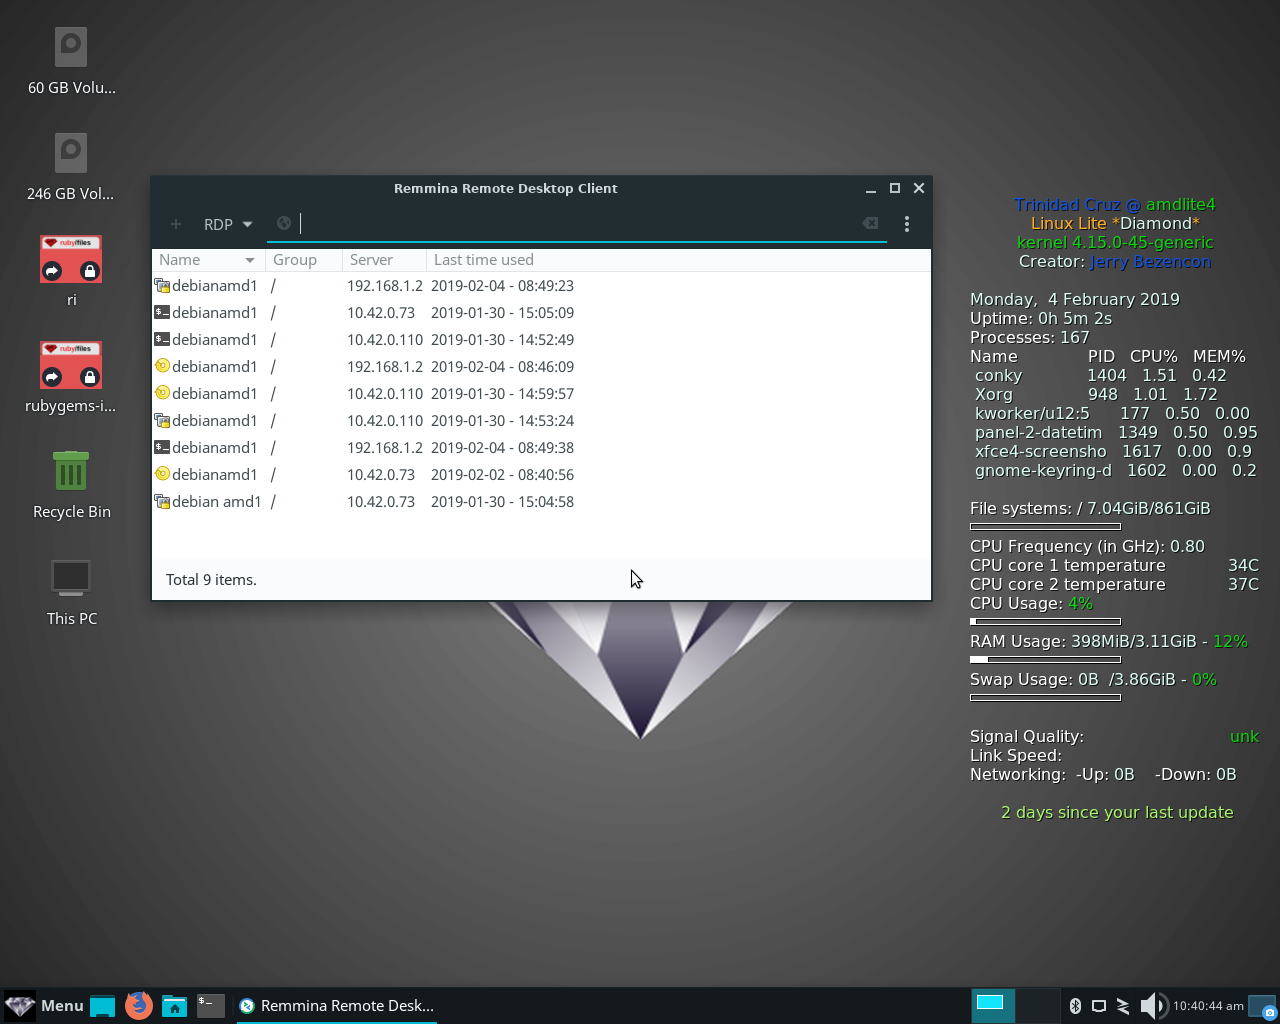
Since I’m going to connect with Remmina from Linux Lite here, connect your computers with the direct ethernet connection you set up. Click connect first on the shared to other computers wired connection you set up, and then connect to the wired connection from your Debian machine, and use the office profile you set up in GUFW for direct ethernet connections on both machines. Open up Remmina on your Linux Lite desktop. As you can see below I have already configured three types of connections and three different IPv4 addresses for the purpose of this demonstration. Hopefully if you’re familiar with Linux you will also notice that I have not made any configuration changes to /etc/ssh/ssh_config on the Linux Lite machine, or /etc/ssh/sshd_config on the Debian machine. The installation defaults are prepared for first time user login with a password, so there is no need to fool with them until after you have setup your connections.
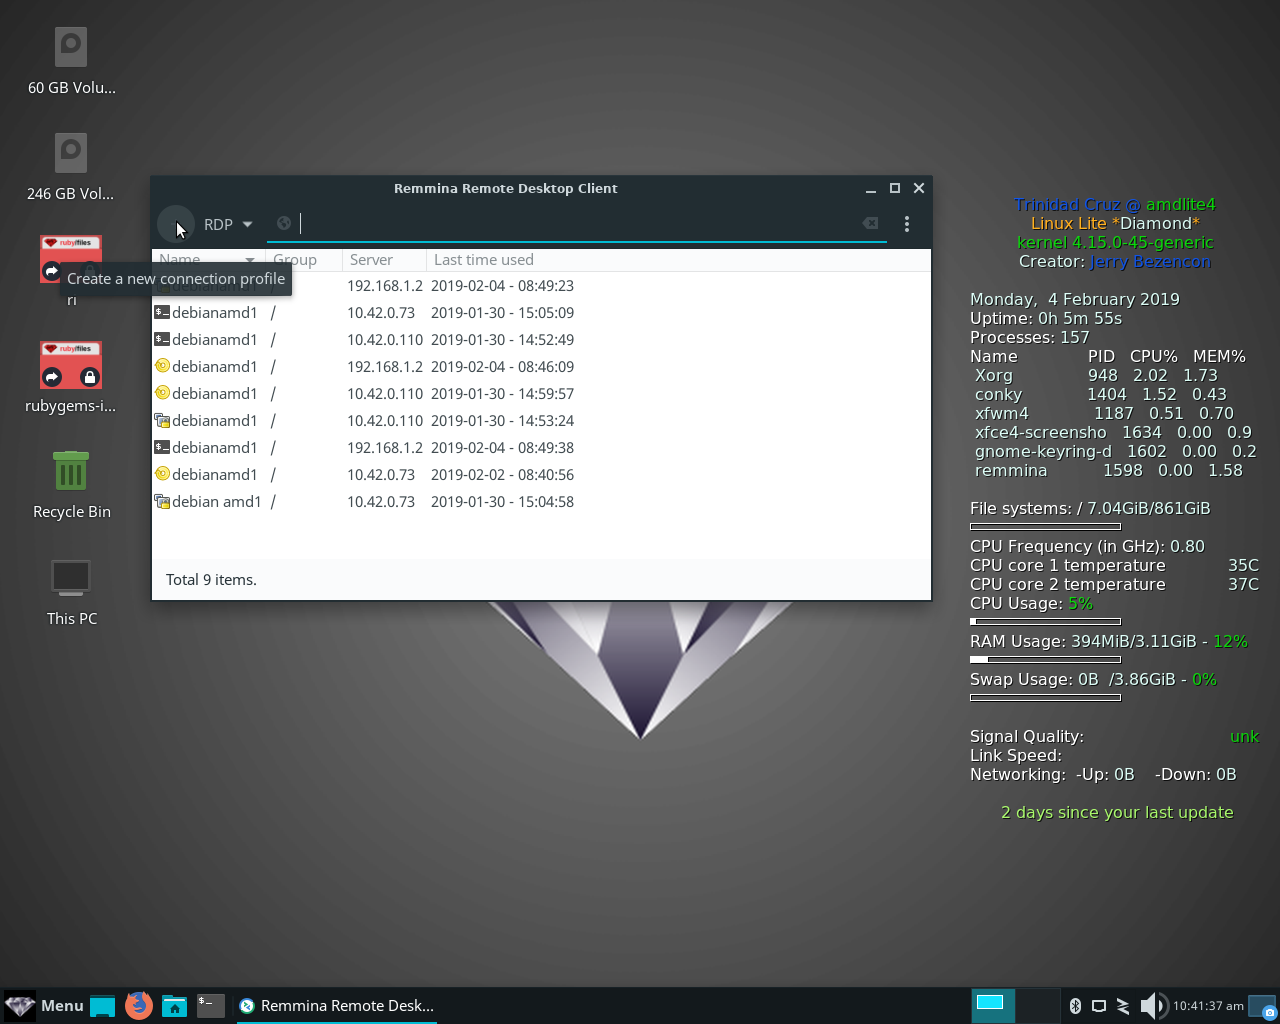
Of course your Remmina window will be empty of connections, and I will discuss each type before I’m done here, but for now click on the + button in the upper left corner of the Remmina interface to add your connection. See image below.
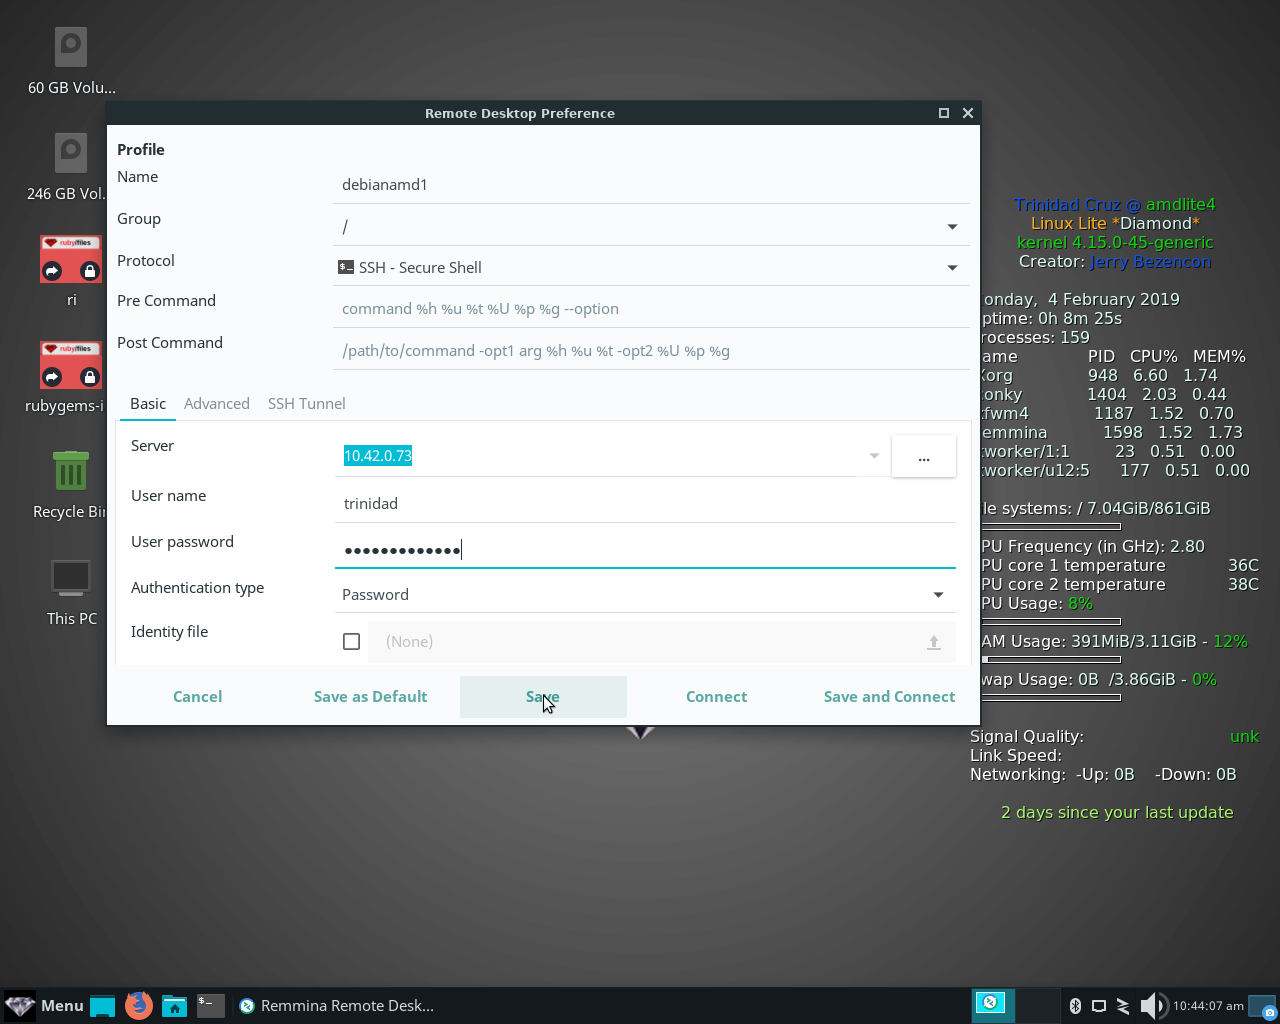
When the new connection window opens fill out the connection information like it is below, in this case the netbios name debianamd1. To find yours open up your Debian terminal and your netbios name will be what follows after the @ sign and before the $ sign in the prompt. For group just select the forward slash / from the dropdown menu. For Protocol select SSH – Secure Shell from the dropdown menu. In the box next to Server type in the IPv4 address of the directly connected Debian computer, in this case 10.42.0.73. For User name put down the user name on your Debian computer, and for password your Debian user password. For Authentication type select Password from the dropdown menu. Save the connection. See image below:
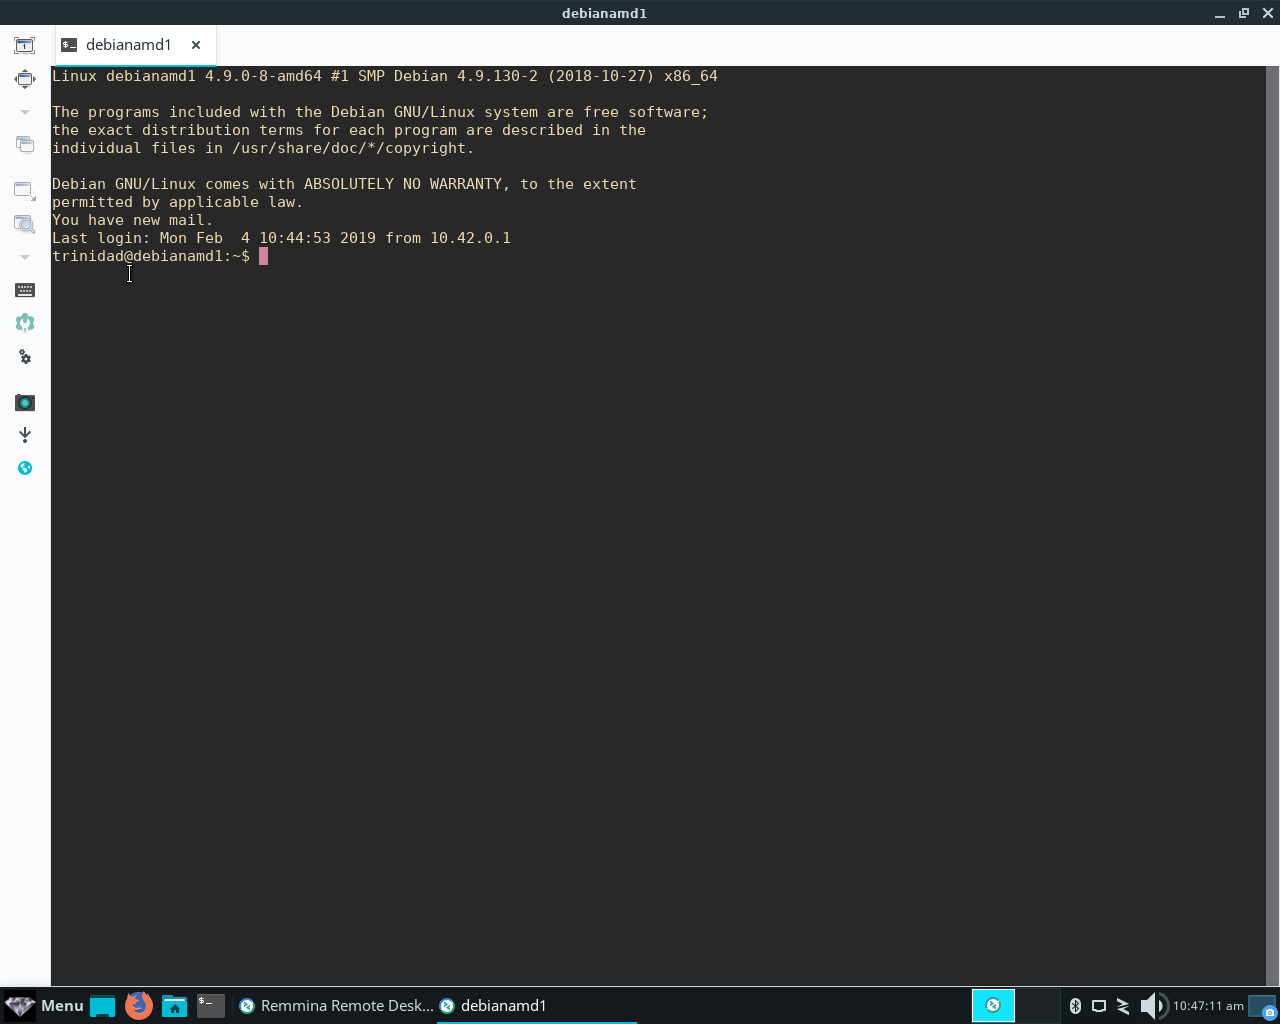
You will now see your main Remmina window again with your new saved connection. Right click on the connection and click connect from the menu. Enter your password when prompted, accept the servers certificate if asked. If you successfully connect Remmina will display a secure shell on your desktop like the one below. Type exit at the prompt and hit Enter and the shell will disconnect. You first must be able to connect this way with a user name and password to set up keys, which I am going to do next.
Section 4b) Generating & Sharing SSH Keys
To repeat: you first must be able to connect SSH with a user name and password to set up keys, which I am going to do now. You generate keys first from the client side, the Linux Lite Remmina side in this case. Quit Remmina if it is still running. Click the three vertical dots in the right upper window menu, or the Z looking lower right hand corner tray icon and select quit. Then open up XFCE terminal on your Linux Lite desktop and type ssh-keygen after the prompt and hit enter. The key will generate with a 2048bit encryption load, but if you want more type ssh-keygen -b 4096 and the key will generate with a 4096bit encryption load. See the image below to get an idea of what the process looks like in the terminal as I go through the options. I already generated my keys so I don’t want to use the native terminal images and overwrite them, but the image below should be understandable to most users.
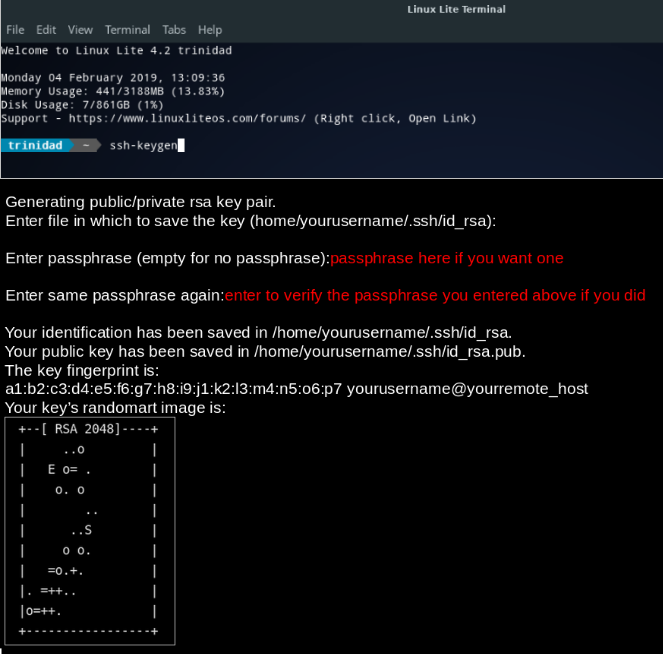
After you enter the ssh-keygen command you will be prompted to accept a default file or create one for your key. It’s fine to just hit Enter and accept the default file placement for your key. Next you will be prompted to enter a passphrase. I never create one, just hit Enter, but if you have another user on your Linux Lite computer, you may want to enter a passphrase here to protect your Debian 9 computer from being accessed. Don’t use a passphrase like: Ilovelinuxlite or Ihatewindows. Pick something from literature like: alicethroughthelookingglass or the darker side like: trashcanmanlovesfire. When you enter the passphrase you will be asked to enter it again for verification. The terminal will then pass the notifications of your key locations and hex code and generate an image and you’re done. *Note* Just remember when you select a passphrase you will have to enter it every time you connect, and though it can be stored in Remmina that seems like defeating its purpose to me, and when you use the VNC connection you will be prompted for your x11vnc password too, so making that connection through an SSH tunnel will require entering your passphrase twice and your x11vnc password.
Now you need to share/copy your keys to the SSH server on your Debian computer. There are several ways to do this, but SSH on Linux Lite 4.x series and Debian 9 both now come with the utility ssh-copy-id which makes the process very easy. Open your XFCE terminal in Linux Lite and type the command below and then hit Enter:
ssh-copy-id yourusername@remote_host_IPv4_address or in my case ssh-copy-id trinidad@10.42.0.73 See the image below:

When the terminal prompt returns just type exit and hit Enter to leave the terminal.