Wake On Lan & SSH Shutdown On Your LAN
Booting up a computer via a network connection has been around since the 1980s, and nowadays Wake On LAN is part of the modern UEFI boot system and most BIOS since the Windows 2000 era. Anyway, my intention here is to show how simple this is to set up for an ordinary user of Linux Lite, or Debian, using only Network Manager, and the Debian or Ubuntu package wakeonlan. I will be using Debian for the demonstration here, but there is little difference in setting this up to work for you the same way in Linux Lite as Network Manager is default in Linux Lite. I will also show how to set this up using wicd and ethtool on a Debian LXDE system which does not have Network Manager as its default.
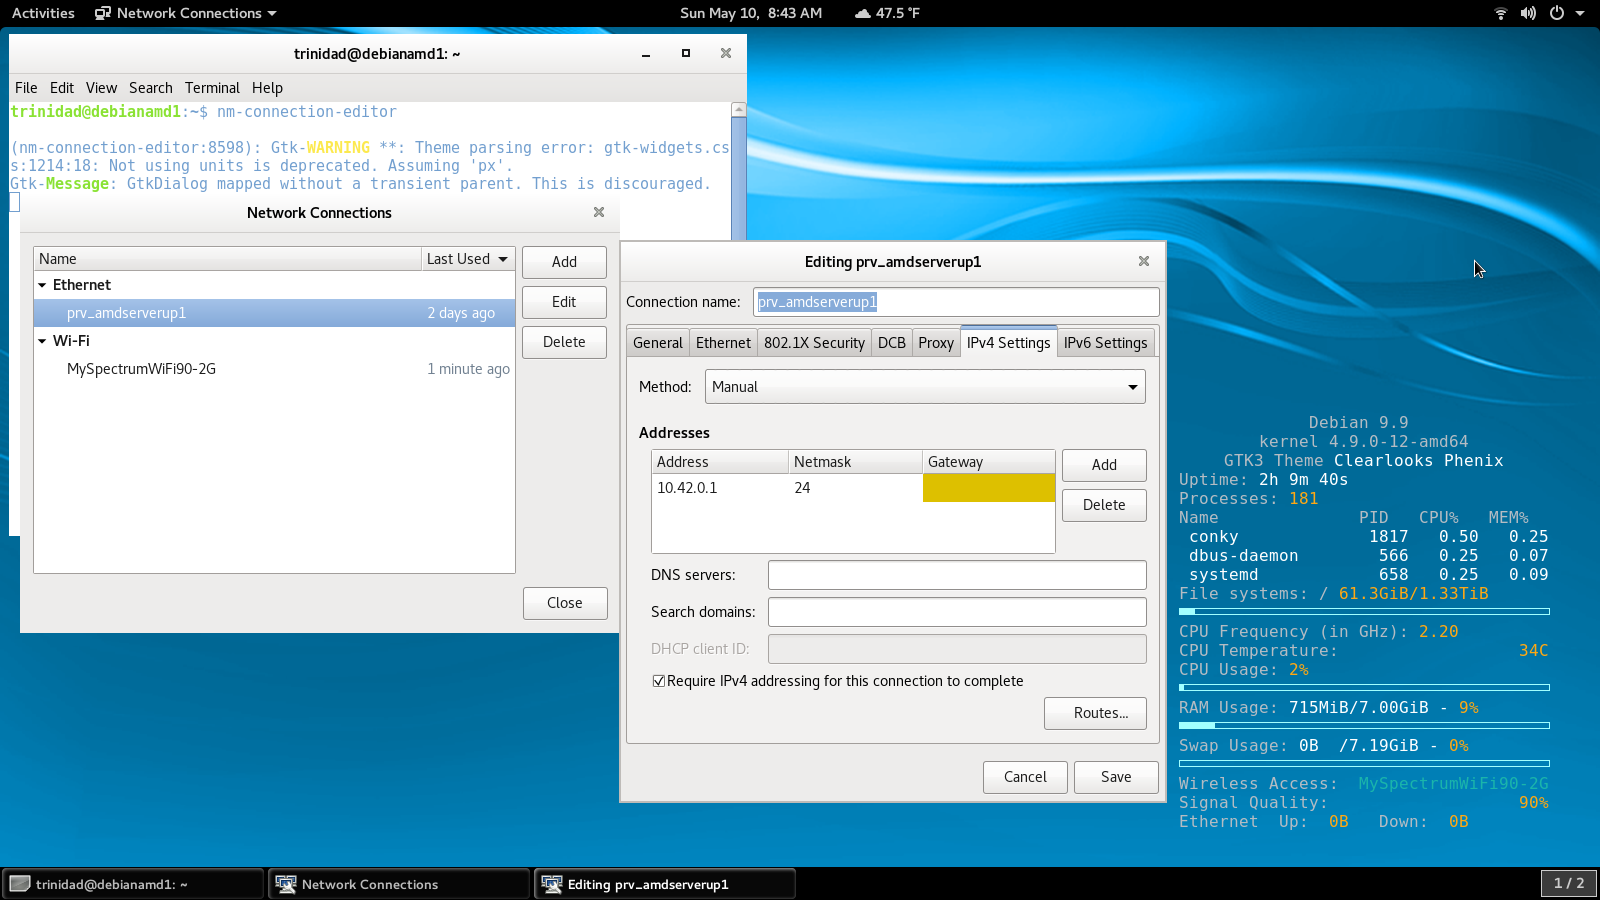
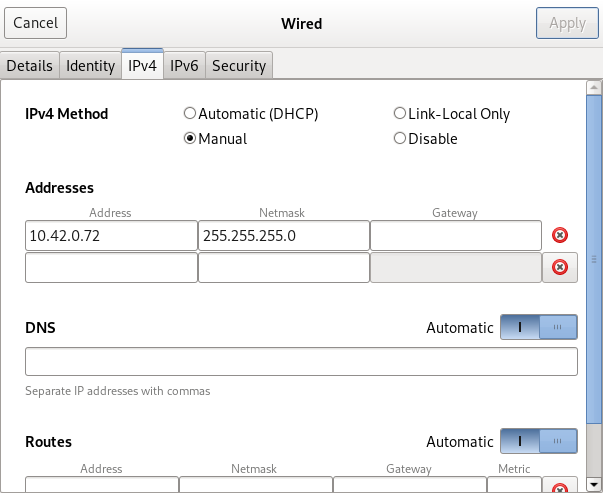
I’m going to use a direct ethernet connection here, which I recommend doing first to determine if you can get wake on LAN working. It’s easy enough to configure it through your router and even over ad hoc wifi afterwards. No sense messing with those connections until you’re sure it works for your particular set of machines. The machine I want use to send the frames of wake on LAN from and wake up my other machine is Debian 9.9 gnome, so I will use network manager to setup the first connection. What I recommend doing for this first direct connection is to open up network manager and manually configure a connection with a static IP. Using a static IPv4 here eliminates some common future connection problems for repeatedly shared computer connections and makes securing other things like SSH easier as well. See the three images below, first from the normal interface and two from nm-connection-editor. You won’t need nm-connection-editor if you are configuring this with Linux Lite 4.x. Make sure you give the connection a name like I have here like prv_amdserverup1 to avoid confusion if you use other connections via ethernet. For ad hoc Wifi and direct ethernet connections I use the prefix prv_ to remind myself the connection is not passing through a router or hub. It also helps other computers on your LAN to locate the connection for new connections.
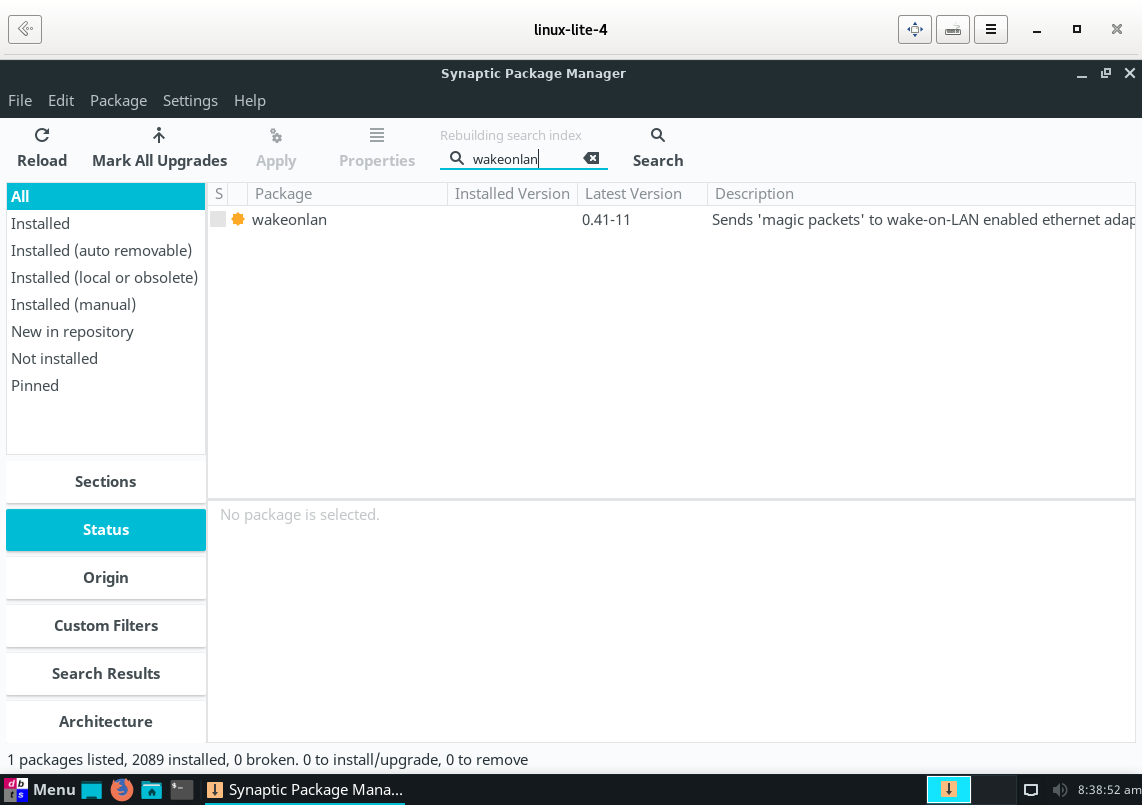
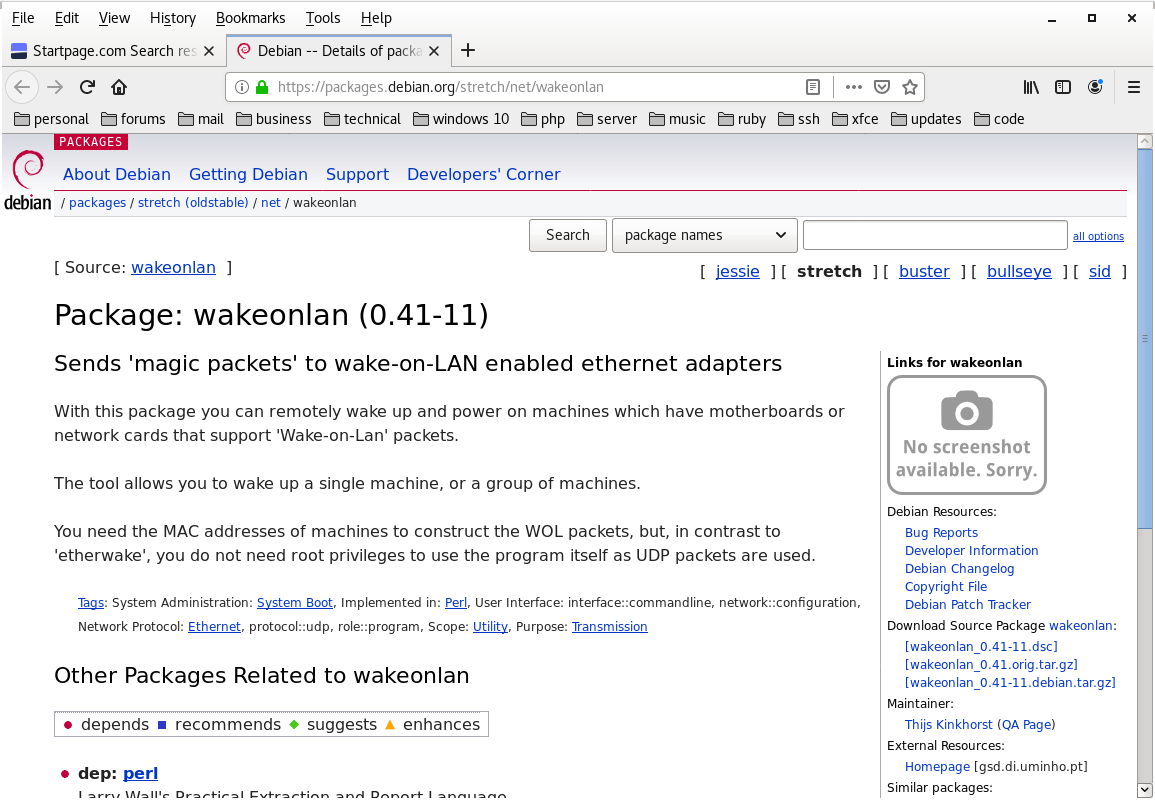
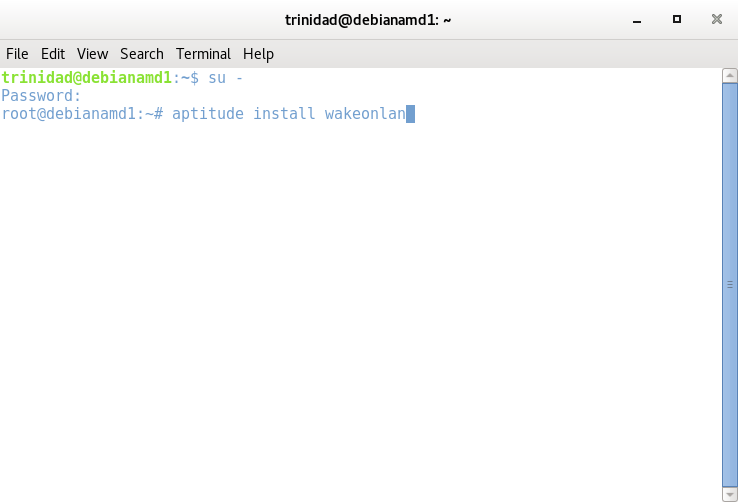
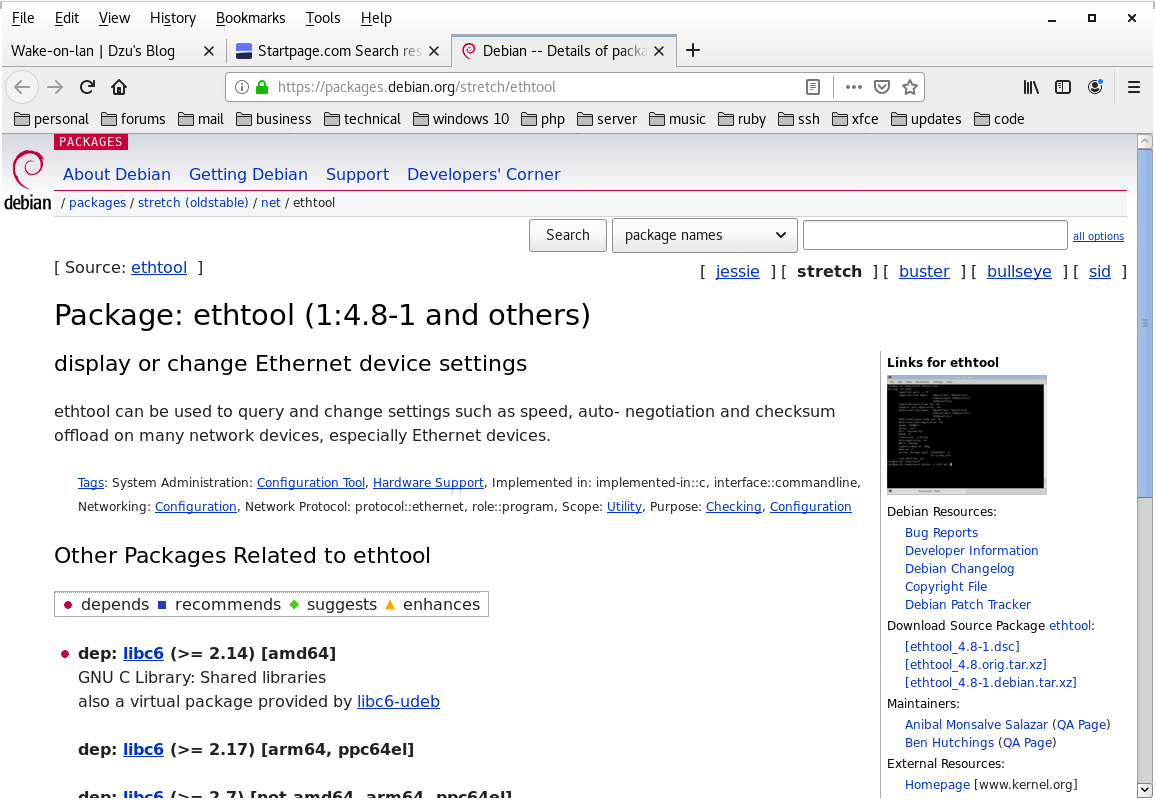
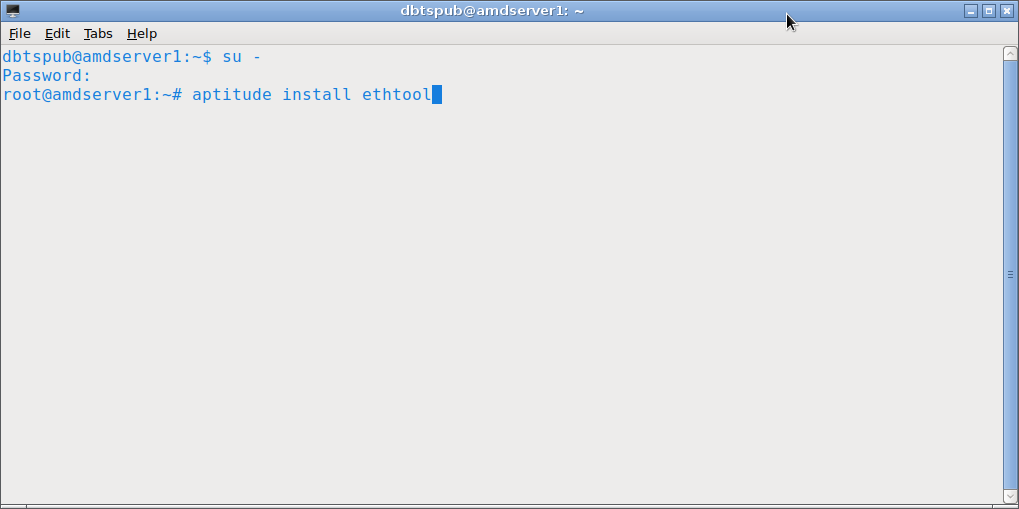
Next you will need to install the wakeonlan package to your system. In Linux Lite use synaptic, and in Debian 9 locate the package to be sure of its name and install with aptitude. See images below:
Now your first machine is ready to send frame packets to your other machine and boot it via LAN. Time to set up your second machine to receive the frame packets you will send and be able to boot from LAN. Linux systems as modern as Debian 9 & 10 and Linux Lite 4.x work very well nowadays with most desktop PCI NICs later than 2004 (16 years old) Older hardware and some older laptops as well as a few brand new machines can be hit or miss, but you won’t know until you try. What you need to look for in either your UEFI settings, or BIOS settings is something like LAN Boot, or Boot from LAN, or Network Boot, and enable it. It may also be called in some cases PXE Boot, or ROM Boot, or Boot from ROM, in which case there will probably be some other settings you need to enable most likely Plug & Play OS or something like it. There will usually be in the case of PXE an interface available from a key combination like shift F10. In the PXE interface you will normally want to select the entry that contains PnP and probably a BEV and a (BBS) option all in one line. The PnP option is the important one as it allows your current Linux Lite or Debian OS to control your NIC with its own drivers if that is possible. In some BIOS you may still have to enable PnP in another spot as well. I have a 2011 ASUS that is like that. The other options in the PXE interface like Int 17 or 18h are there for installing PCI firmware, and/or OEM firmware after hardware upgrades or changes, and/or A-drive (tape, floppy) boots.
Assuming your two machines are already connected over your plugged in ethernet cable, and both running, your first machine should connect from network manager when you choose the connection by name, and your second machine should connect when you just choose wired connection from network manager or the connection name if it is displayed in the wired menu. You may have to configure your firewall on the second machine to allow incoming connections over a specific port, or just disable your firewall for ethernet connections. If you can’t get the machines to connect initially via static IPv4 addresses choose the option shared to other computers on the first machine (the one you want to send wol packets from) and after you get the two connected change both addresses to manual (static). The option will be available in network manager on Linux Lite, but in Debian you will have to run the nm-connection-editor command from the terminal to access the option. Other discussions on my web site cover making connections with Debian and Linux Lite using network manager so I will not cover it in depth here.
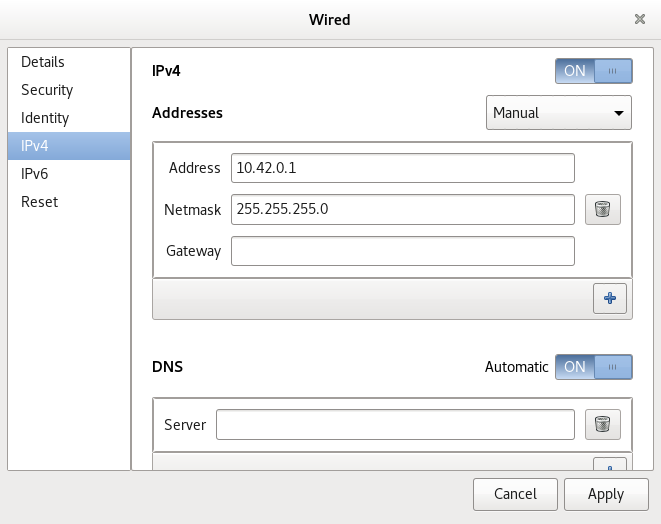
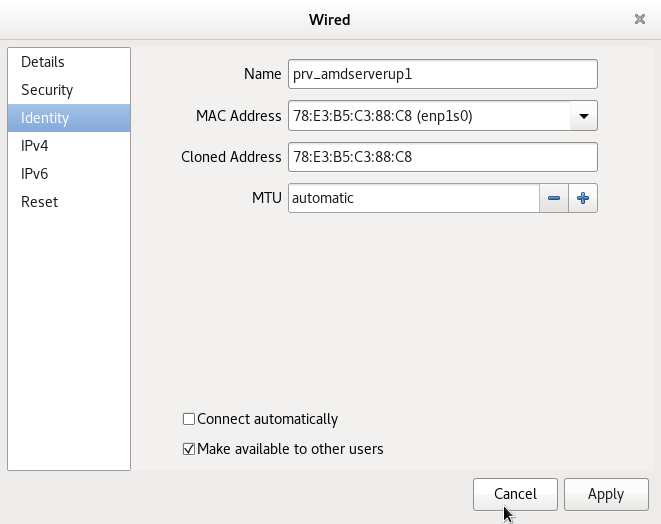
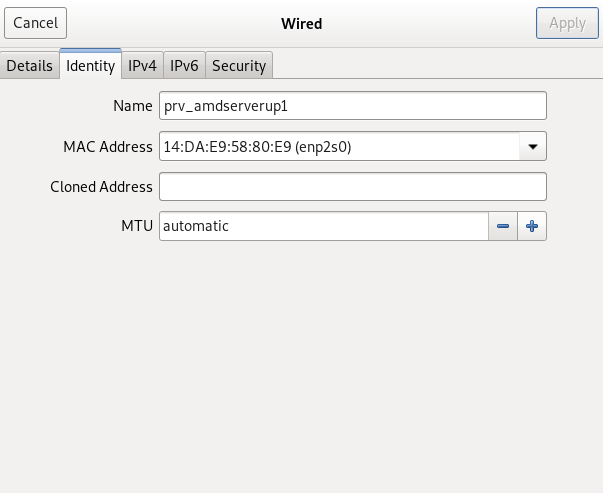
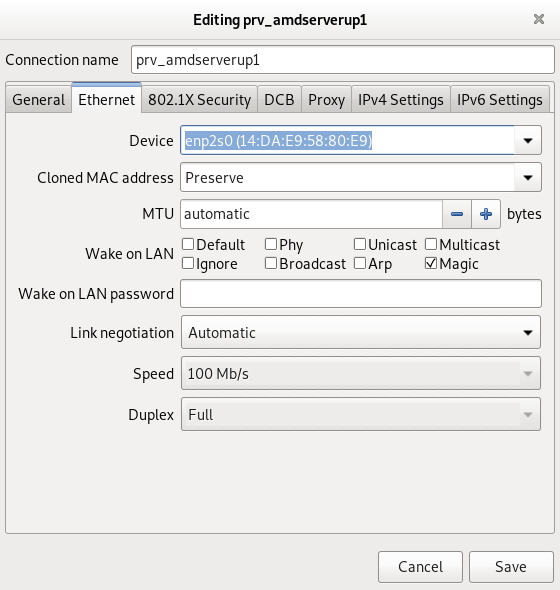
Moving on... take a look at the two images below. Give your connection a name. Configure it manually with the address that is connected per the second image i/e 10.42.0.72. You can use either 10.42.0.1 (if that is the static address of your first machine) for the gateway or 0.0.0.0. Write down the MAC address, as you will need it to send frames from wakeonlan, here i/e 14:DA:E9:58:80:E9. Also write down your interface name, here i/e enp2s0. You will need that for configuring your firewall, if you run one. Finally write down your static IPv4 address as well, as you can route wakeonlan sent frames directly to it and so not interfere with any future connections.
The last step here is to open up nm-connection-editor again and use the connection settings in the image below.
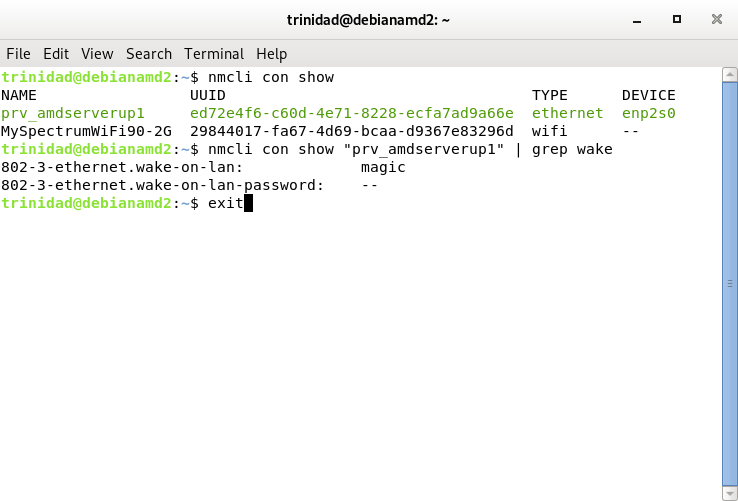
To double check everything after you are done run the two nmcli commands as shown in the image below. Your connection name and device name should both be returned, and magic should be enabled for wake-on-lan.
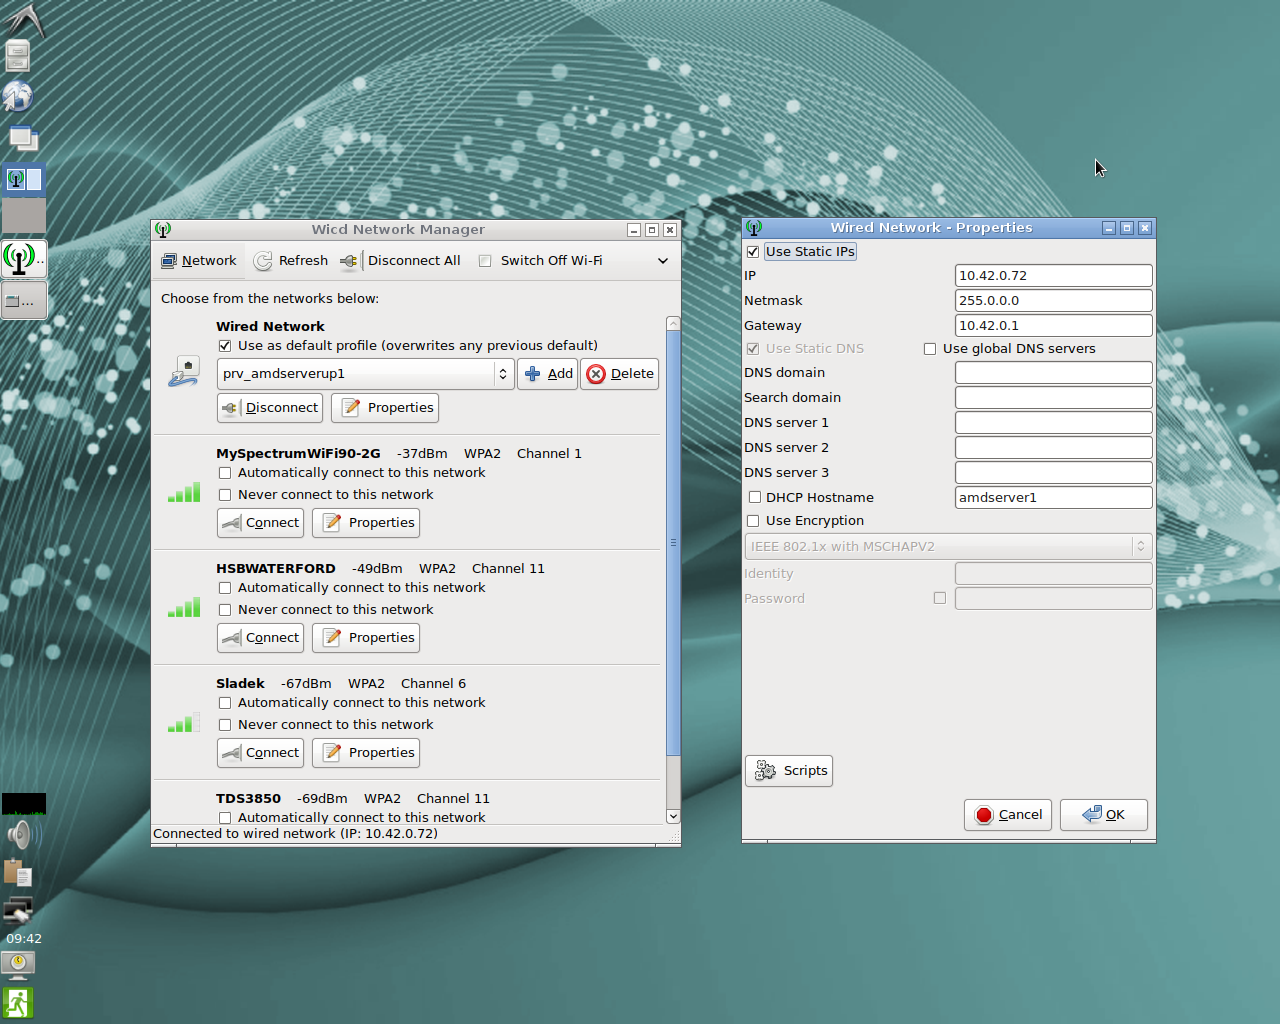
The machine I am setting up here is a dual boot Linux machine with two drives and two Debian systems. I have experienced a problem with dual booted Linux systems that produced a boot loop from wake on LAN, and once solved quit booting from wake on LAN. To avoid those issues I’m going to configure both systems with the same IPv4 static address, connection name, device name, and hardware address. They are both comparable Debian OSs, one 9.9 and one 10.4 so the device names and hardware addresses turned out to match, so all I have to do is set up the static IPv4 address and name the connection. I’ll be using wicd now and ethtool as the Debian 9.9 system is my backup server with a minimal LXDE installation. The image below shows the connection setup in wicd.
Next locate the correct ethtool package and install it with aptitude. See the two images below.
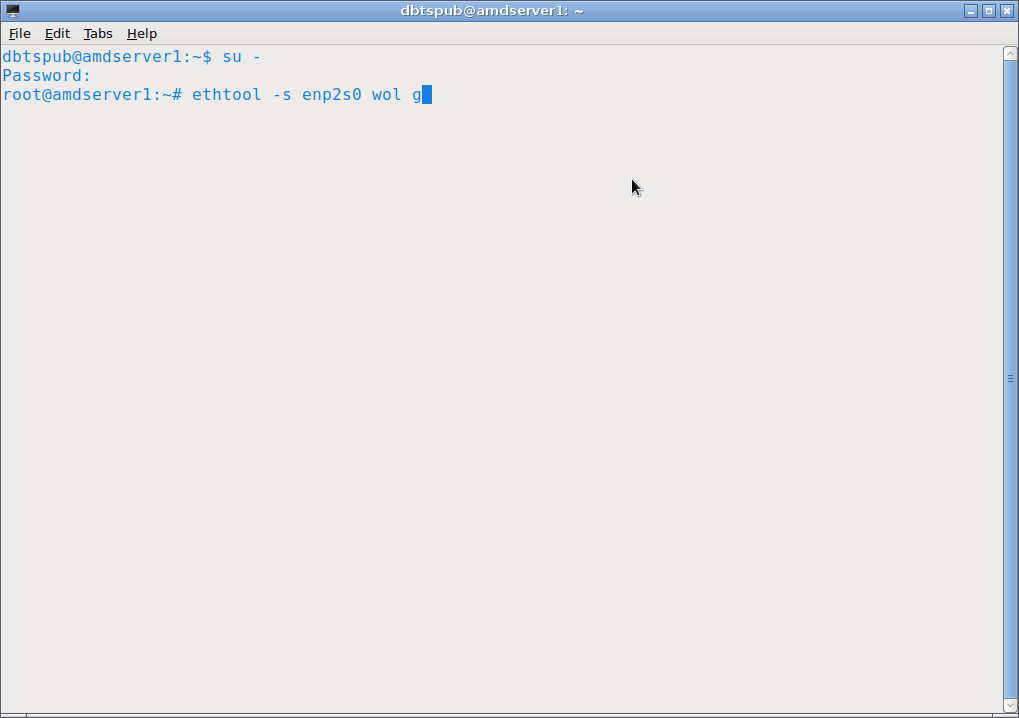
From root run the command as shown below to allow magic packets to wake the machine from LAN. The “g” at the end of the command stands for magic packets.
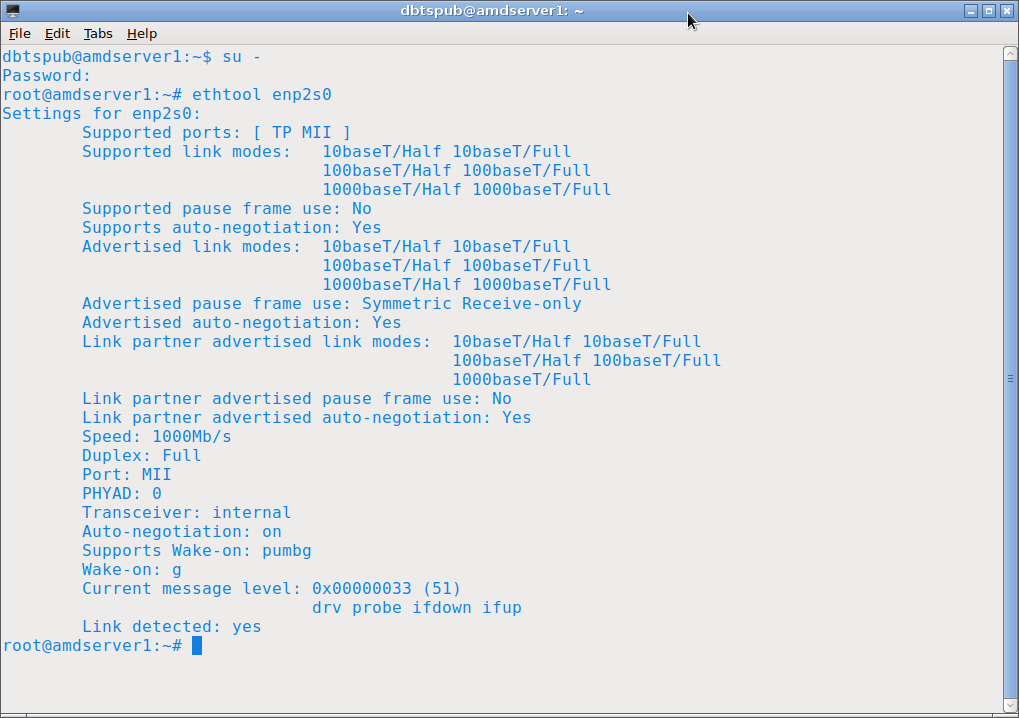
Run the command as shown in the image below to check your connection. The “g” should be present after Wake-on: You will notice that my NIC supports “pumbg” for wake on LAN. That represents respectively: physical, unicast, multicast, broadcast, and magic packet connections. You can also see that the NIC is run by ifup/down, which is common with Debian.
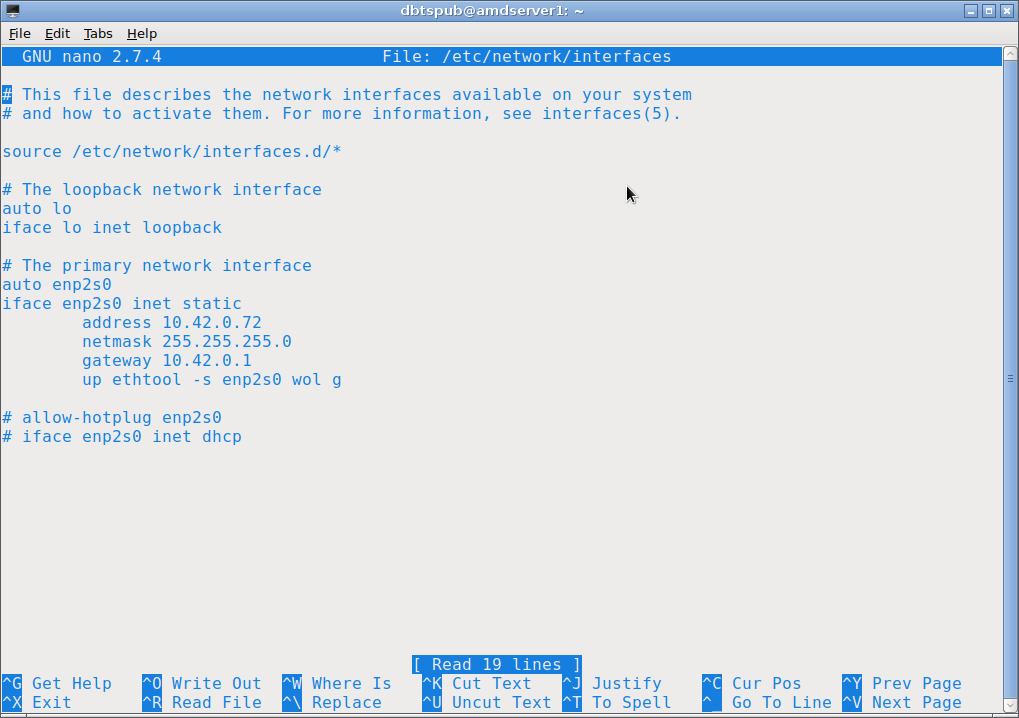
Using ifup/down is convenient here. You can add an ethtool command to /etc/network/interfaces and make the wake on LAN settings persist through reboots. See the two images below. From root right below “# The primary network interface” add the lines as shown in the second image and save the file.
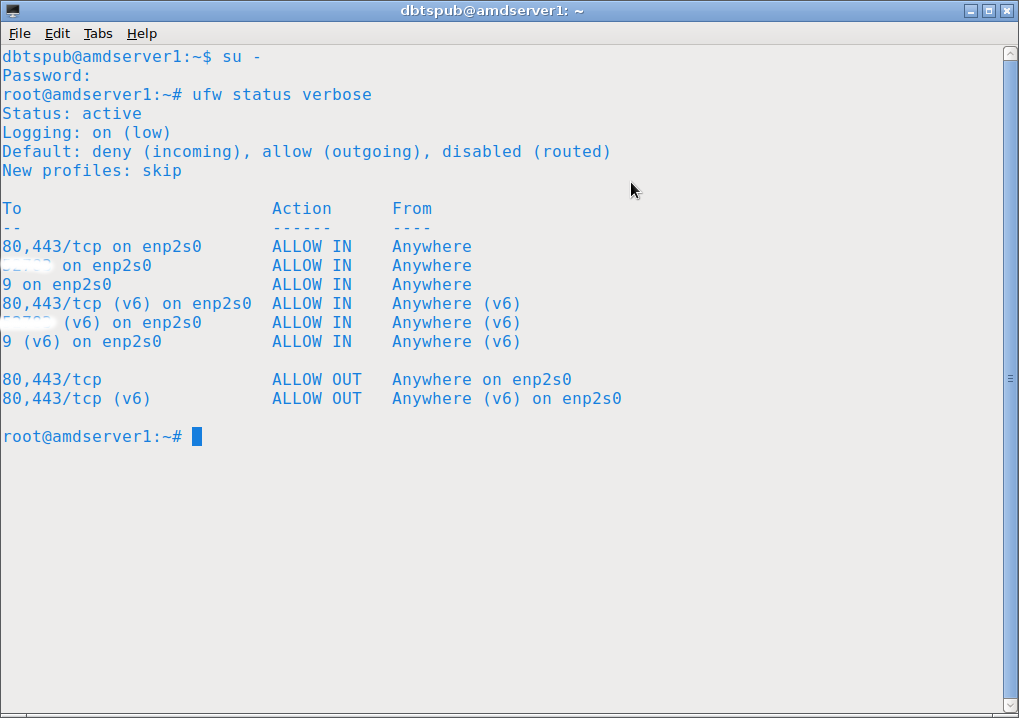
If you run UFW on some machines you made need to add port 9 access. This is my backup server and only runs on an ethernet connection. I’ve discussed UFW usage before in other tutorials on my website, but you can add the rules for port 9 easily like in the image below. The whited out entries are just my SSH ports.
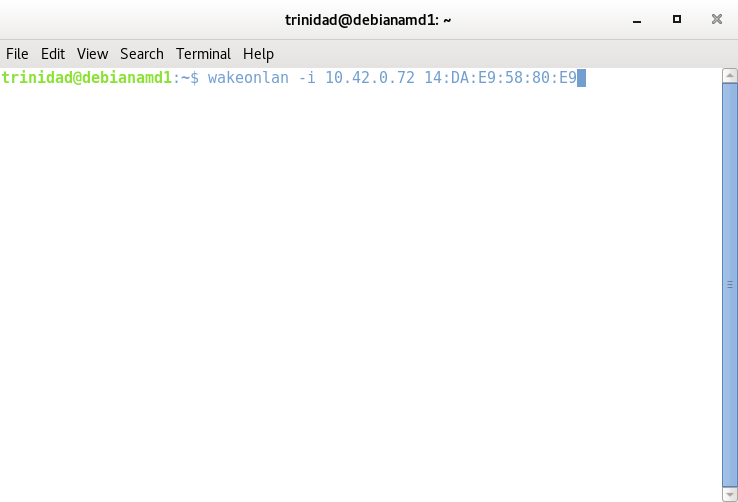
Okay now you should be able to test your wake on LAN connection. Shutdown the machine you want to wake. Open a terminal on the machine you are using to send the magic packets and enter the command as shown in the image below. Start with wakeonlan then the -i and then the IPv4 address of the machine you are sending to, and then its NIC’s hardware address.