Part Two: Set Up X Environment with PowerShell and Configure Remmina and SSH Server On Linux Lite
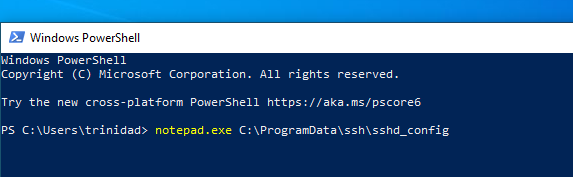
Open up PowerShell with an elevated prompt on your Windows 10 machine (hold down Ctrl+Shift and then click on it) and type in the command notepad.exe C:\ProgramData\ssh\sshd_config as shown in the image below. Hit Enter and Notepad will open once you agree to allow PowerShell to make changes to your system. See images below:
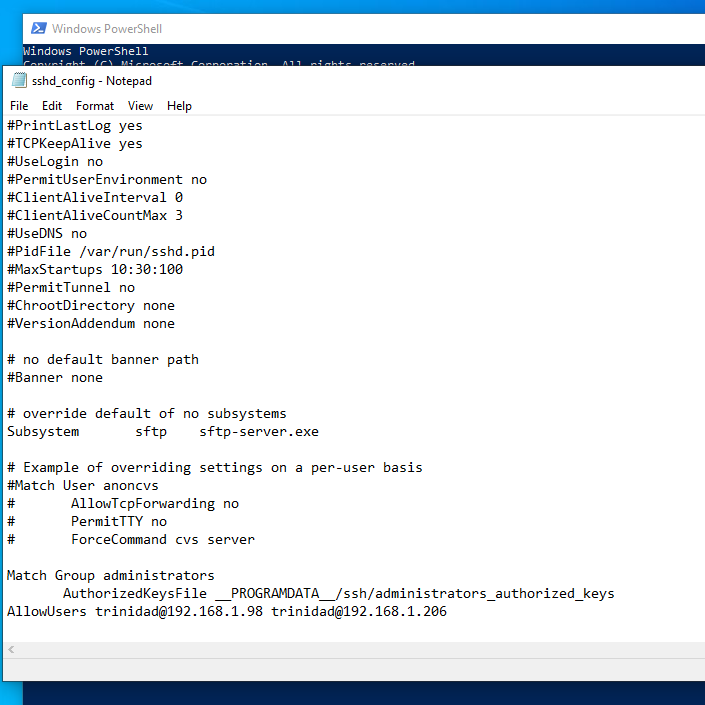
Scroll down in Notepad and add an AllowUsers restriction at the end of the file in the syntax shown. Save the changes and exit PowerShell.
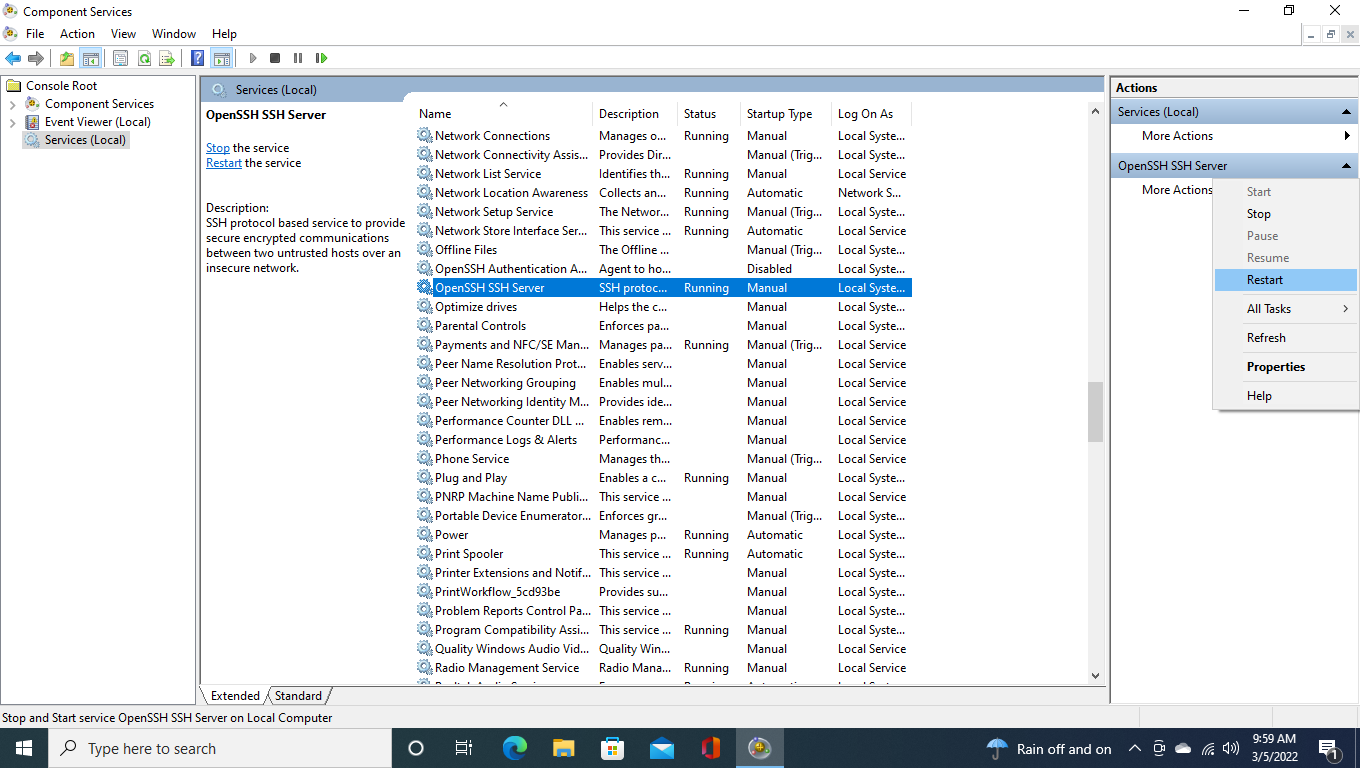
Next go to your menu and find Windows Administrative Tools and click on component services. When the window loads click on Services Local and scroll down to find OpenSSH SSH Server. Click on it so it highlights and from the right hand More Actions dropdown menu select Restart. This will restart your SSH server with your changes saved.
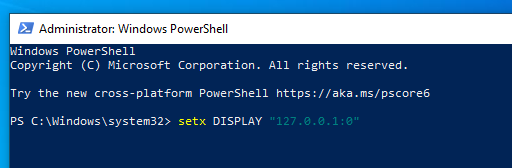
Open up PowerShell again with an elevated prompt and type the command setx DISPLAY “127.0.0.1:0” as shown below. This will send SSH forwarded X11 data to your Xming server on display port 0.0 and be saved in PowerShell from now on. Exit PowerShell with the exit command when you are done. When you open it again the new x forwarding environment will be there and respond to your PowerShell SSH commandlets for x forwarding.
Next on your Linux Lite machine open a terminal and type the command shown below. Enter your sudo password when prompted.

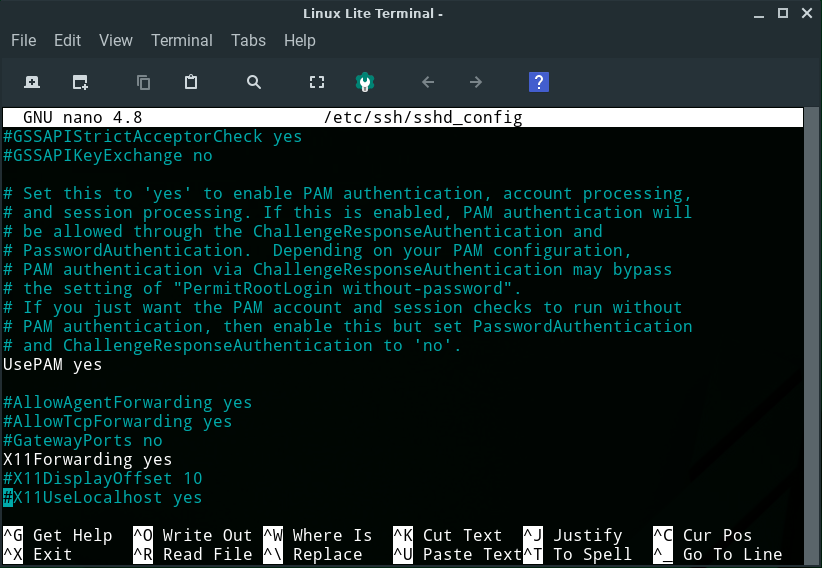
When the nano editor opens scroll and find the line pertaining to X11 forwarding and edit it to look the same as the image below. Save the file (CTRL+x then Y then Enter).
Run the command below and enter your password when prompted to restart SSH server with your changes.

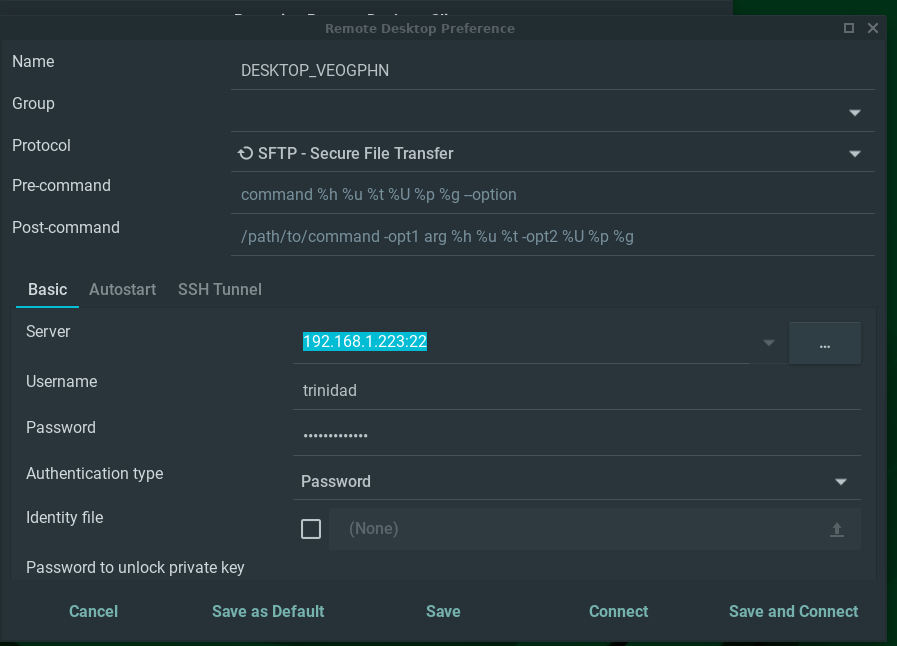
Open up Remmina and add the connection information for your Windows 10 computer: net-bios name, protocol, server address, user name, password and save the connection.
Part Three: Easy And Fun, Running Remmina For SFTP On Your Windows 10 Desktop