
Build & Deploy A Web Server & Home Website Yourself
Part One:
1) Introduction
Debian is a great base operating system to deploy and operate an Apache2 web server from, and that’s what we’re going to learn to do in this tutorial. We’re also going to learn how to build simple informative .html web information pages like this one to deploy on our home website and server. We’re going to do all this with Debian stable packaged applications and tools. Originally the World Wide Web was envisioned as a place where anyone could deploy an HTTP server, and the truth is, it’s actually easier and cheaper to do now than it was then. Nobody in the tech world is about to make this easy for you beyond the basics, because that’s right about where their own paychecks come into the picture. We’re going to start from the beginning with the basics of deployment, implementation, and tool building and continue on to the basics of securing and monitoring your new running server.
2) Hardware
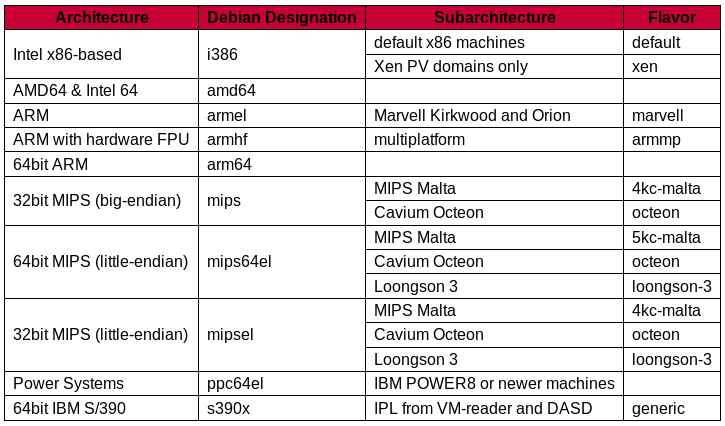
Debian 9 “Stretch or stable” is compatible with most common OEM hardwares up to 15 years old or newer, but for what we intend to do I recommend at least 8gig of RAM, 250gig HDD, and AMD processors with four cores are quite adequate. Drive space is less important than RAM and CPU speed, and in this case 250gig is advantageous compared to 1T or bigger when we go on to secure the server. We are building a simple public facing HTTP and/or PHP LAMP server with public access to a single home service web site. See the links below for helpful hardware information and common configuration solutions and the basic image below that for available Debian ports.
https://wiki.debian.org/Hardware
https://wiki.debian.org/InstallingDebianOn
You can follow the first link below to download the official Debian net install image. The second link below will take you to some unofficial images which include non-free code blobs (firmware) that may be necessary to install on some hardware. Things like the AMD graphics package and NIC and Wifi drivers etc. The third link below is the base index of available net install images. The fourth link is the location of the tar ball firmware download if you wish to install firmware afterwards or through pre-seeding the installer. It is best to know the hardware you wish to install to and determine whether or not you need the non-free image in advance.
https://www.debian.org/CD/netinst/
https://cdimage.debian.org/cdimage/unofficial/non-free/cd-including-firmware/
https://www.debian.org/releases/stretch/debian-installer/
https://cdimage.debian.org/cdimage/unofficial/non-free/firmware/stretch/current/
3) Connecting
You can connect whatever way you like, and the installer will try to configure your connection for you, but if you are not sure of your NIC or your Wifi hardwares you may find yourself unable to connect because of missing firmware. The simplest way to connect, and also the least susceptible to network connection drops, is to direct connect via ethernet cable to another Linux computer that allows a shared to other computers wired connection, and is itself connected to the Internet via Wifi in the 26 to 64mbs range or higher. On decent 64bit hardware this speed will allow complete installation in around a half an hour of a full Debian DE OS.
4) Installation of Debian OS & DE
The Debian net install ISO come with two versions of the Debian installer, a modern graphical version and the standard text version. To get an idea of what to expect from the installer see the links below. The first link is the text installer, the second the graphical installer. I recommend getting familiar with the text installer. Please install with a root password and a regular user name and password. *We will be choosing another different separate user name and password for mariadb later so think about it a bit and write down your passwords. Root will be the same for our server and our OS and we will NOT be allowing sudo.
https://www.howtoforge.com/tutorial/debian-minimal-server/
https://www.linuxtechi.com/debian-9-installation-guide-with-screenshots/
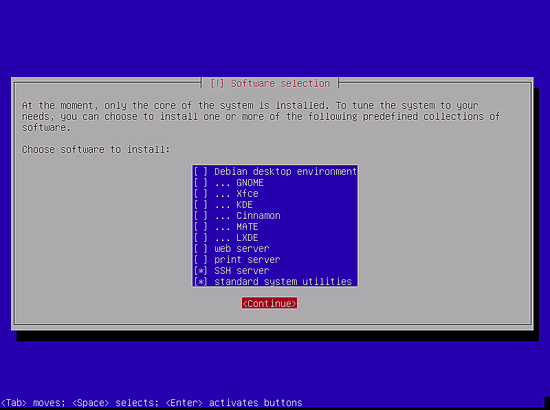
When the installer gets to the screen below (task selector) we must choose some specific options and for our purposes (Debian LAMP with a Debian base OS DE) I recommend the following choices of software for specific simple convenience:
a) Check the box for the LXDE DE only, and none of the others offered. (The Thunar file manager in XFCE is problematic with some Debian server utilities will we use later so NO XFCE, and LXDE divides the file system quite neatly between the DE and the Debian server tools, and the window manager makes Debian GTK stuff easy to configure. KDE is problematic with its QT base, and gnome is unnecessarily overweight for our purposes.)
b) Check the box for web server (This will set up the split file system correctly, add the task selector, and add some Debian server utilities.)
c) Check the box for print server (We want the T/T font set ups from cups. We’re going to build our web pages with our base system.)
d) Check the box for SSH server (This will allow for secure shell logins to our server, and SFTP, and allow us to admin anything on it from any of our other machines.)
e) Finally check the box for standard system utilities (We are going to be using our Debian system for more than a base server so there is no advantage to going completely minimalist for us.)
5) Boot To Your New System & Update
Because we now have a running Debian 9 system built from a net install ISO we can update and use synaptic package manager to install what we need for our LAMP server. We do not need to fiddle with our sources list, which will already be Debian .org anyway, and will contain free and/or non-free depending on which ISO we found it necessary to use. I recommend this method because the packages will be the most up to date, and I recommend avoiding copying and pasting commands from Internet tutorials, as they can be, and are often out of date. (You may or may not still be connected to the Internet. Open the LXDE main menu to >Internet>Wicd Network Manager. If you are still wired to another computer’s shared connection and it is still active, simply add a wired connection name and click connect. To test your wired shared connection open Firefox and go to google.com.) After connecting open a terminal and su to get a root prompt. Run apt-get update. Exit the terminal afterwards.
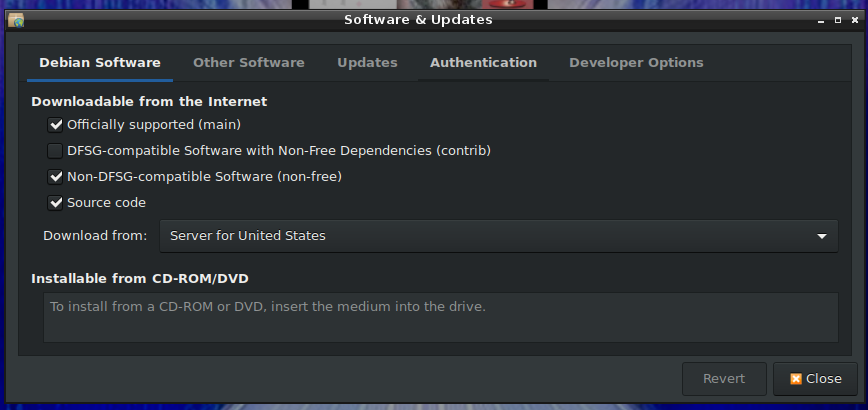
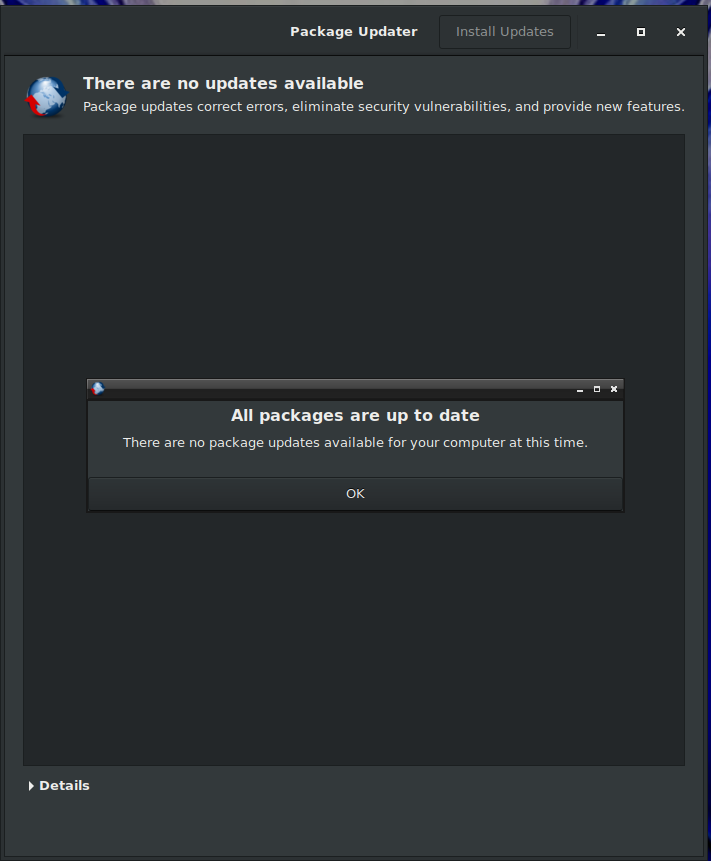
*It’s convenient to manually check for and monitor updates via the main menu and a GUI so let’s install an application to aid with automatic updates and software source configurations. From the main menu go to >Debian>Applications>System>Package Management>Synaptic Package Manager and open it. Enter your root password when prompted and type pk-update-icon into the search box. Mark it for install when it appears and accept all the dependencies. After installation two new icons will be in your LXDE main menu. Under >Preferences>Software & Updates will appear. Click on it to show the first screen below. Under >System Tools>Package Updater will appear. Click on it to show the second screen below.
6) Install Lightdm GTK Greeter Settings
Because we are running a Debian OS with a DE, and an Apache server we would like to have a lightdm custom login display that allows and shows multiple users so that we can login as root if we want to and work with our server files and configurations. We are not some big server farm so this is not a security issue. Once again navigate from the main menu >Debian>Applications>System>Package Management>Synaptic Package Manager and open. Enter your root password when prompted and type lightdm-gtk-greeter-settings into the search box. When the package appears mark it for installation and agree to all dependencies. Once installed find the LightDM GTK+ Greeter settings in the main menu at >Preferences> LightDM GTK+ Greeter settings. Click on it and enter your root password when prompted, and then select an avatar for your user and any background you would like to appear.
*It is the default setting in Debian 9 that no user name appear in the login screen and no choice for other. To change this setting we need to edit the configuration file. Open a terminal and su to root. Enter your root password and at the root (#) prompt enter the command below:
nano /usr/share/lightdm/lightdm.conf.d/01_debian.conf
Change the line that reads: greeter-hide-users=true to: greeter-hide-users=false Hit control+x, then y, then enter to save the file. Exit the terminal. Now you will be able to login as root from the login screen by selecting the “other” option and typing in root as the user along with your root password.
7) Install MariaDB
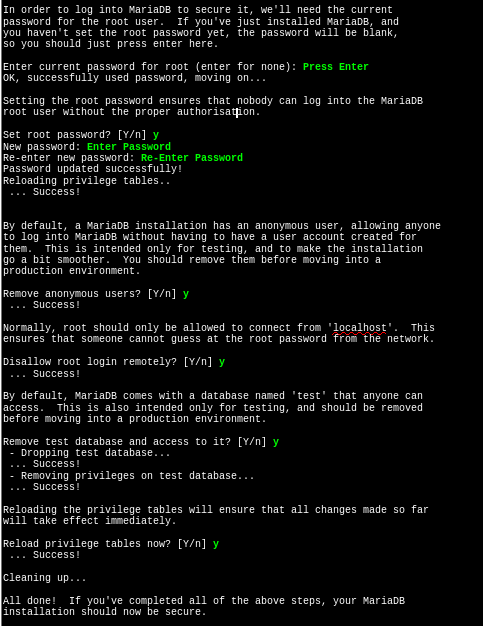
Let’s logout now and restart our Debian system and select other at the login screen and type in root and our root password and login as root. (I personally use a different wallpaper for my root OS than my normal user OS to remind me where I am when my mind wanders so you might want to change the wallpaper for the root DE. Navigate from the main menu >Preferences>Desktop Preferences to open the desktop wallpaper selection application.) Next navigate from the main menu to >Debian >Applications >System >Package Management >Synaptic Package Manager and open synaptic. In the search box type mariadb. Locate the following two packages: mariadb-client (metapackage) and mariadb-server (metapackage) and mark them both for installation allowing all dependencies. Install them. After installation with metapackages to a running OS the post installation security script should run automatically, (see the image below) but if it does not just open a terminal and type: mysql_secure_installation and it will run. Just follow the green entries. When you set the root password use the SAME root password as your OS. These steps will remove anonymous user, disable remote root login and remove the test database. These steps are a basic requirement for MariaDB database security.
Next we need to create and secure a new database and user in mariadb. It is never a good idea to use root for anything other than handling the mariadb package as a whole. Individual database instances should have their own users and passwords and this will also allow us to use phpmyadmin with the same users. Open a terminal and run: mysql -u root -p Enter your root password when prompted. Next run: CREATE DATABASE newdb; Then run: CREATE USER 'username'@'localhost' IDENTIFIED BY 'userpassword'; where ‘username’ is the user name you create and ‘localhost’ is the name of your computer on the network shown in the prompt in your terminal, and ‘userpassword’ is the new password you set for the new user of the new database. We want this user to have all privileges and ownership of its new database so next run: GRANT ALL PRIVILEGES ON newdb.* to 'username'@'localhost'; where once again ‘username’ and ‘localhost’ are as described above. Now we are done with our first database setup so we can run the command below to finish:
FLUSH PRIVILEGES;
quit
8) Install PHP
Once again navigate to and open synaptic. Type php into the search box and locate the latest packages: php7.0 (7.0.27-0+deb9u1) & php7.0mysql (7.0.27-0+deb9u1) and mark them for installation and install them and all dependencies. That’s it for php now.
9) Install Apache2
Navigate again to synaptic if you’re not still there and type apache2 into the search box and locate the latest packages: apache2 (2.4.25-3+deb9u4) & libapache2-mod-php7.0 (7.0.27-0+deb9u1) and mark them for installation. Install them with all dependencies and close synaptic after.
10) Test Your Server & PHP Info
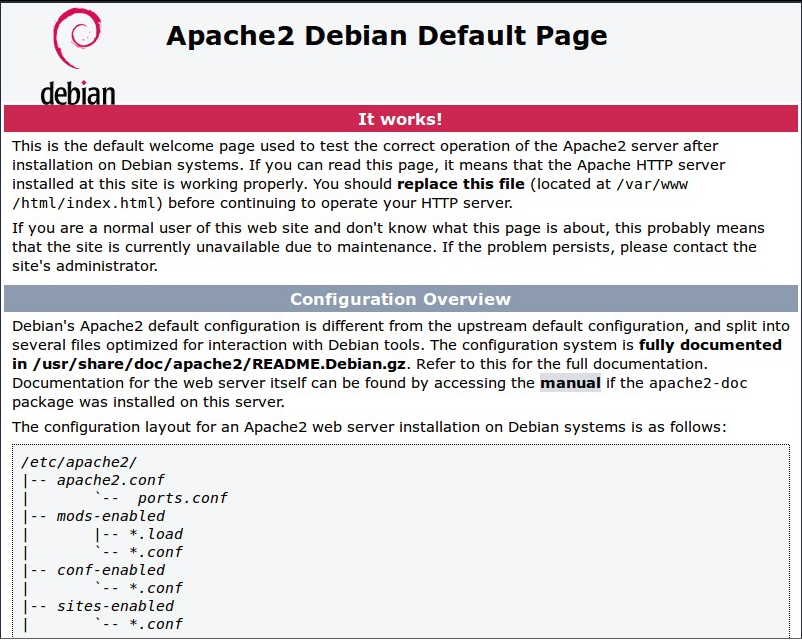
Open up your Firefox browser and type localhost into the search box and hit enter or the go arrow. The image below should come up if your new server is running.
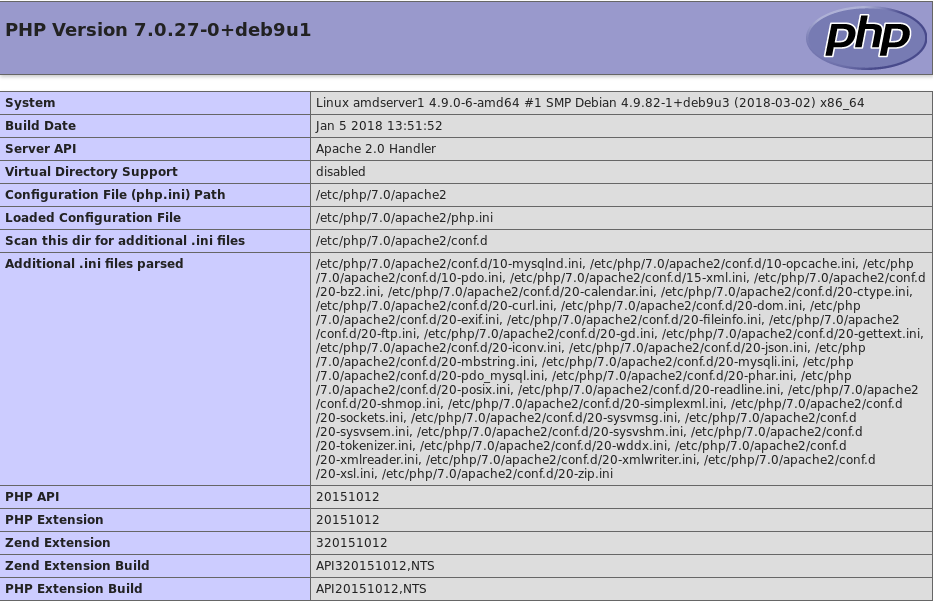
We want to leave our default Apache2 page alone for the moment and add a new file to /var/www/html. We can use nano to do this. Open a terminal, you should still be in root, and run the following command: nano /var/www/html/info.php A blank file will open in nano into which you must copy and paste or type the following entry: <?php phpinfo(); ?> Hit control+x, then y, then enter to save the file. Open you browser again and type localhost/info.php into the search box and the image below should appear in your browser window. (This image is just the first part of info.php scroll down in your browser to see it all.)
11) Install phpmyadmin
Now that our server and php are up and running we can install phpmyadmin a very decent GUI application from which we can conveniently work with our databases, server, and php. Navigate to and open synaptic again. Type phpmyadmin into the search box and locate and mark for installation the package: phpmyadmin (4:4.6.6-4) and install it with any dependencies. Only one more step is required in Debian 9 to access your newly installed phpmyadmin GUI. Open a terminal and run the following command: nano /etc/apache2/apache2.conf When the file opens in nano add the following entry at the end: include /etc/phpmyadmin/apache.conf Hit control+x, then y, then enter to save the file, then exit the terminal. Now open Firefox again and type phpmyadmin in the address box and hit enter or the go arrow. A screen will appear like the image below.
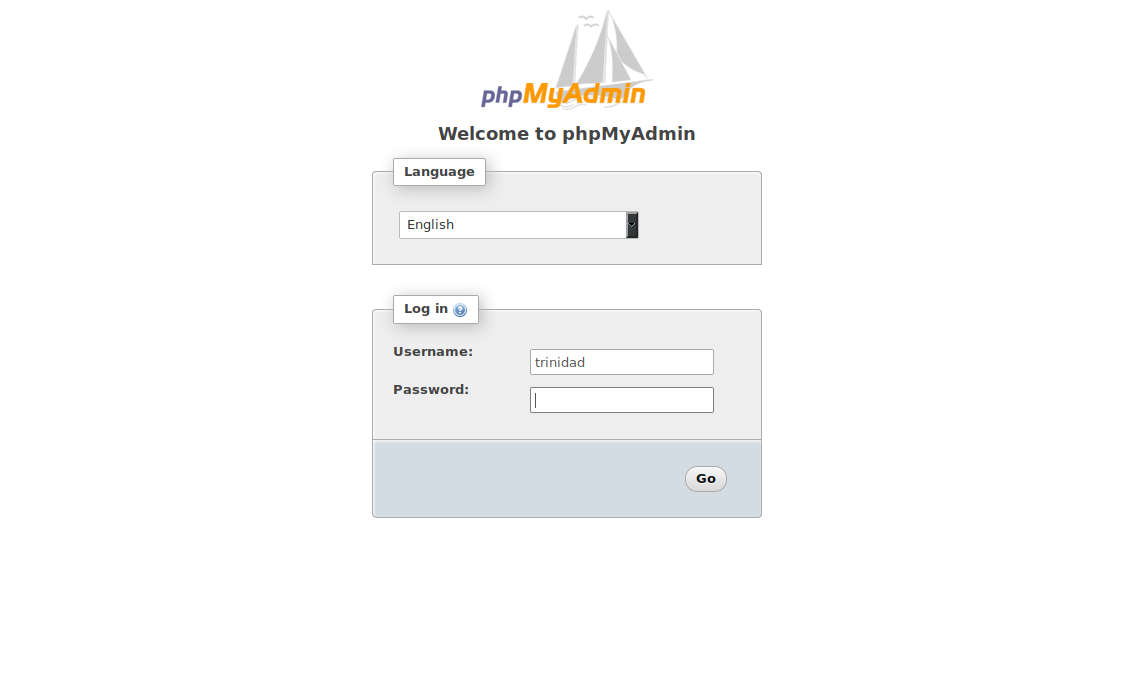
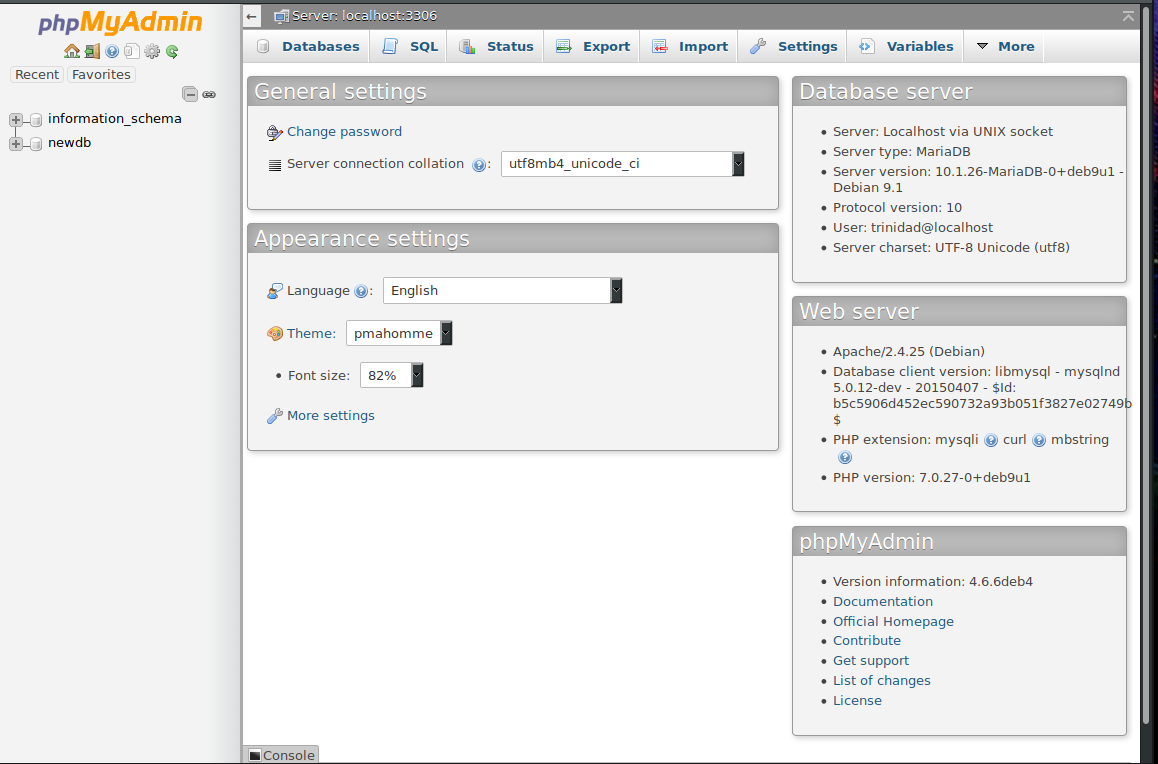
Select your language and log in with the user name and password you created that matches the new database you created with mariadb. A new window will open like the image below.
12) Congratulations!!
You now have an operational Apache2 http web server with php and sql setup, and a full DE Debian 9 OS to work from and build and fine tune it all. Below are a few informational links worth the read.
https://httpd.apache.org/docs/trunk/getting-started.html
https://docs.phpmyadmin.net/en/latest/
Don’t be intimidated. As promised I will keep this simple. In the next tutorial we will demonstrate how to easily build a basic .html home website for our server with LibreOffice and a few Debian tools.