4) Configuring Windows 10 Firewall To Limit Connections By IP Addresses
Comments:
What I’m going to discuss here is a simple way of limiting RDP and SSH port connections by IPv4 addresses using Windows firewall in Windows 10, and optionally choosing a different RDP port. If you intend to connect over the Internet to RDP without using an SSH tunnel, or some other method of securing your connection, it’s probably a good idea to follow these simple instructions for choosing a different RDP port and limiting those connections by IPv4 addresses. These are simple and easy security solutions that work well, though there are several other ways to secure your RDP connections, and many reasonably priced proprietary security solutions for Windows 10. I’m just discussing the method here, not the concept, because changing the RDP port number basically just avoids some simpler Web Bots that exist in the wild to target RDP on routers forwarding port 3389. Reputable US Internet service providers generally clean such Bots out these days, but in the name of paranoia I’ll go through the process.
It’s worth mentioning that you don’t want to choose a port that is regularly used by some other application. Microsoft registers certain services on certain default ports with the Internet Assigned Numbers Authority (IANA) as do other OSs and Internet applications. See the link below:
https://www.iana.org/assignments/service-names-port-numbers/service-names-port-numbers.xml
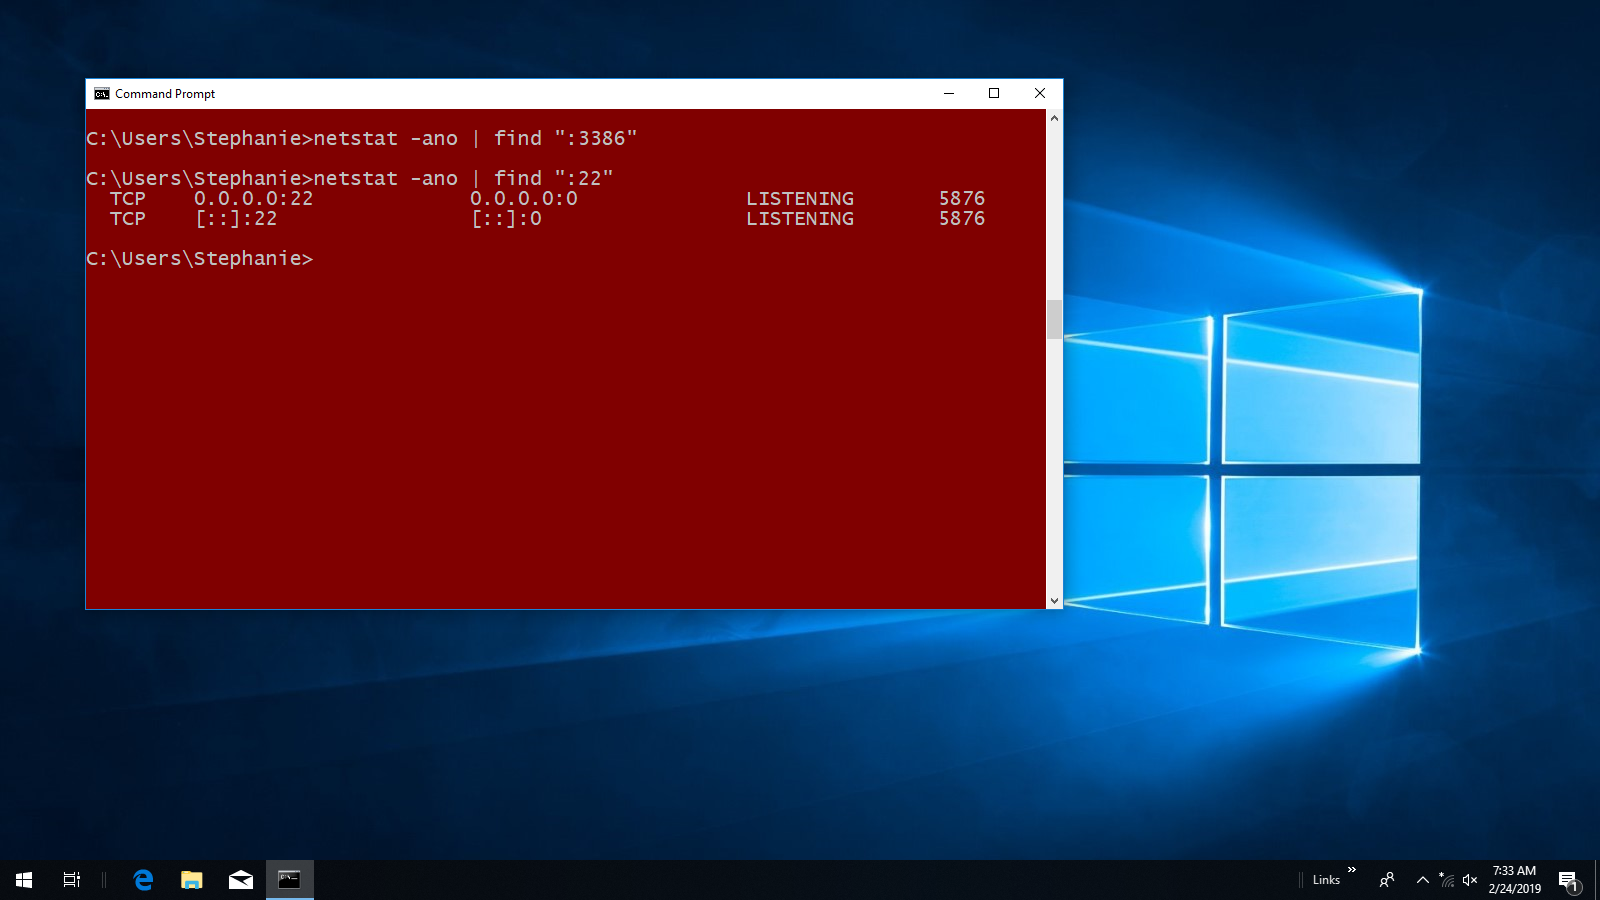
Pick a port number you’d like to use that you think is not a default port used by your particular Windows 10 installation and its unique applications and open the command line interface again and type the netstat command: netstat -ano | find “:3386” like in this example, and hit Enter. This will return the port and connection state and the process ID that owns it in numerical form. If it’s not currently in use nothing will happen and your command prompt will return. To make sure you entered the command correctly try it with a port you know is in use like port 22. See image below:
To change your RDP port you’ll need to edit the registry file for it, so be careful here. Hit the Windows key and type regedit, and then click on regedit Run command.

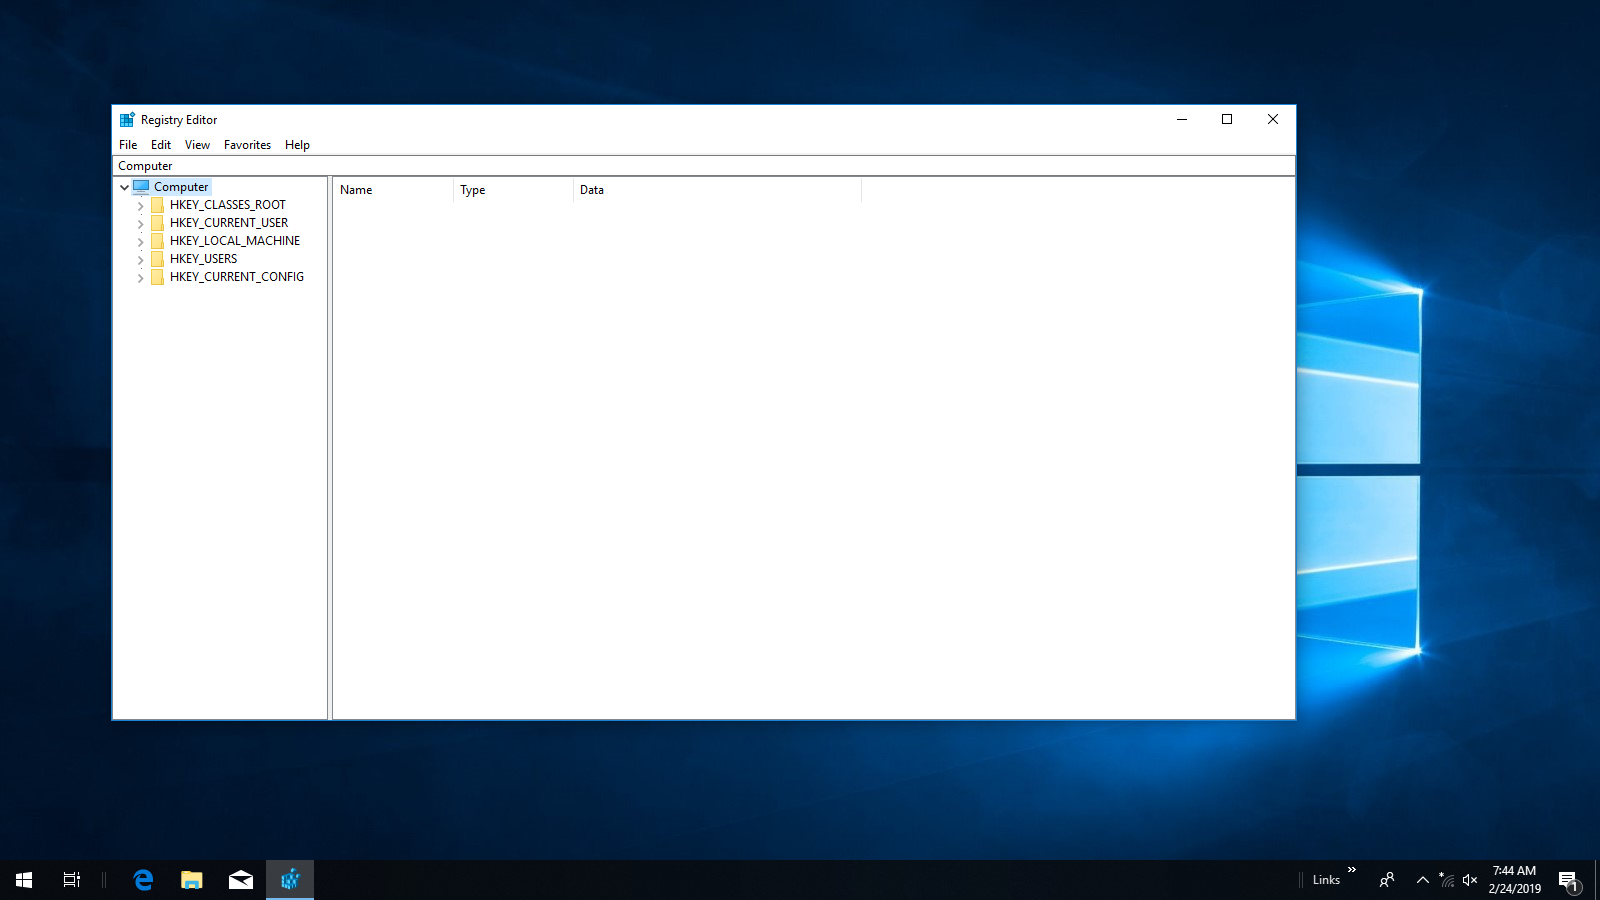
A window for the registry file system tree will open. See image below:
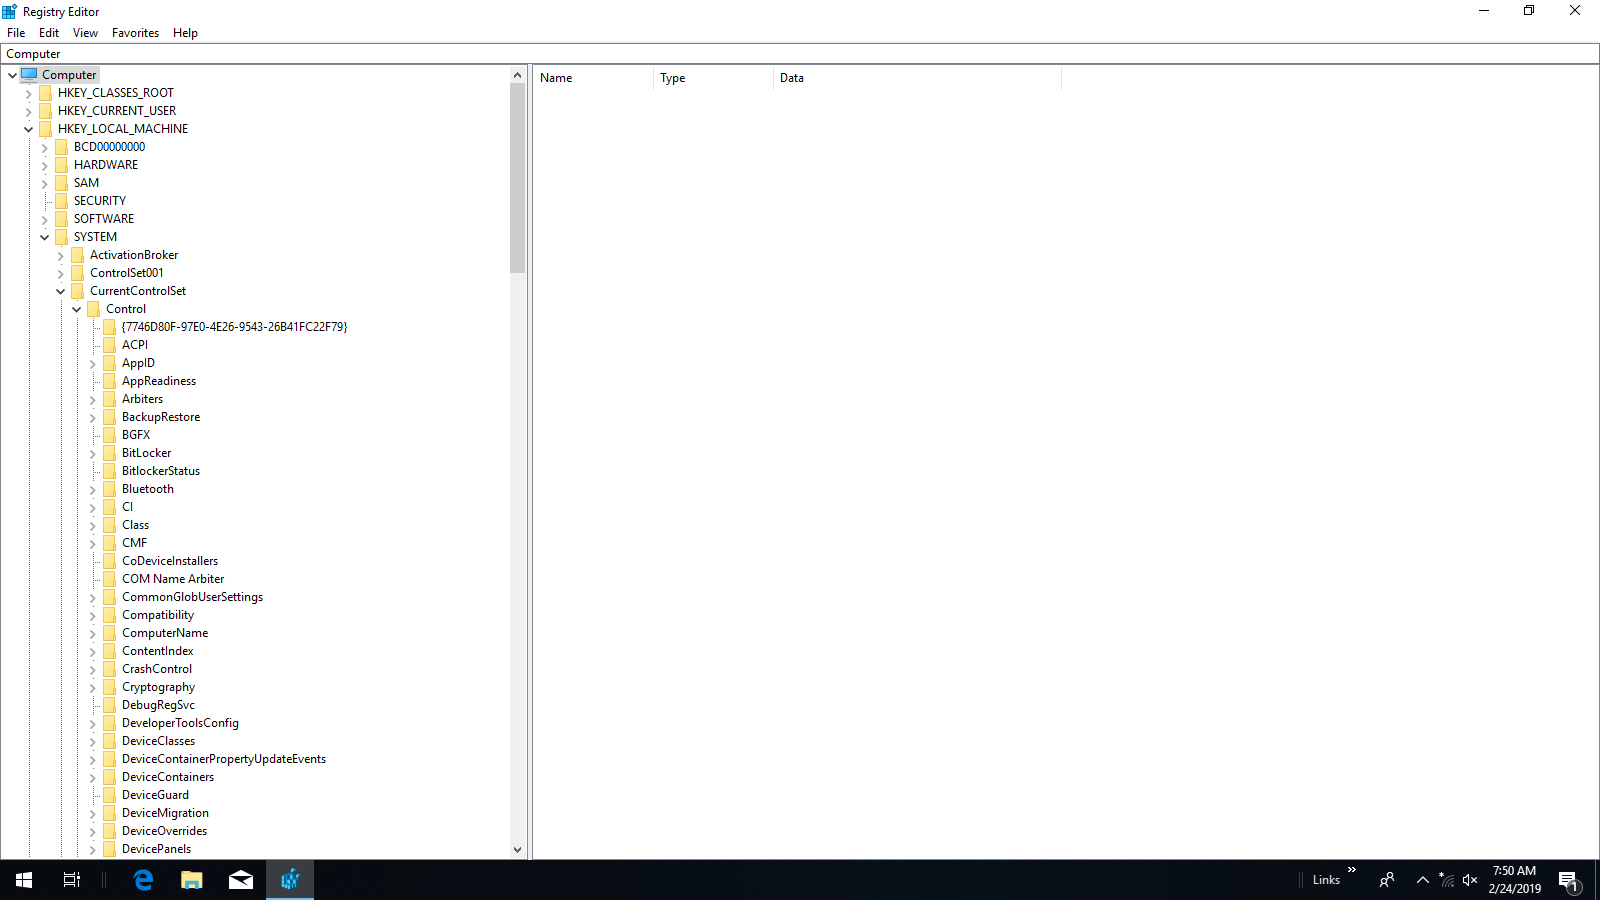
Expand the file tree; click the >HKEY_LOCAL_MACHINE entry to expand it; then >SYSTEM; then >CurrentControlSet; then >Control. See image below:
Then scroll down and click >Terminal Server; then WinStations; then RDP-tcp; and as you may notice this particular machine does not have Remote Desktop Server enabled because if it was an entry for Port Number would appear in the right pane with other sub-keys. Scroll through the entries in the right pane and look for a Port Number entry. See image below:
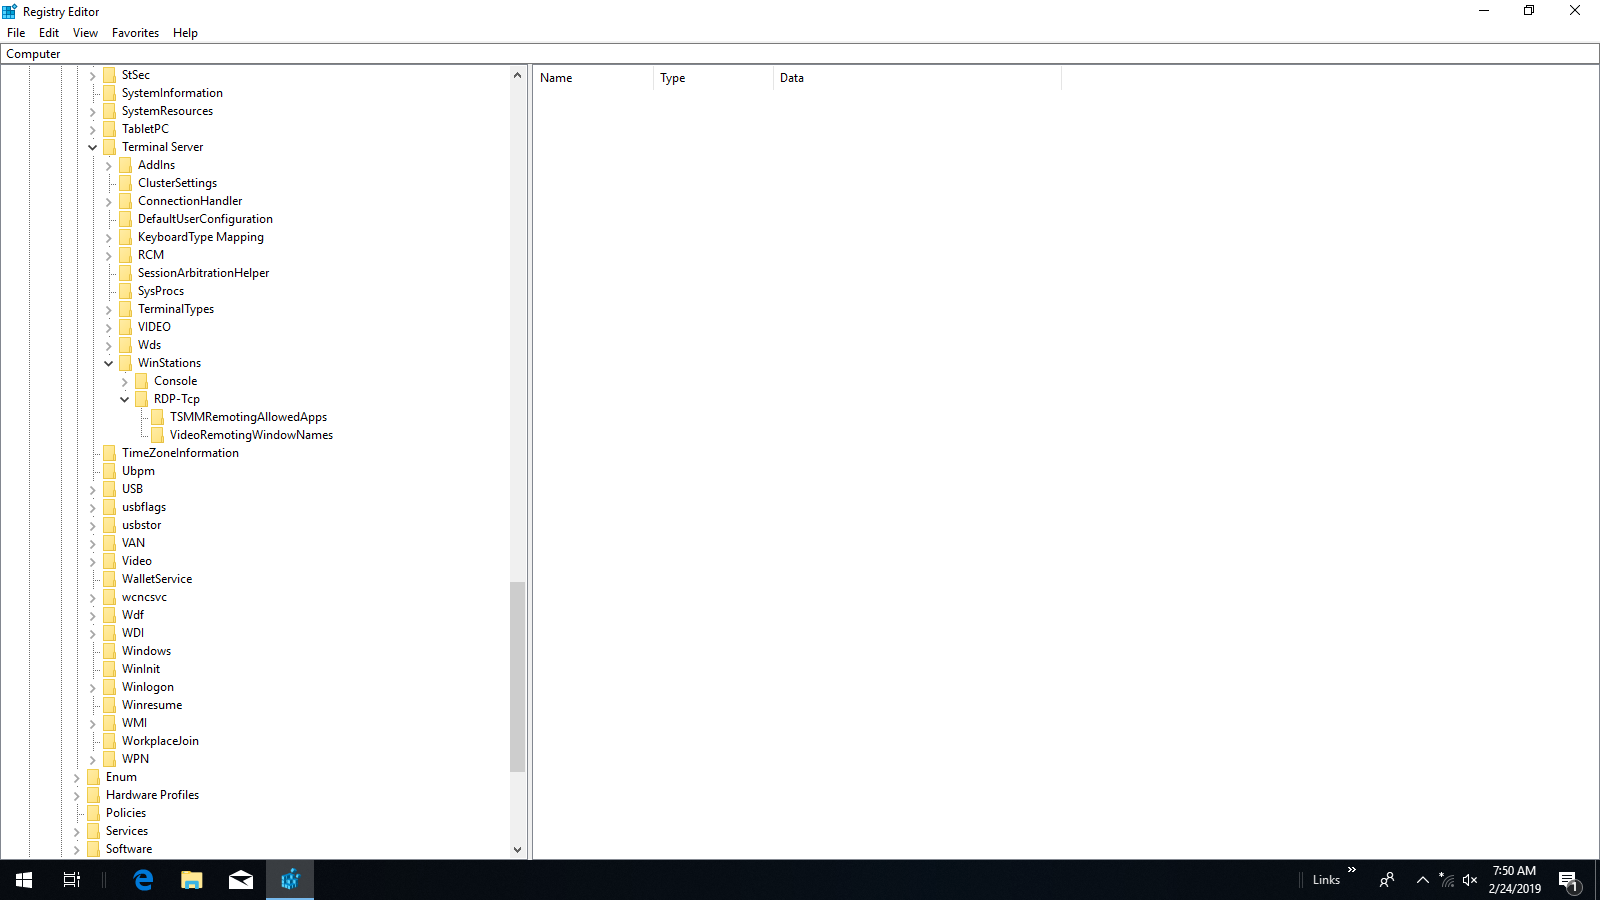
When you find the Port Number entry click on it and a window like the one below will appear. Select decimal, change the port number to the one you’ve decided to use, and click OK. Close the registry editor and restart your computer and the RDP server port change will take effect. See image below:
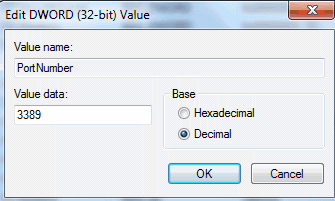
You can use Windows 10 firewall to limit port connections to specific IPv4 addresses. Hit the Windows key and type wf.msc. Click on wf.msc as shown below and your firewall settings will open up. See image below:
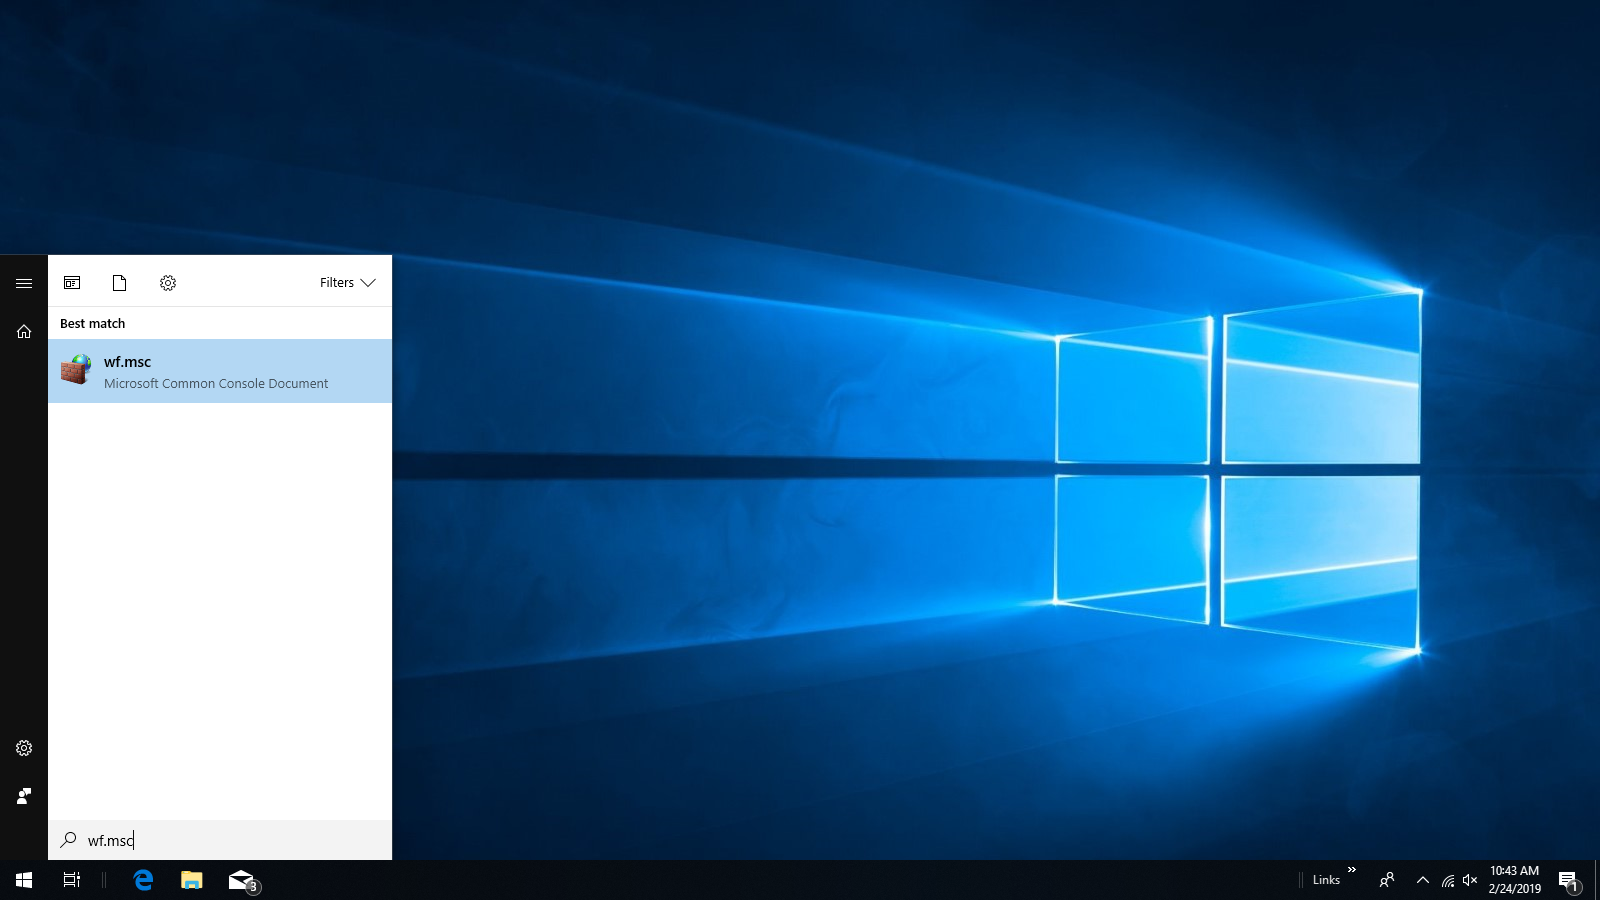
Click on Inbound Rules in the left pane, and then New Rule… in the right pane. See image below:
The New Inbound Rule Wizard will open. Select Port and click next. See image below:

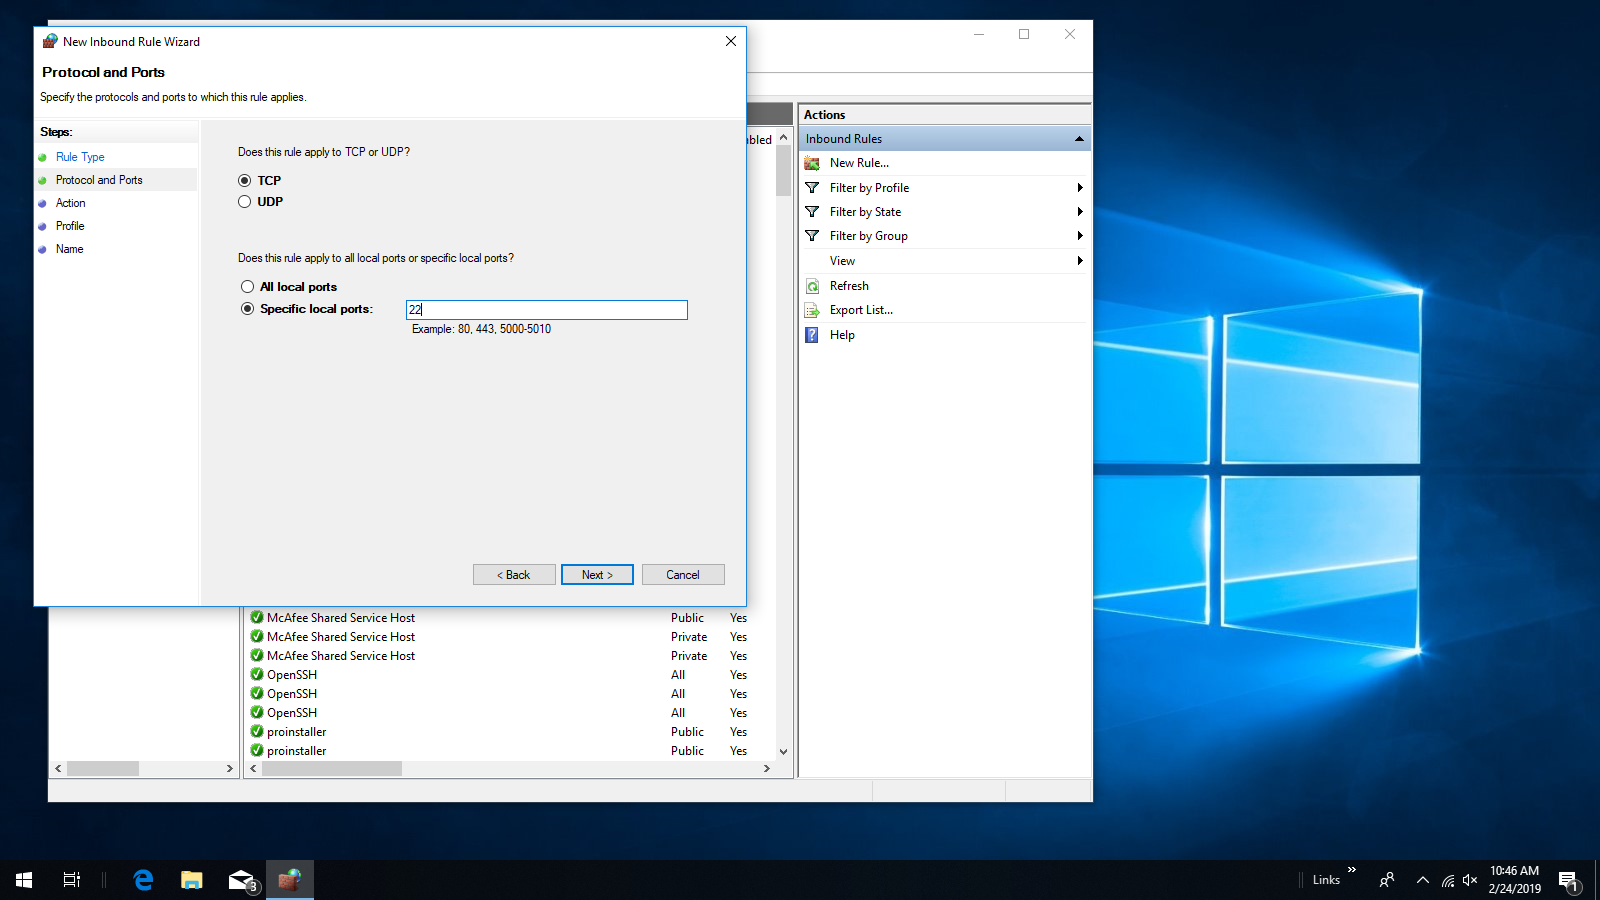
I’m going to work with port 22 here because this person’s grandson uses her computer for gaming and I don’t want him or his gaming buddies to gain access to port 22. I’m only concerned with TCP here, but if you are working with RDP port (3389) or whatever number you have assigned to it, select TCP from the menu. After typing in your port number click next. See image below:
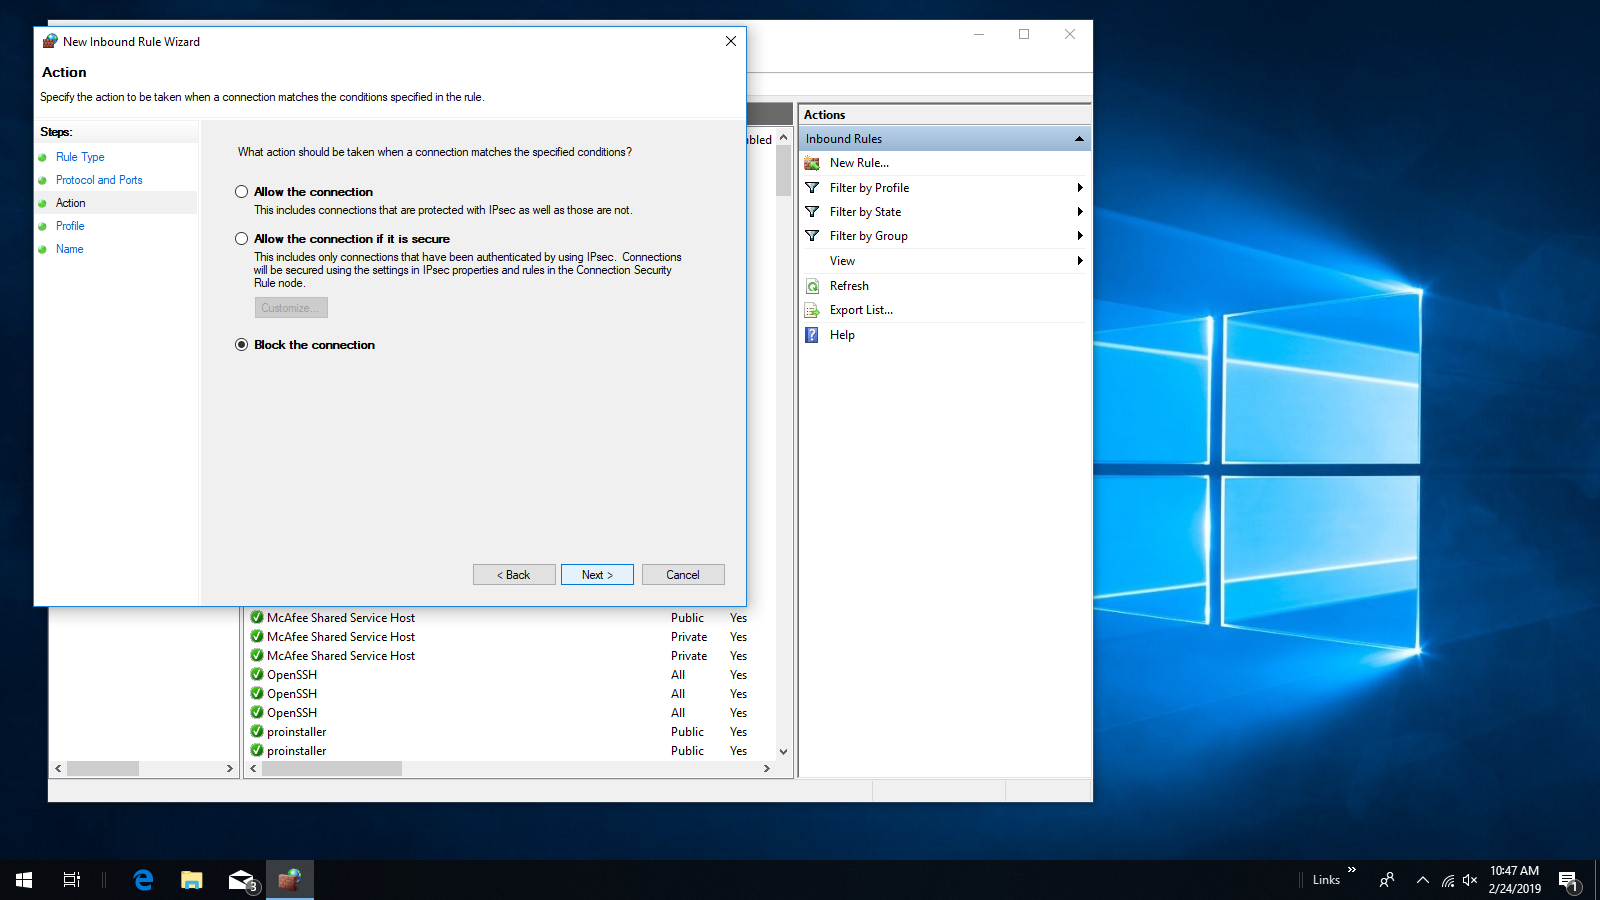
On the next screen select block the connection. You must create an inbound connection blocked port before you can add exceptions. Click next after selecting Block the connection. See image below:
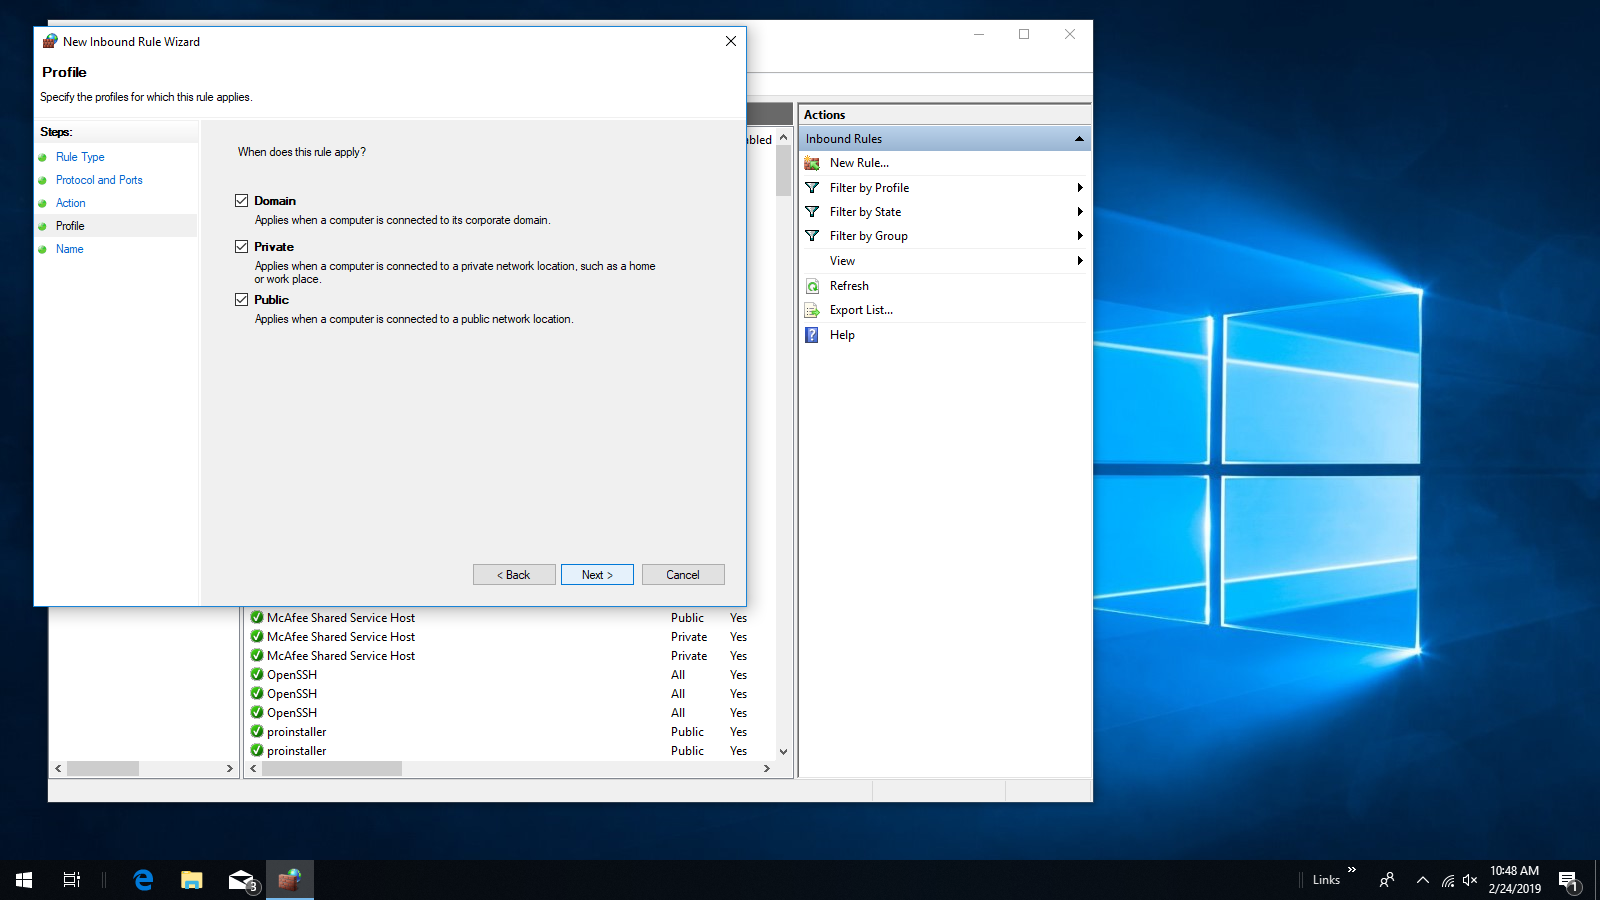
On this screen check all three boxes unless you want different permissions on private addresses. Click next. See image below:
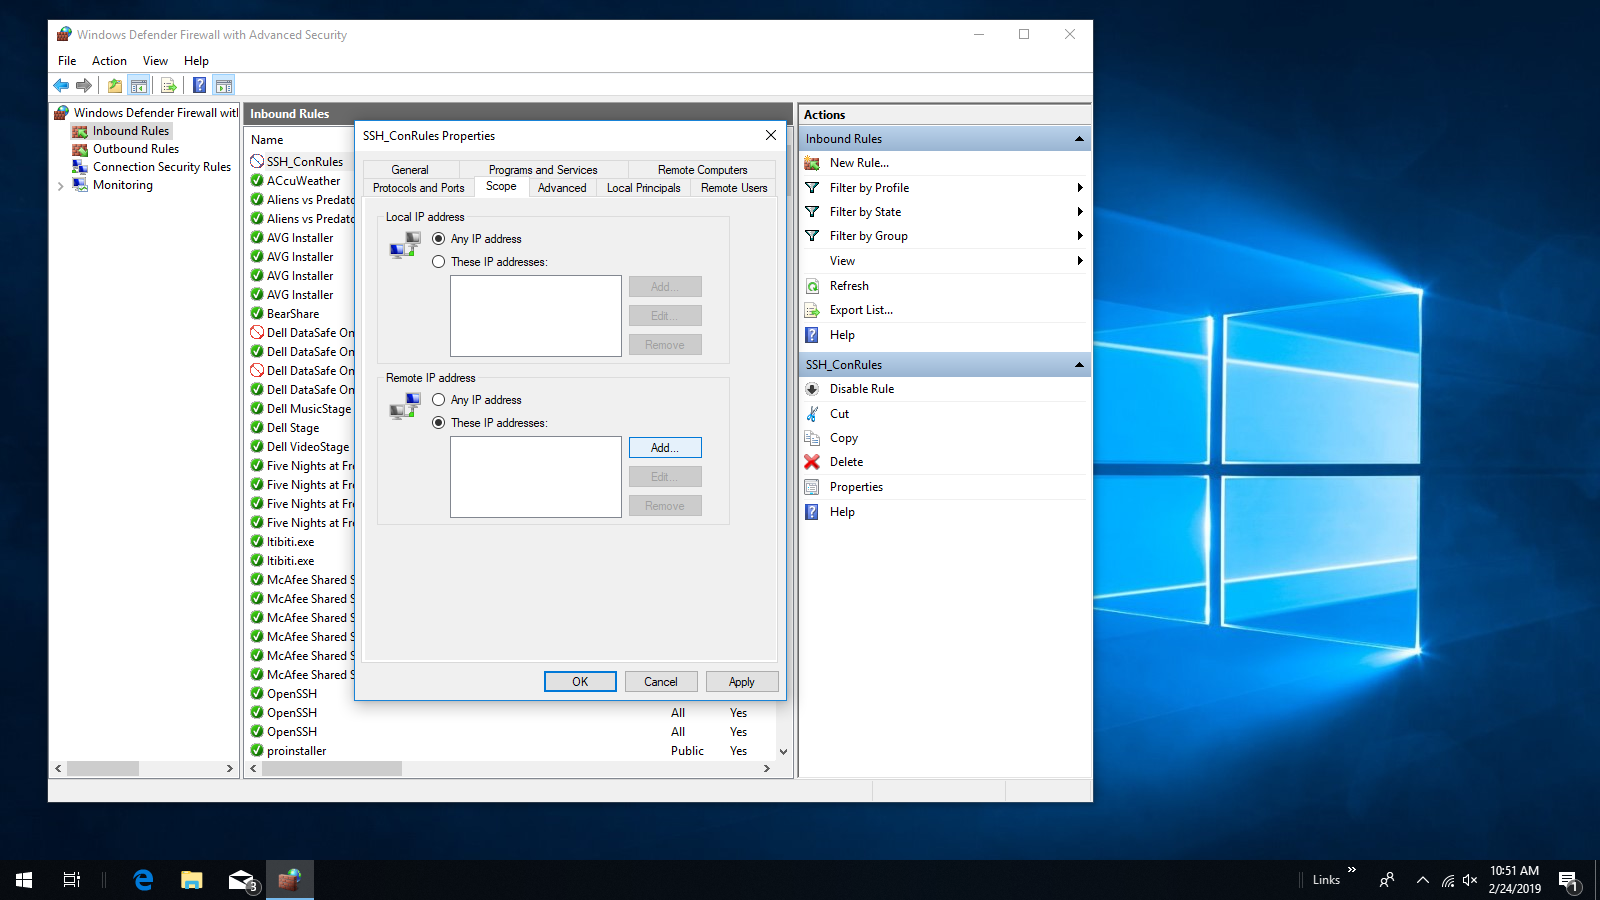
I’m missing an image here but the next screen allows you to name the rule. Name your rule something sensible like I did here: SSH_ConRules in the example, or RDP_ConRules if you are working with RDP. After naming your rule click finish. When the next Window loads find your rule in the right pane and click on Properties. It should be there because it’s new and at the top of the rules list. If not just click on it, and its menu will come up in the right pane. See image below:

When the Properties Window opens click the scope tab. See image below:

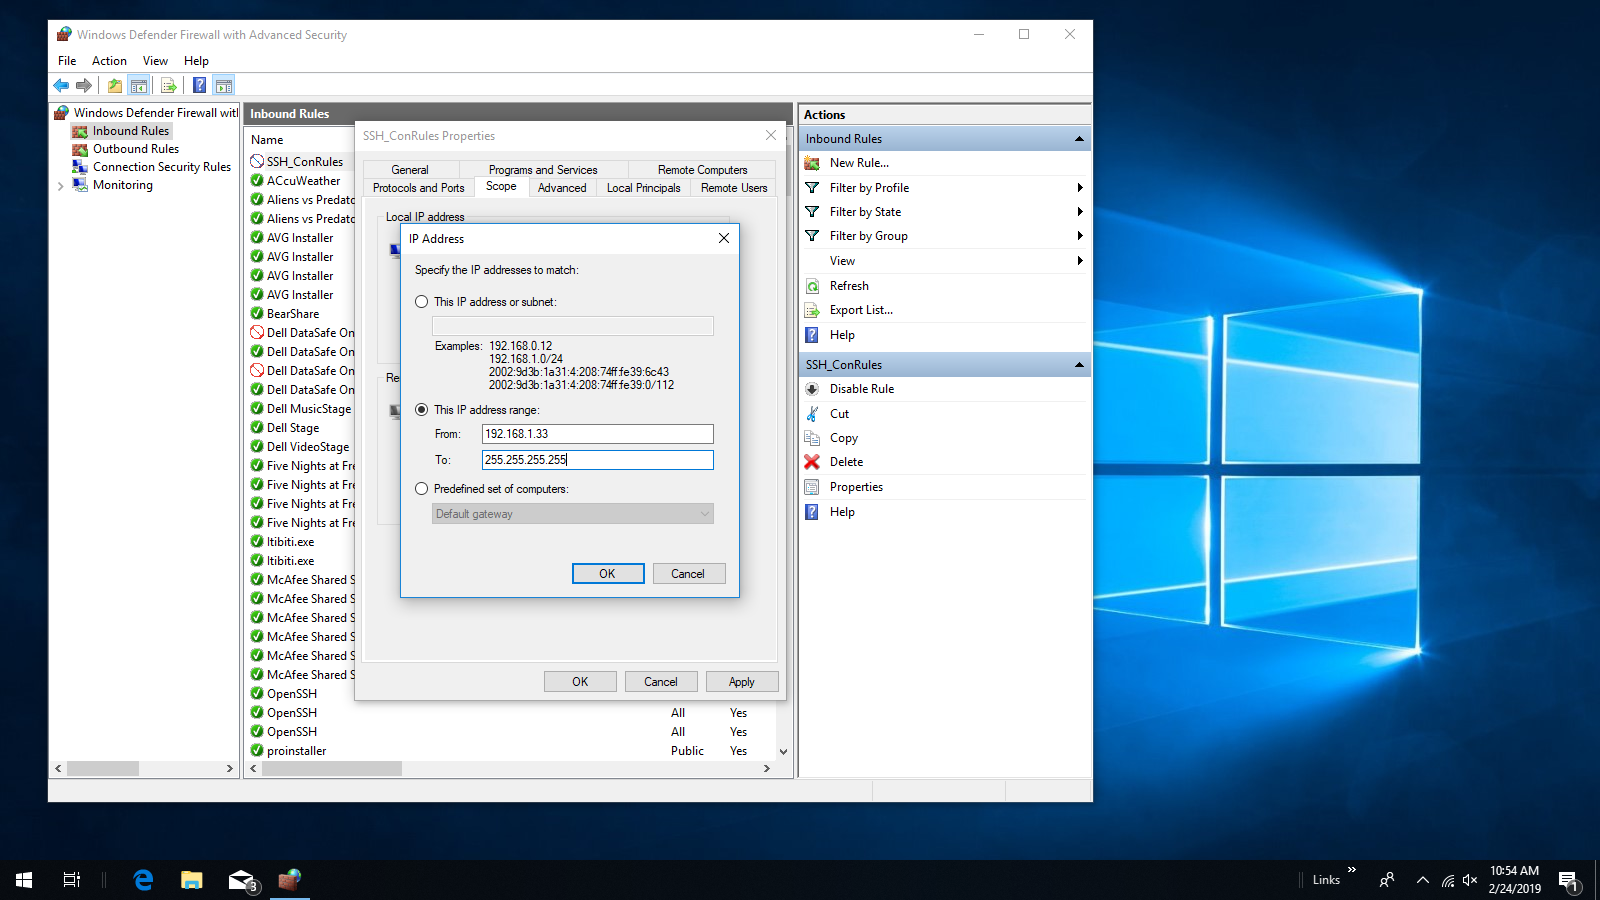
Under Remote IP address select These IP addresses and click the add button. See image below:
I’m only showing one image of the IP address window, and this is the second one, but when it opens select This IP address range and use the format starting with the From: box at 1.1.1.1 and then hit tab and in the To: box type the IPV4 address one number short of the address you want to be able to connect with in my example case 192.168.1.31 because I want to be able to connect from 192.168.1.32. Click OK. Click add again and This IP address range: and type the IPv4 address one number higher then the IPv4 address you want to connect from like the example 192.168.1.33 in the From: box and type 255.255.255.255 in the To: box. Then click OK. See images below: