6) Configuring Samba In Linux Lite 4.xx & Connecting To Windows 10
Samba has been around for long time and nowadays for new users the Linux Lite version pretty much works out of the box. Following the Linux Lite Help Manual should enable most new users to easily set up file sharing between their Windows 10 and Linux Lite 4.xx computers. See link below:
https://www.linuxliteos.com/manual/network.html#shares
I’m going to discuss it anyway, and mention a few things new users may not know. First of all, Samba literally works out of the box to access all files on your Windows 10 computer from Linux Lite once you enable network file sharing in Windows 10 to allow the connection through the firewall. See image below:
You can type smb://whatever the IPv4 address of your Windows 10 computer is into Thunar’s address bar (as long as both machines are connected to the same local network) and when prompted for authentication just enter the current user (must be an administrator) you are logged into Windows 10 with, and that password, and you can access your Windows 10 files from Linux Lite as long as you don’t have any other security restrictions set on port 445 in Windows. You will probably have to do it twice the first time, once to connect, once to open the Windows Users folder. This is the default behavior for Windows 10 file sharing on a local network, meant to simplify file sharing on a local network between Windows computers and non-Windows clients. However it won’t work the other way around (access your Linux Lite 4.xx files from Windows 10) without adding some additional software to your Windows 10 computer, OR creating a user and file sharing folder on your Linux Lite 4.xx computer per the Linux Lite Help Manual. I used to use the ext2fsd application and map the drive on earlier versions of Windows 10 but currently development there has stalled. Anyway those are your two easiest options to access your Linux Lite 4.xx files from Windows 10 with Samba. See the links below for more technical information about Samba:
https://wiki.samba.org/index.php/Main_Page
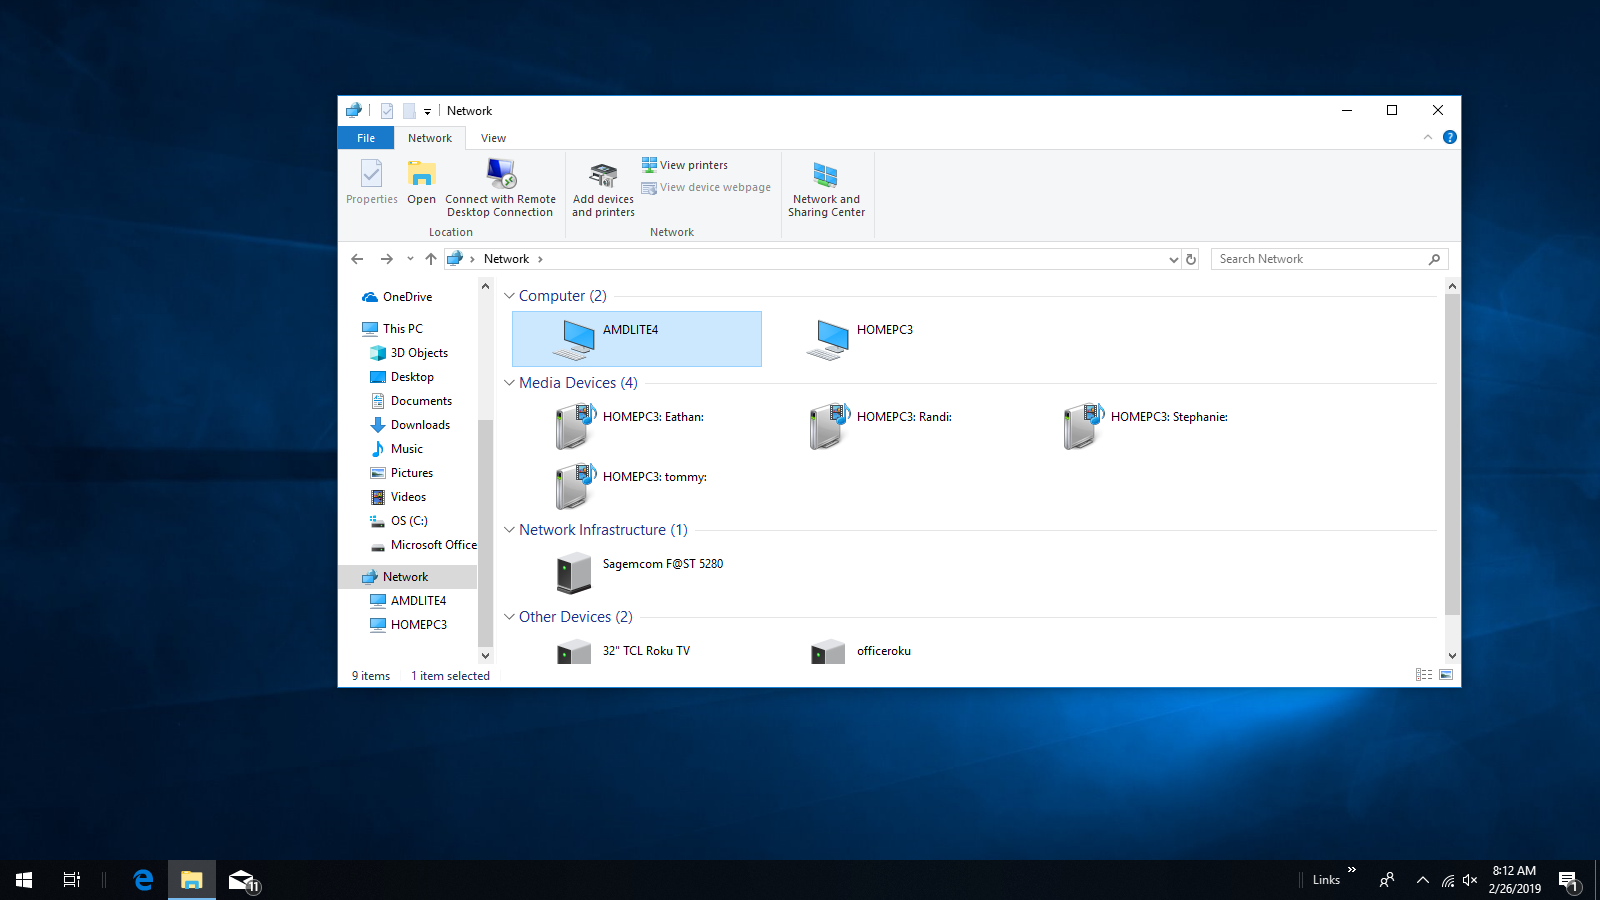
The Linux Lite Help Manual describes what should happen on your Windows 10 computer. Your Linux Lite computer should appear in the network panel of file explorer on your Windows 10 machine. See the three images below:

However should is the operative disclaimer here. If you are a new Linux Lite user and you can connect to your Windows 10 machine and access its file system, but you can’t seem to connect to your Linux Lite share folder, and/or your Linux Lite computer is not showing up in the network panel you can be sure that the problem is caused by your Windows 10 OS. So… before you go back and start fiddling with the Linux Lite Samba configuration take a look at what’s going on with your Windows 10 machine. I have had to deal with this on customers’ office networks since Windows 10 arrived on the scene. Those of us who have had to follow the entire upgrade/update path from Windows 7/8 to Windows 10 1809 know that Windows updates turns things on and off in Windows networking without asking. *So again… assume it’s your Windows 10 computer that has the problem and not your Linux Lite computer.*
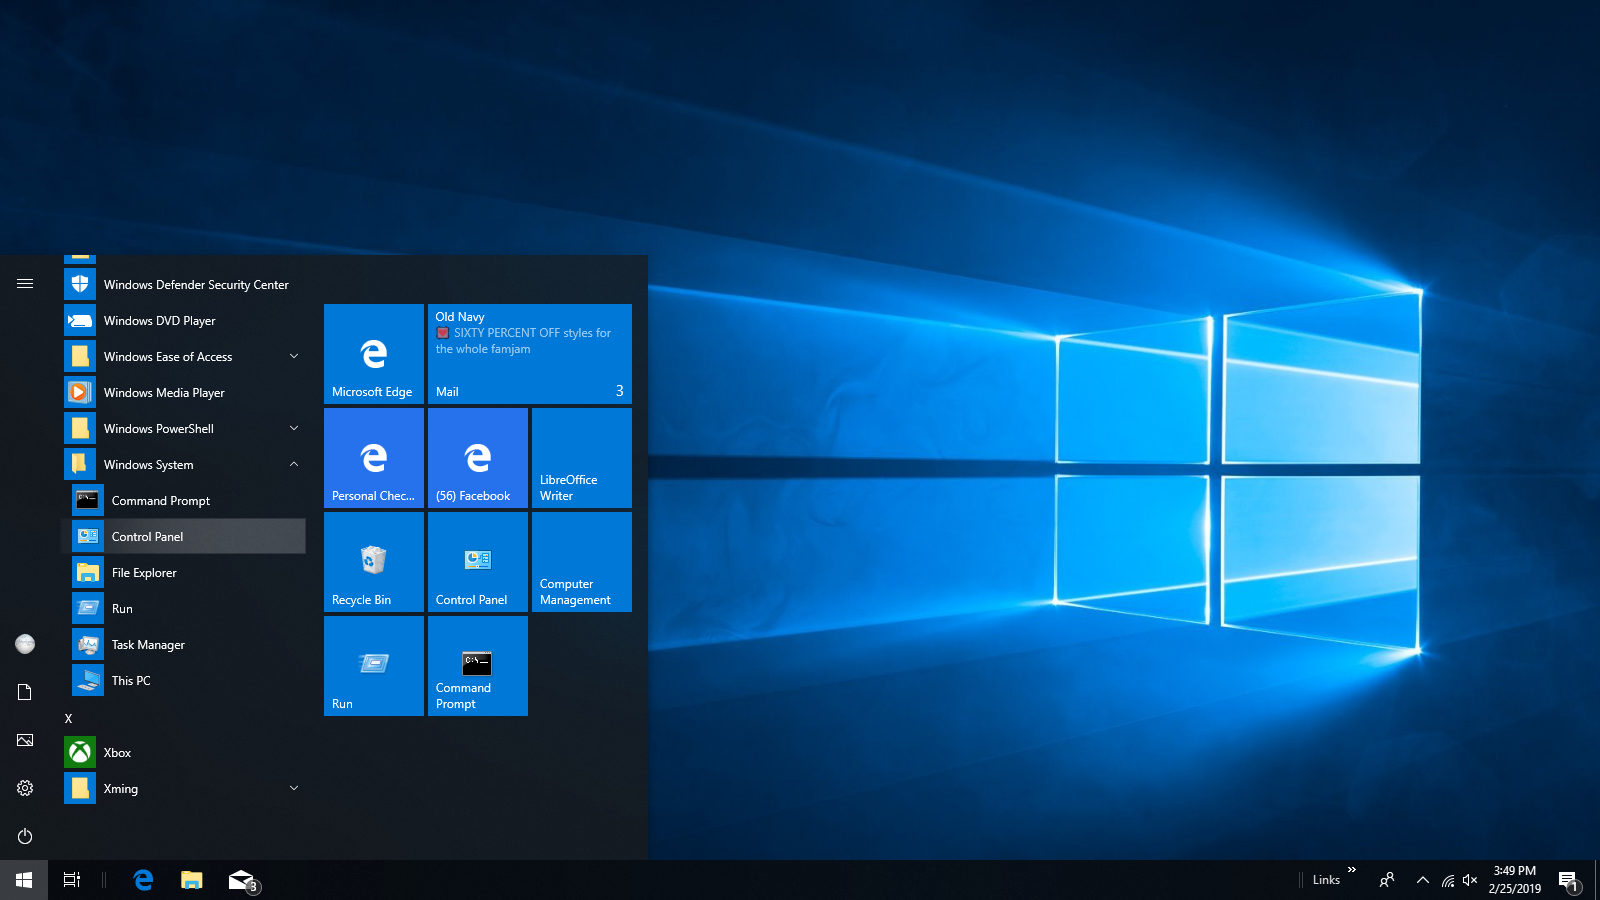
I’m going to run through a few of the post update fixes for network configuration failures that Windows 10 users have run into involving Samba shares along the tedious Windows 10 upgrade/update path so this section will be a little long. You may need to do one, or even all of them to get your Linux Lite computer to show up in the Windows 10 file explorer network panel and be able to access its Samba shares. They all require a restart of your Windows 10 system. If you’ve never tried to use Samba shares before, or they have quit working for some reason, the first thing to check is whether or not the Samba feature is enabled on your Windows 10 computer. Recent Windows 10 updates to build 1803-9 have been shown to disable Samba client. Locate and click on control panel in your menu. See image below:
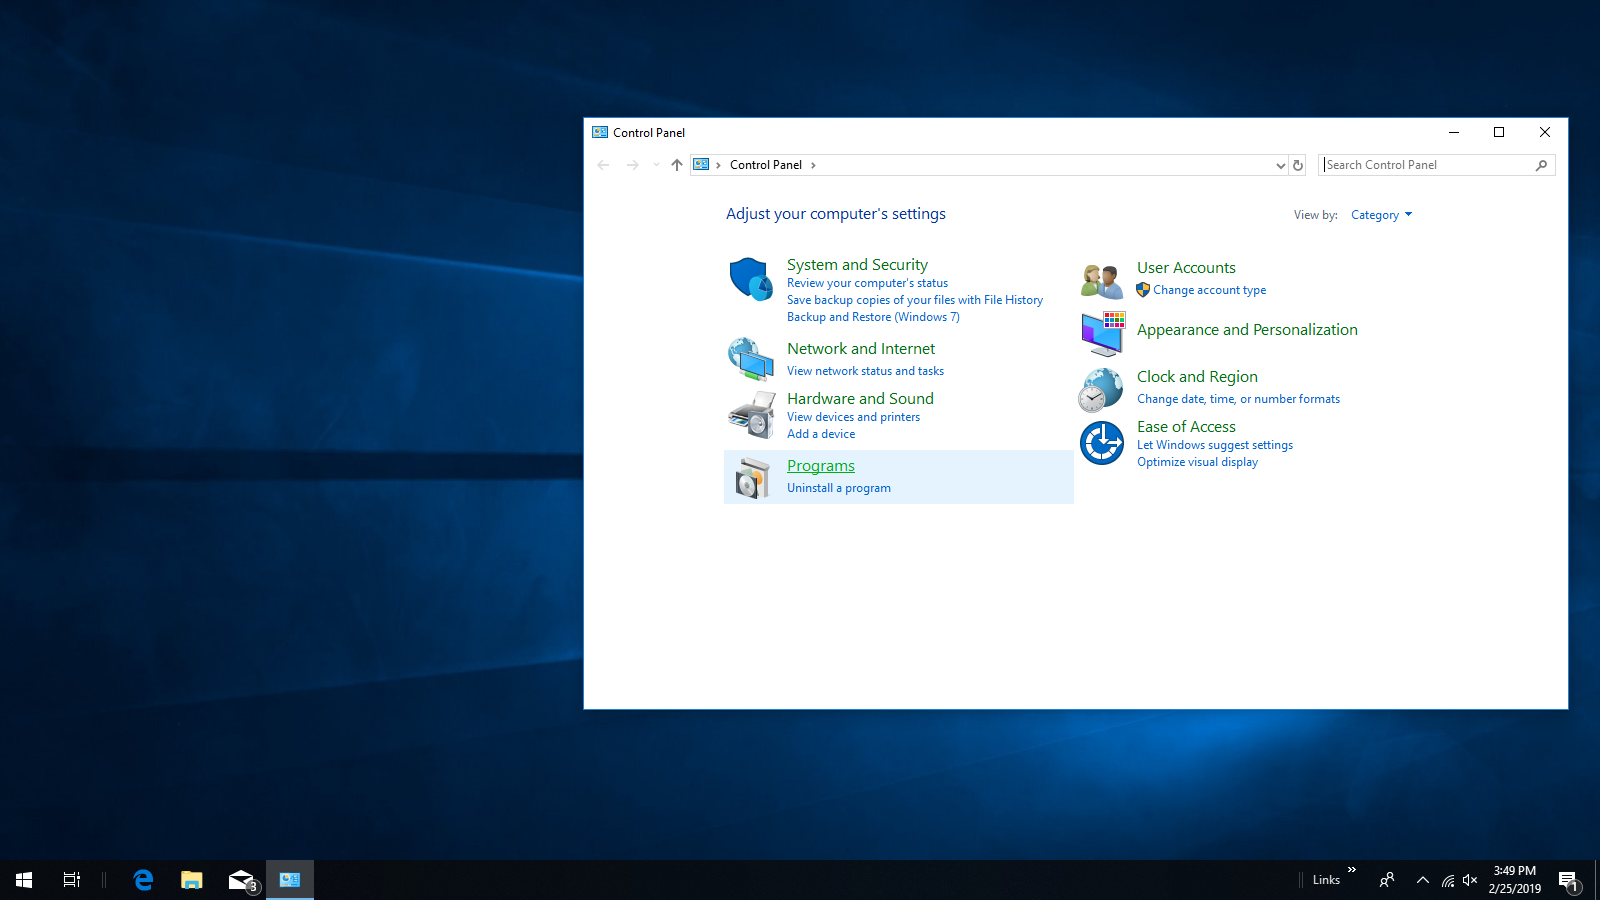
When Control Panel opens click on Programs. See image below:
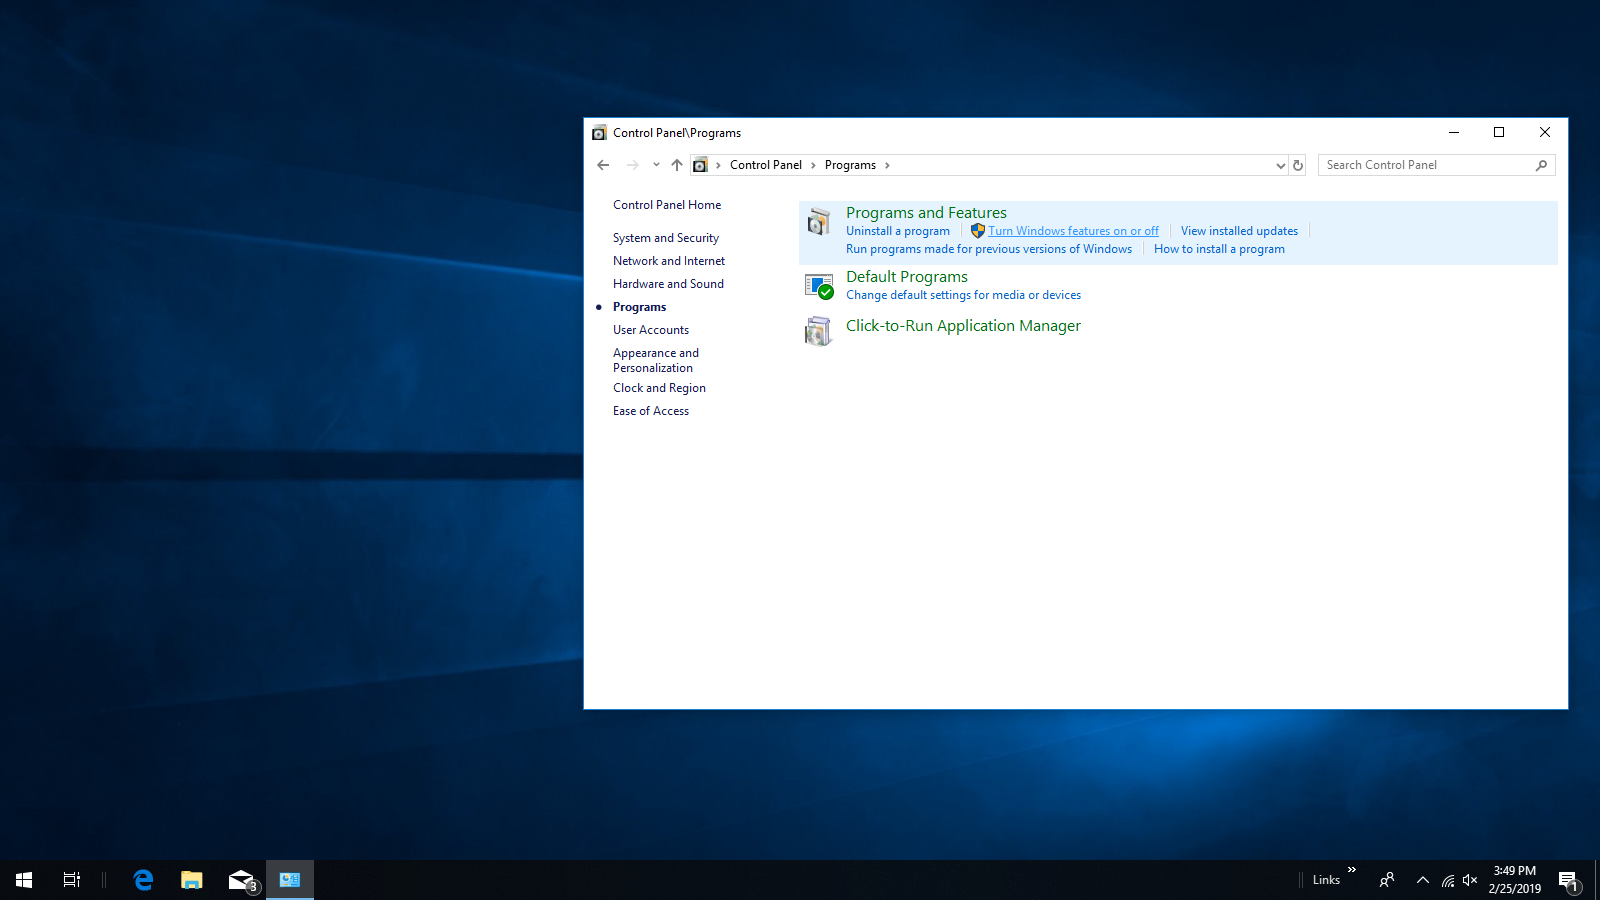
Under Programs and Features click on Turn Windows Features on or off. See image below:
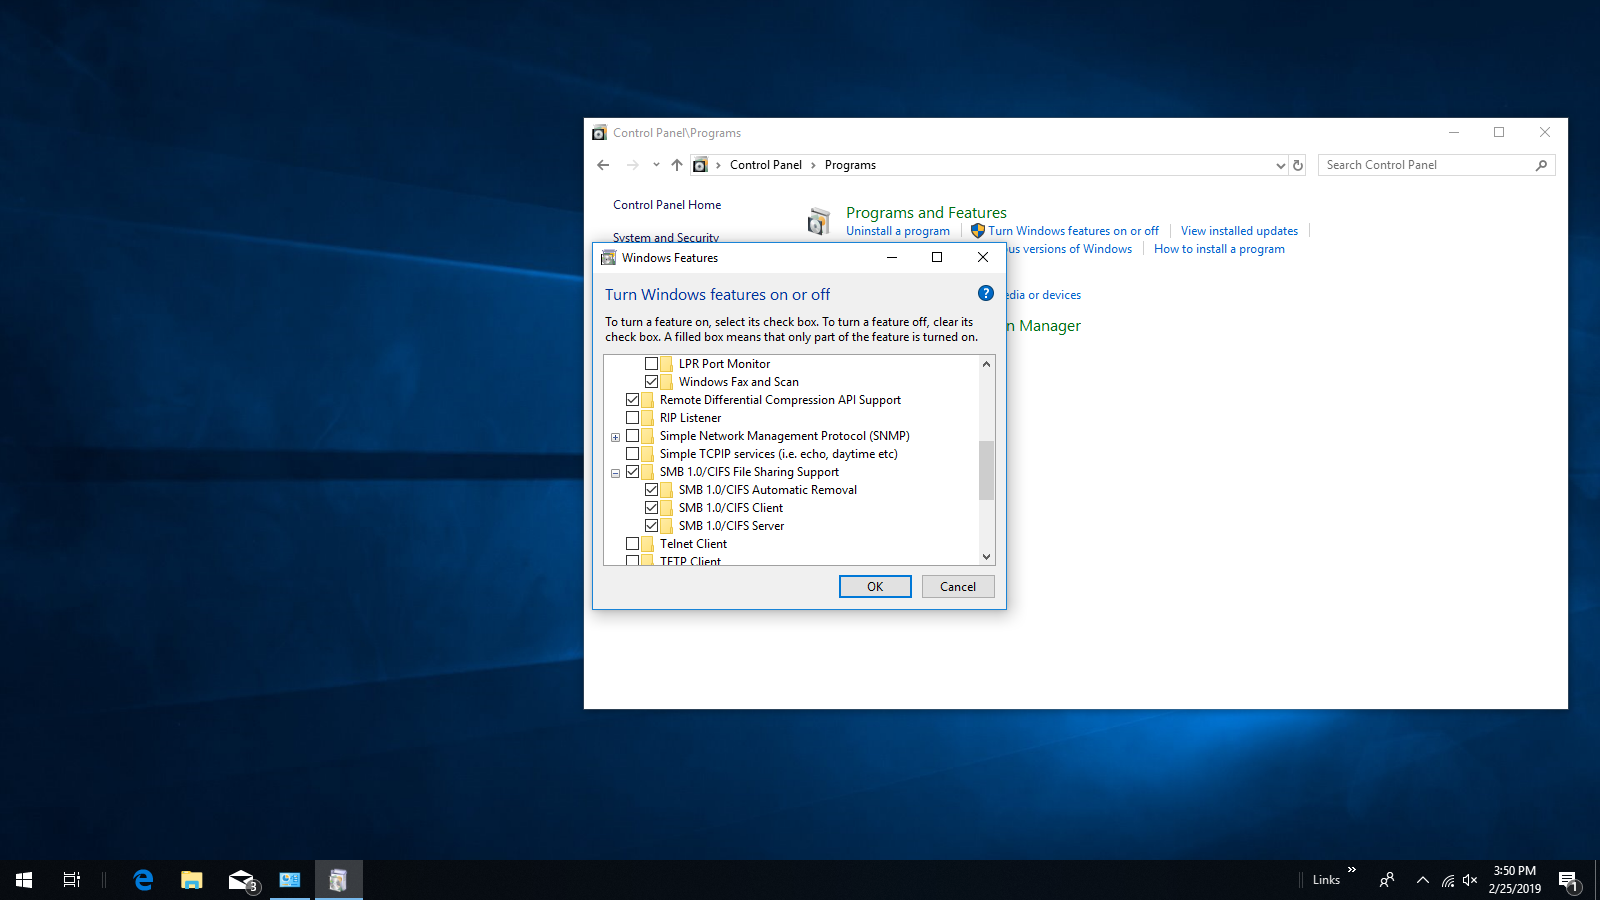
Under SMB 1.0 CIFS File Sharing Support all three boxes should be checked. If any of them are not, check them and click OK and they will install. Then restart your computer. See image below:
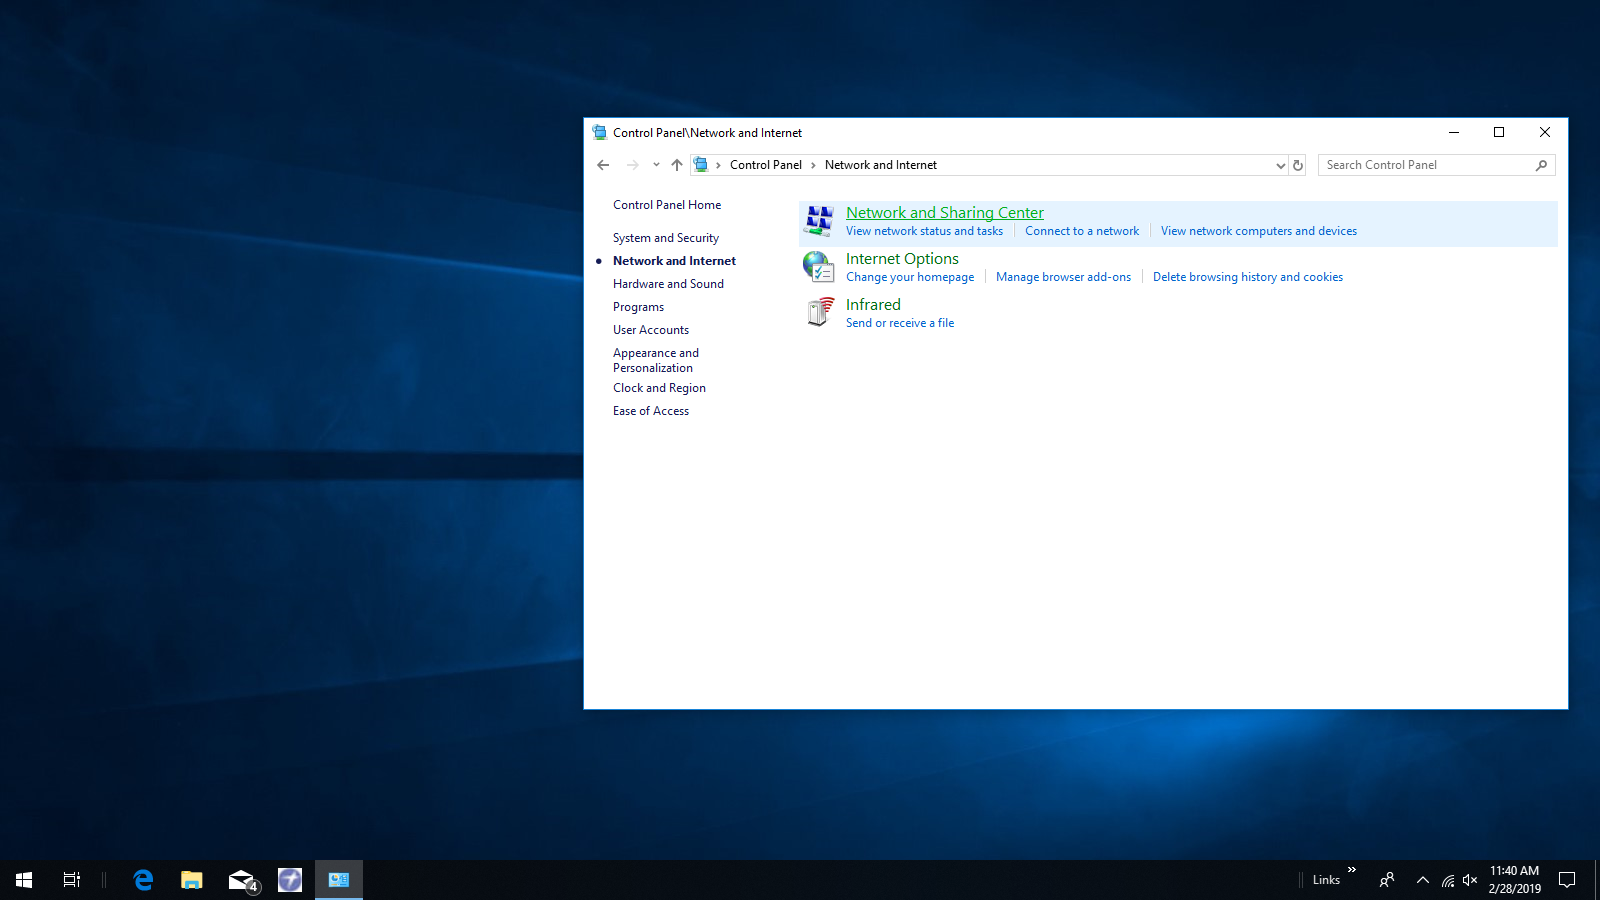
From control panel again this time click on Network and Internet. See image below:

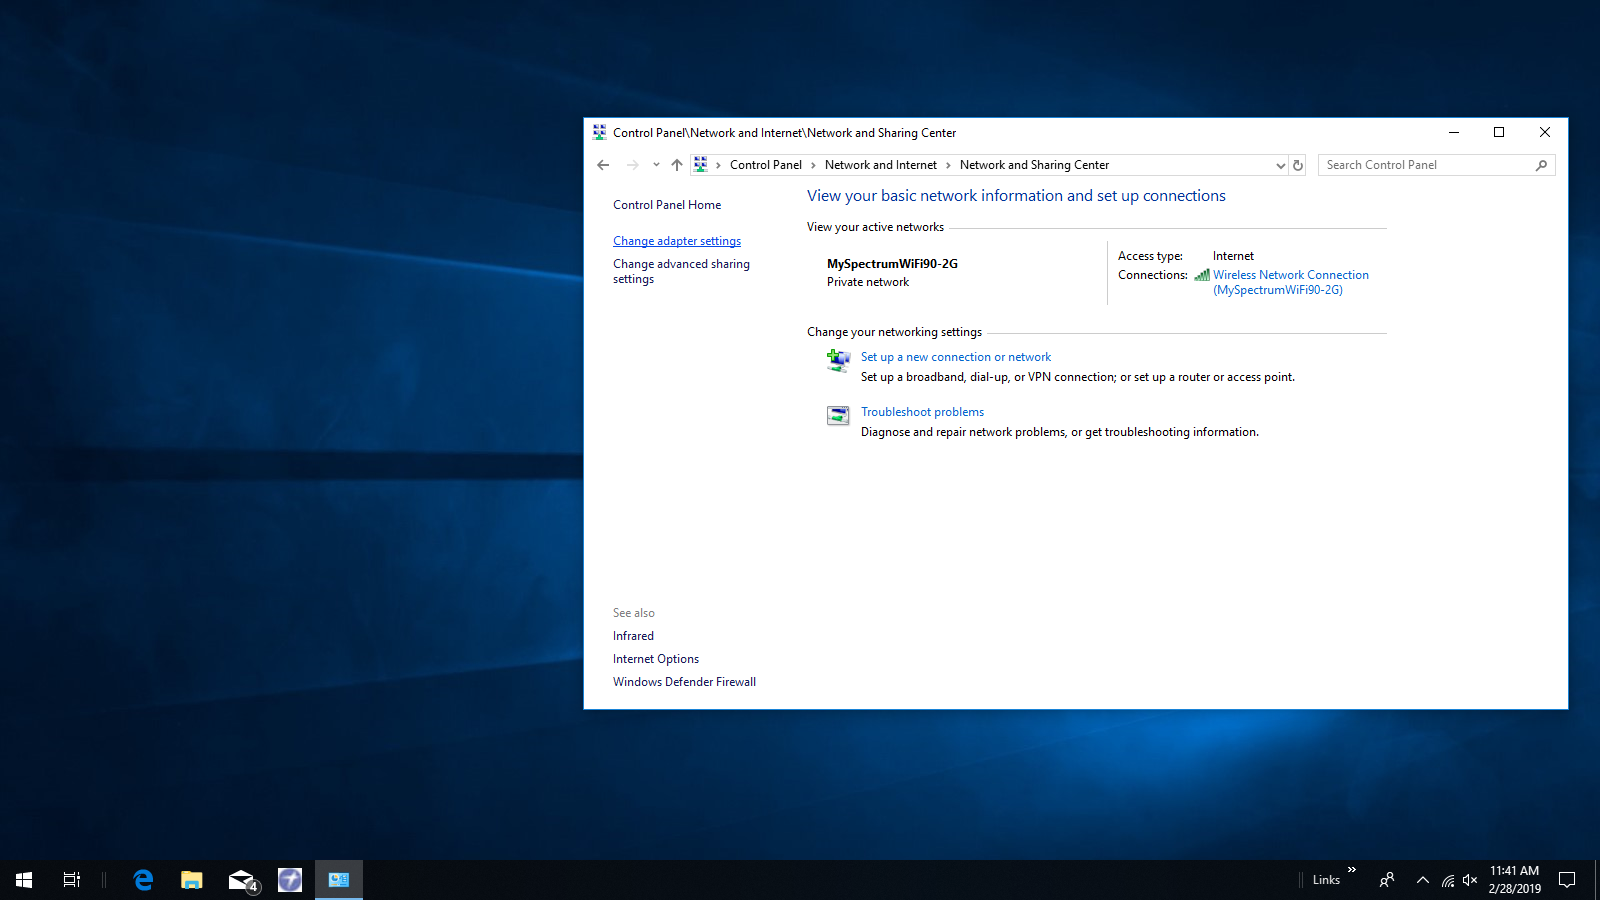
Next click on Network and Sharing Center. See image below:
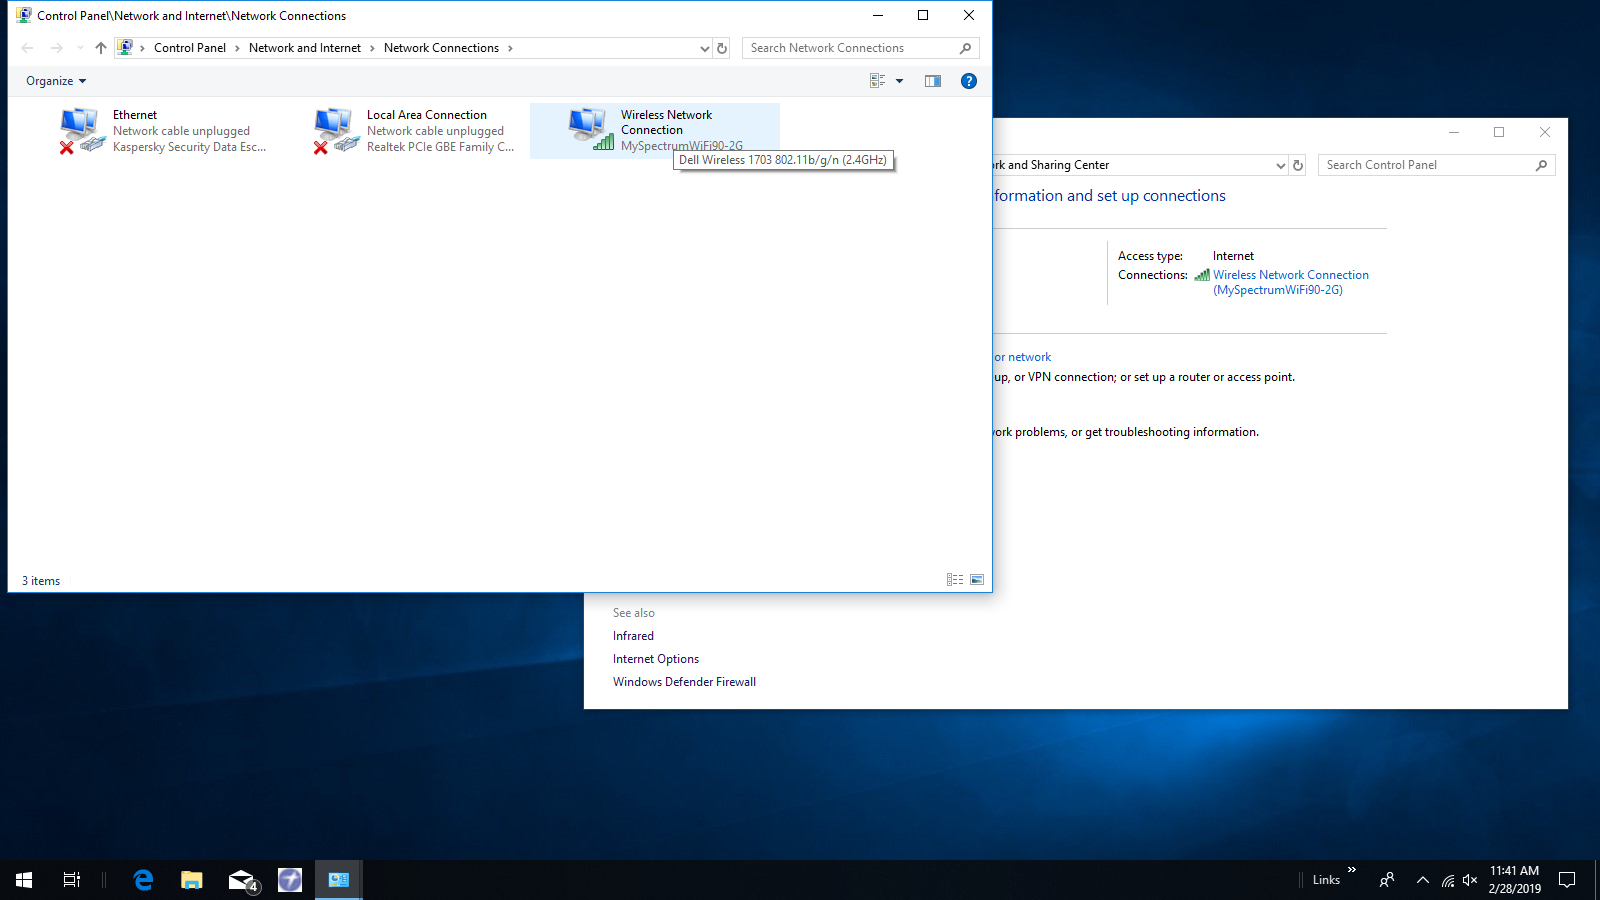
Next click on Change adapter settings in the left pane. See image below:
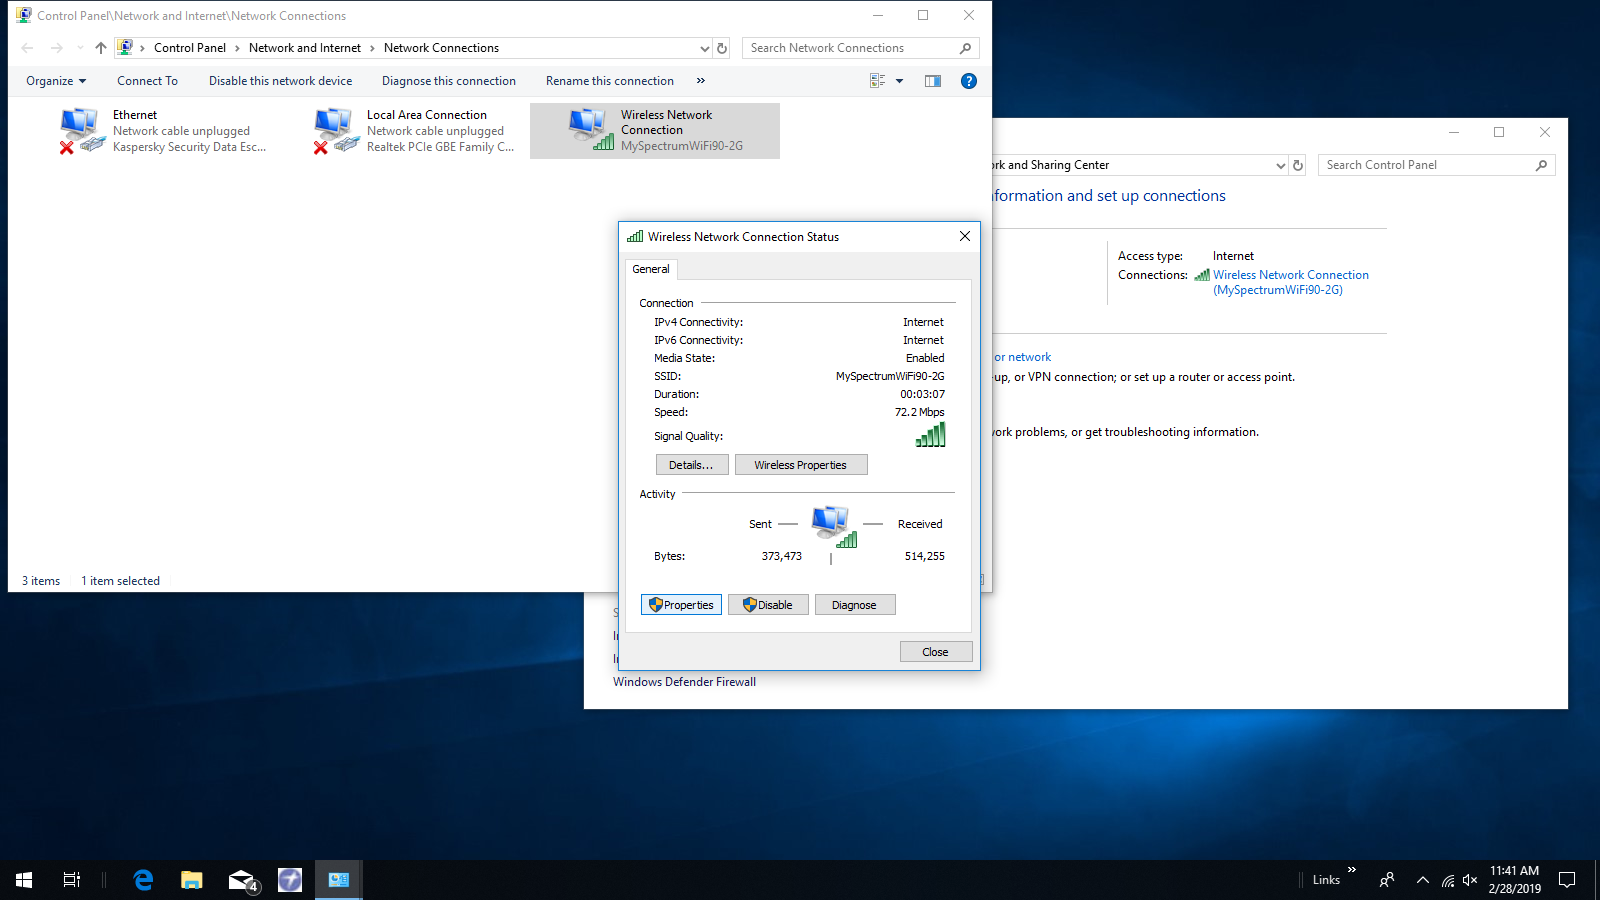
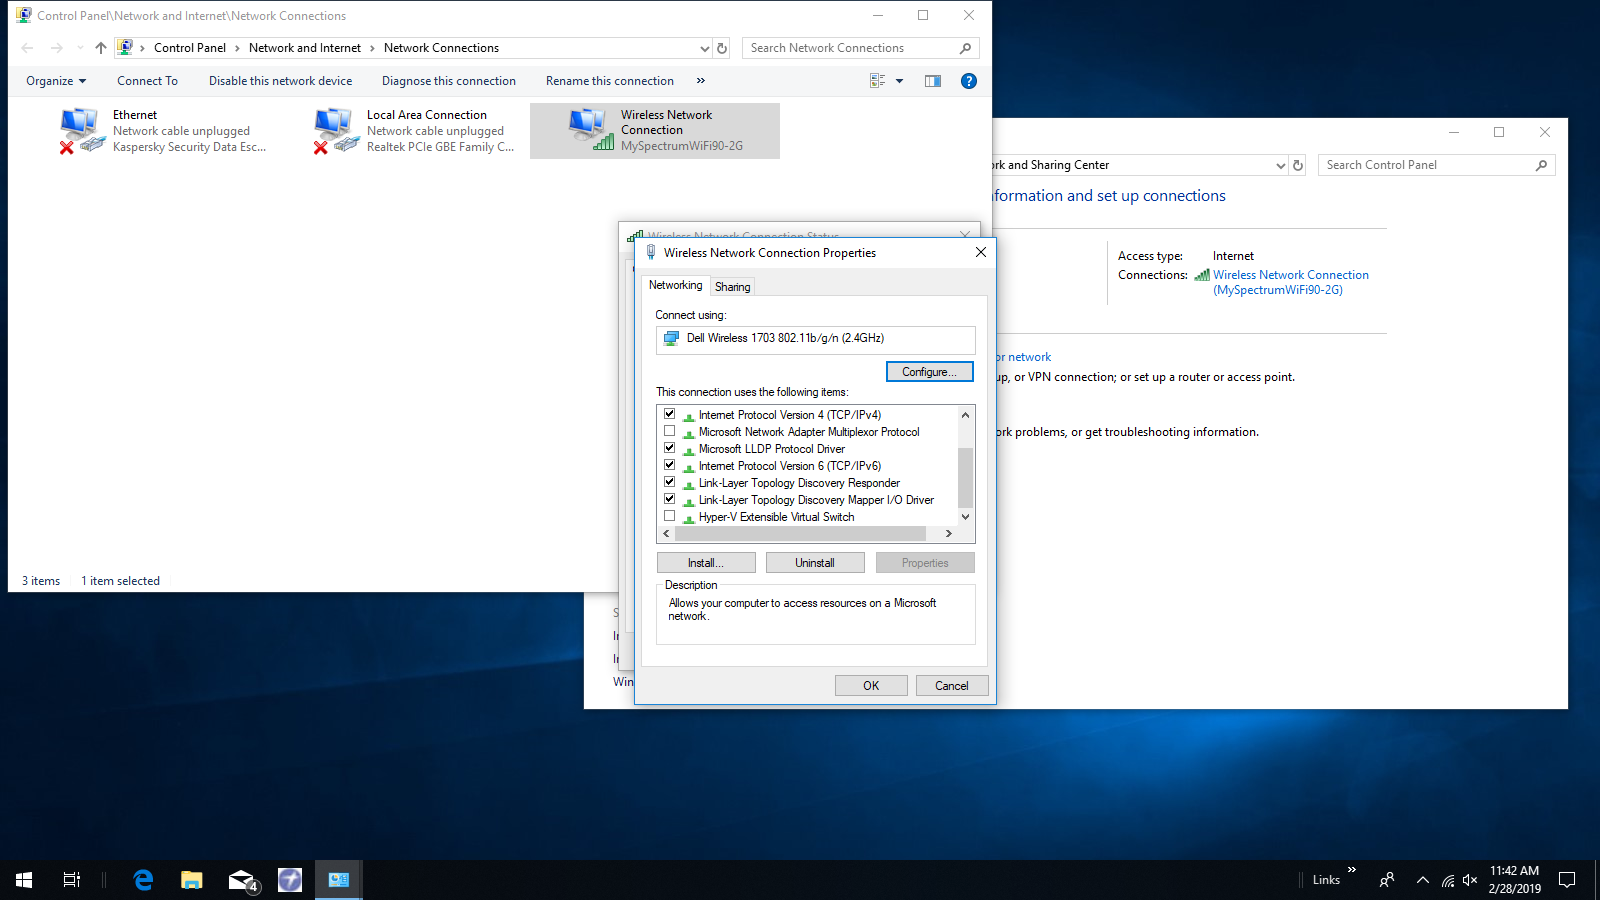
Double click on your connection. See image below:
From the window that appears click on properties. See image below:
From the window that appears scroll to find Link Layer Topology Discovery Responder and Link Layer Topology Discovery Mapper I/O Driver. If the boxes next to them are not checked, check them and then click install. Restart your computer after installation completes. See image below:
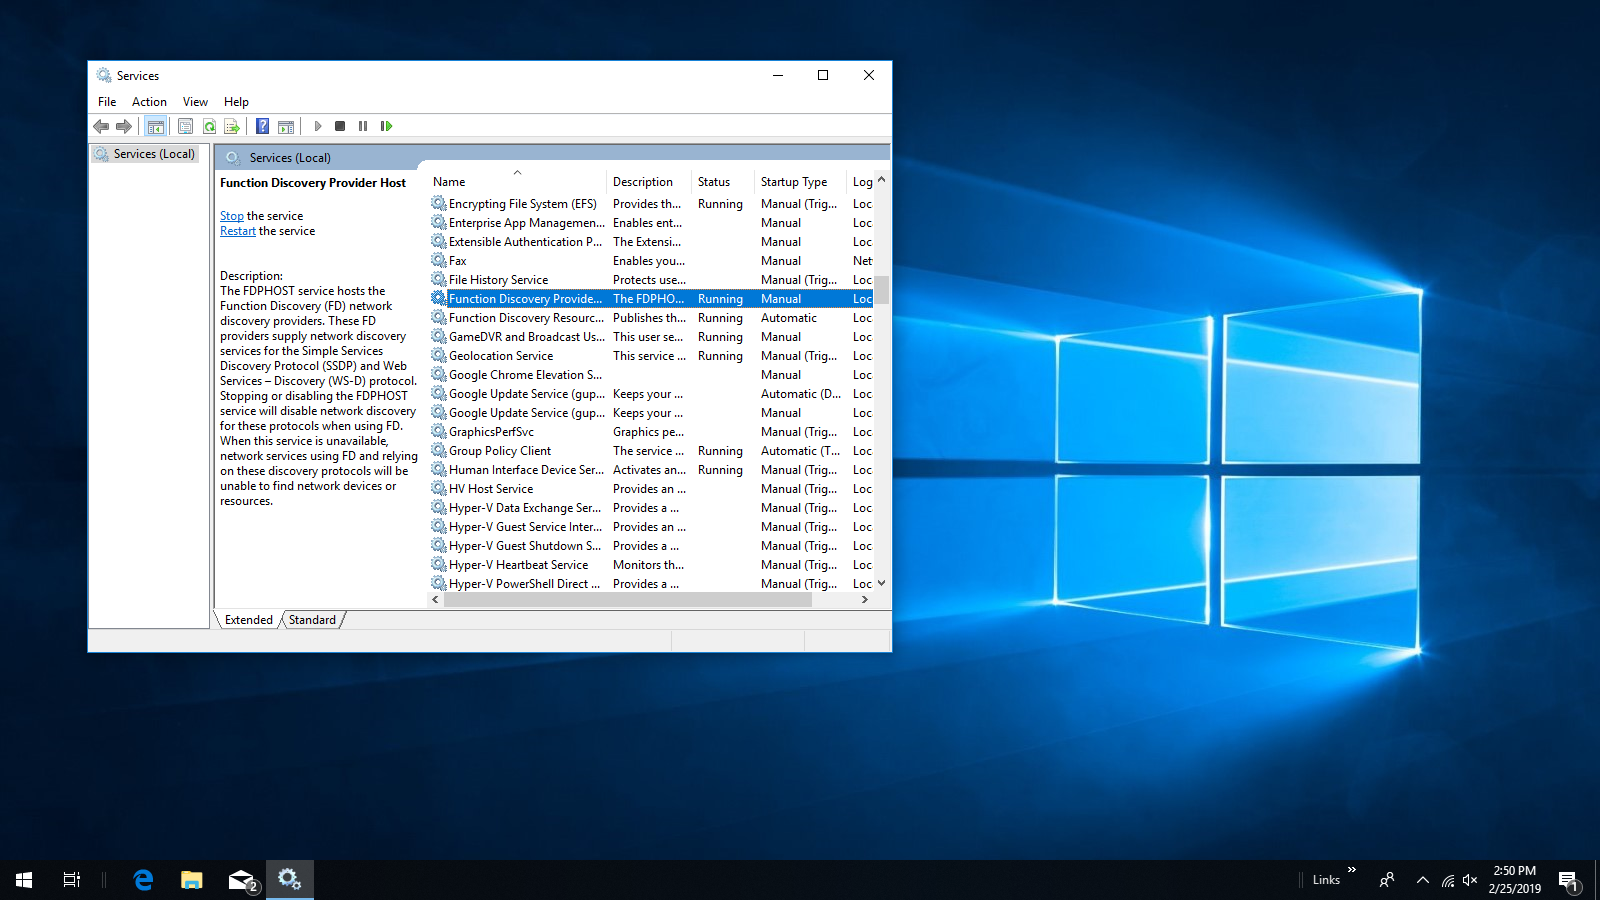
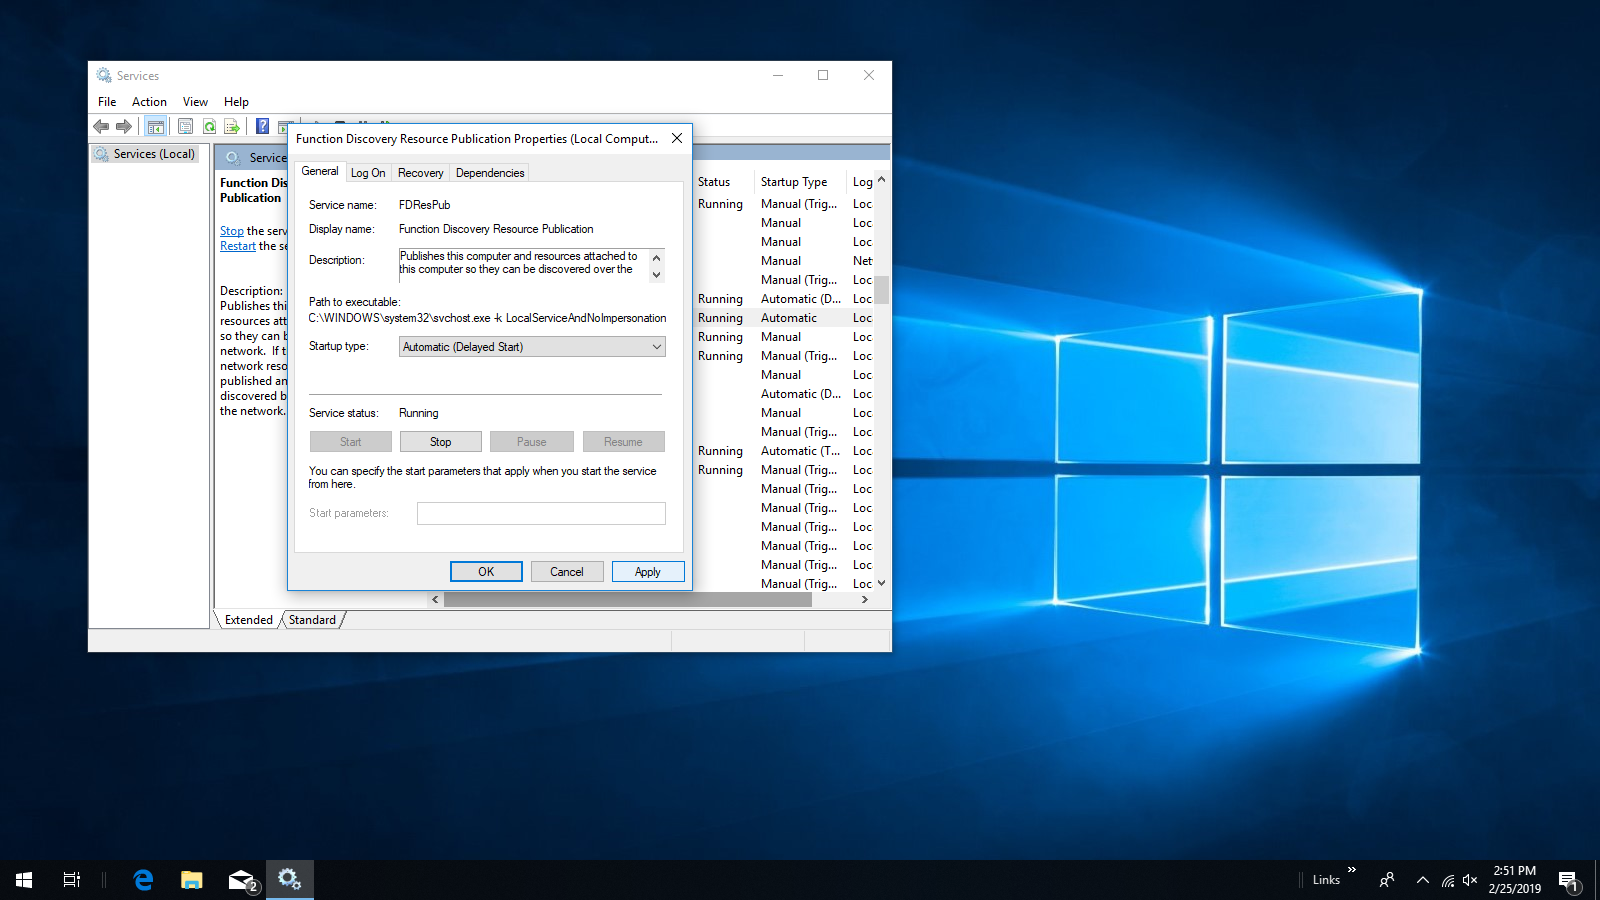
Some past Windows 10 updates 170x build series have been shown to change some Services settings. Hit your Windows key and type services. Click on the Services application that appears. See image below:

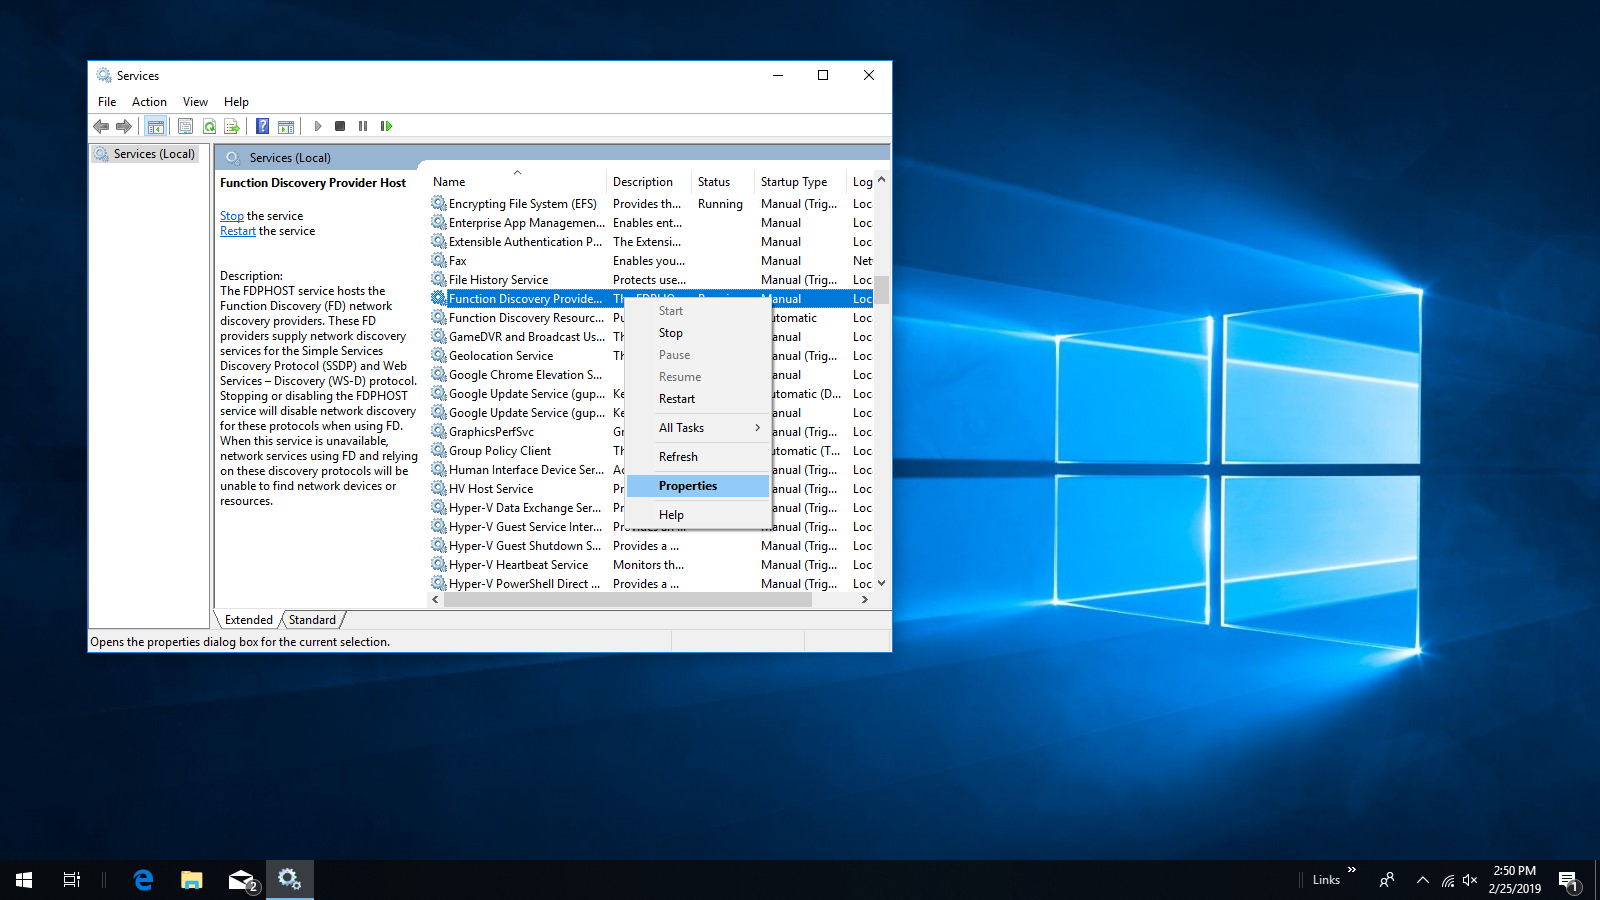
When the Services window appears scroll down to find Function Discovery Provider Host and Function Discovery Resource Publication. They are usually right next to each other in the list. See image below:
Right click on the first one and select Properties from the menu. You will have to do this for both of them one at a time. See image below:
When the Properties window appears expand the menu for Startup type and select Automatic (Delayed Start). See image below:
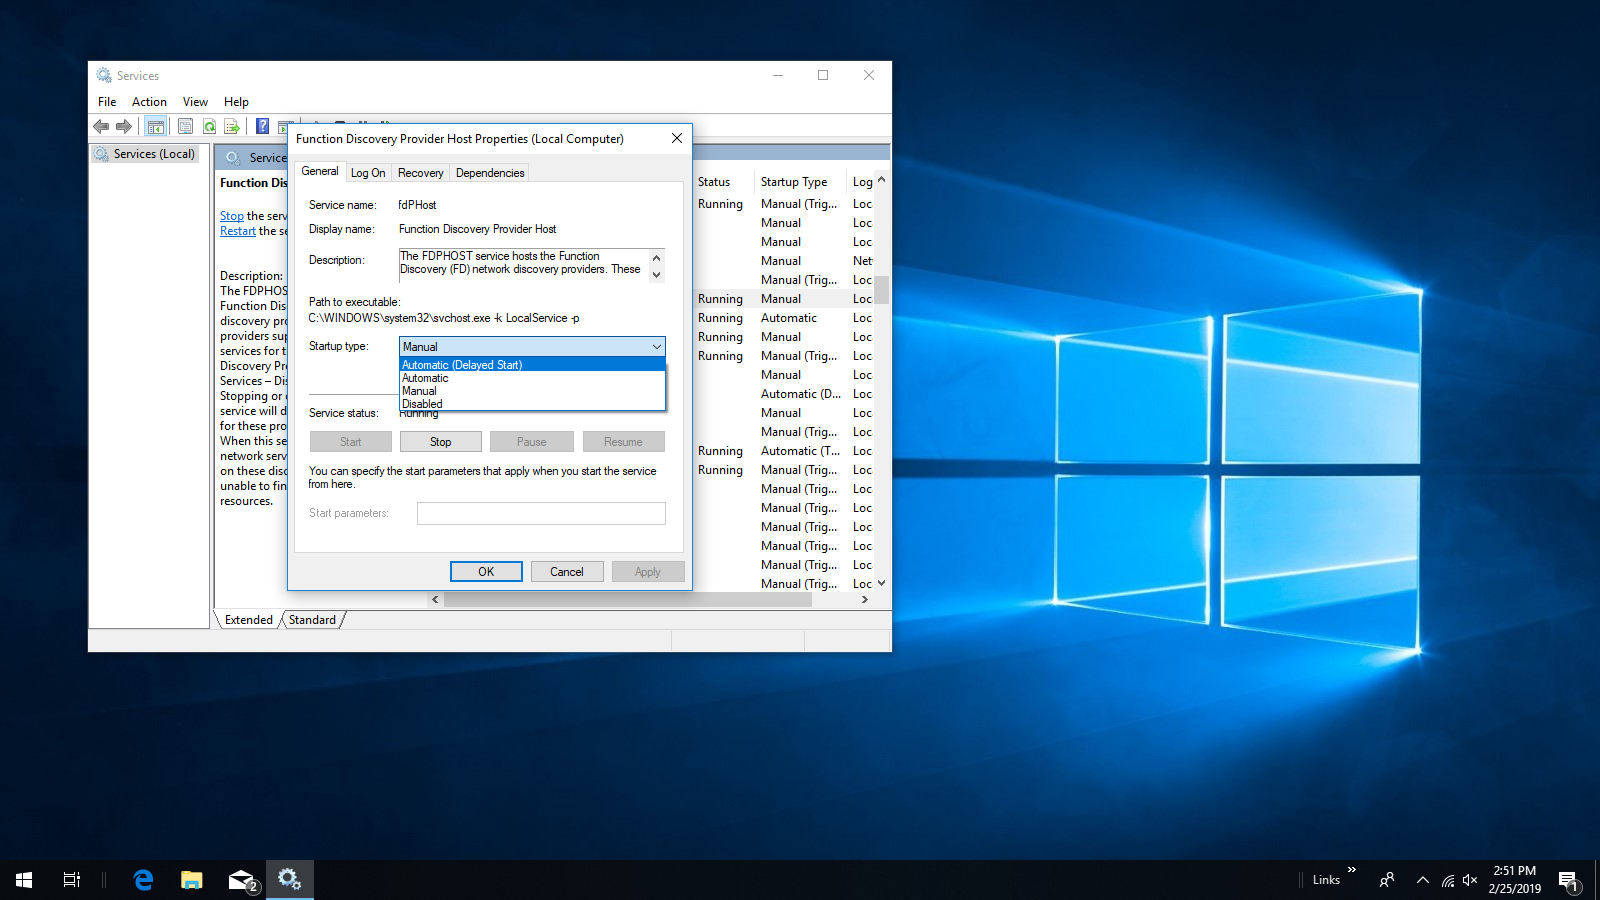
Click apply then OK. Do this for both Services then close the Services window and restart your computer. See image below:
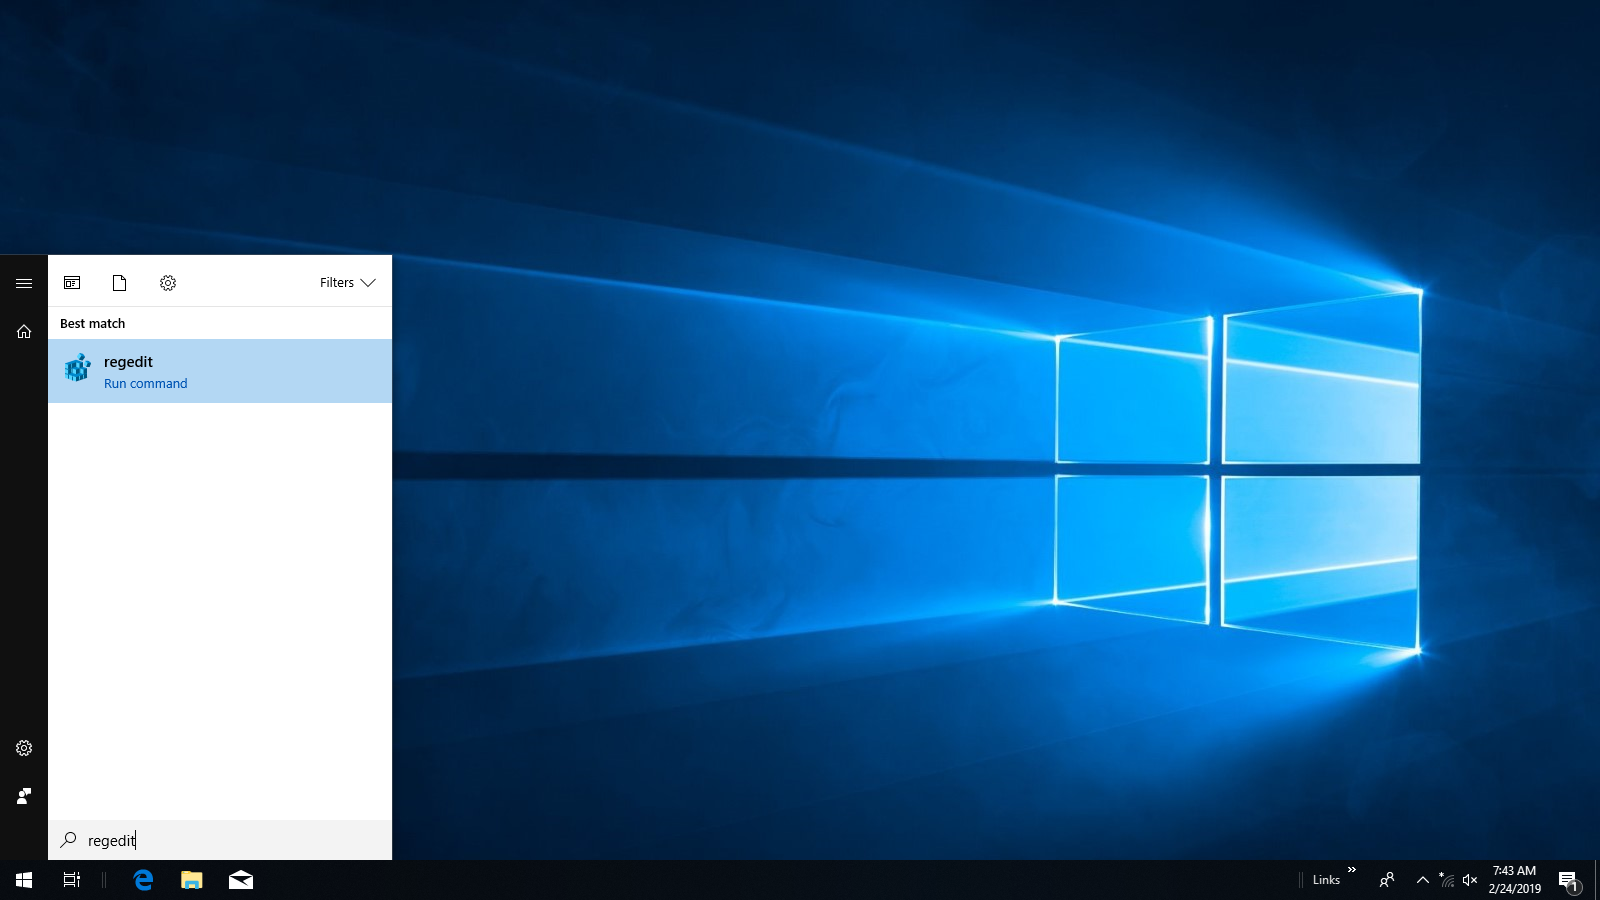
Depending on the size of your local network (number of Windows 10 devices on it) Windows 10 updates has been shown to be unable to configure some file browser parameters correctly. Hit your Windows key and type regedit and click on the regedit Run command that appears. See image below:
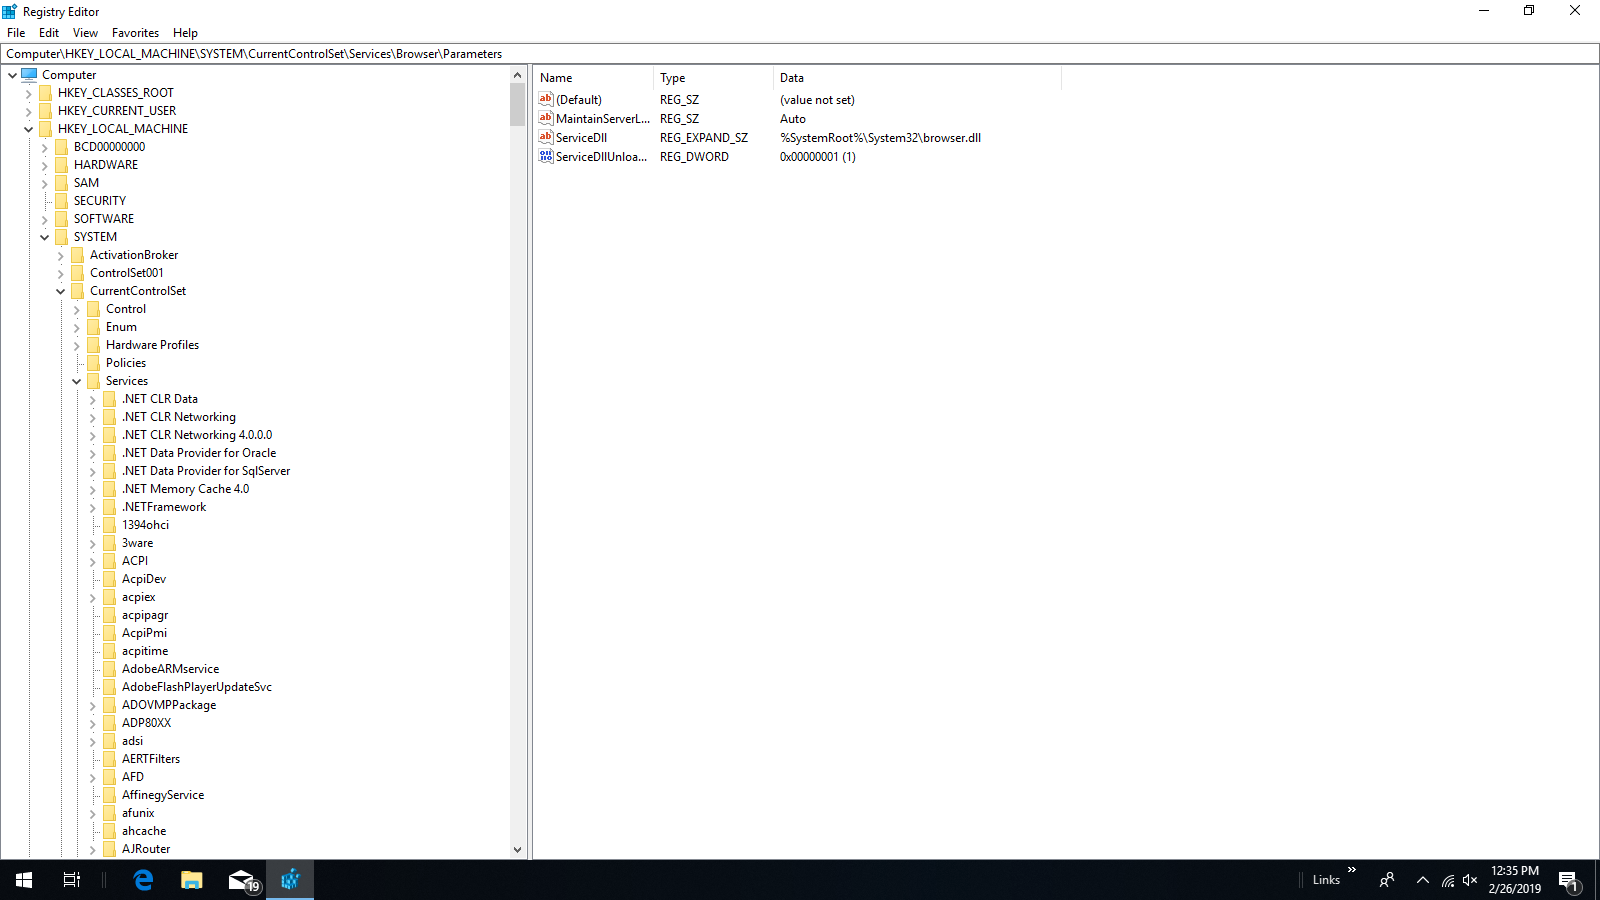
Expand the file tree: click on >HKEY_LOCAL_MACHINE; then >SYSTEM; then >CurrentControlSet; then >Services; then >Browser; then >Parameters; then click MaintainServerList in the right pane and an Edit String window will open. Change the Value data entry from Auto to Yes. Click OK. Close regedit and restart your computer. See image below:
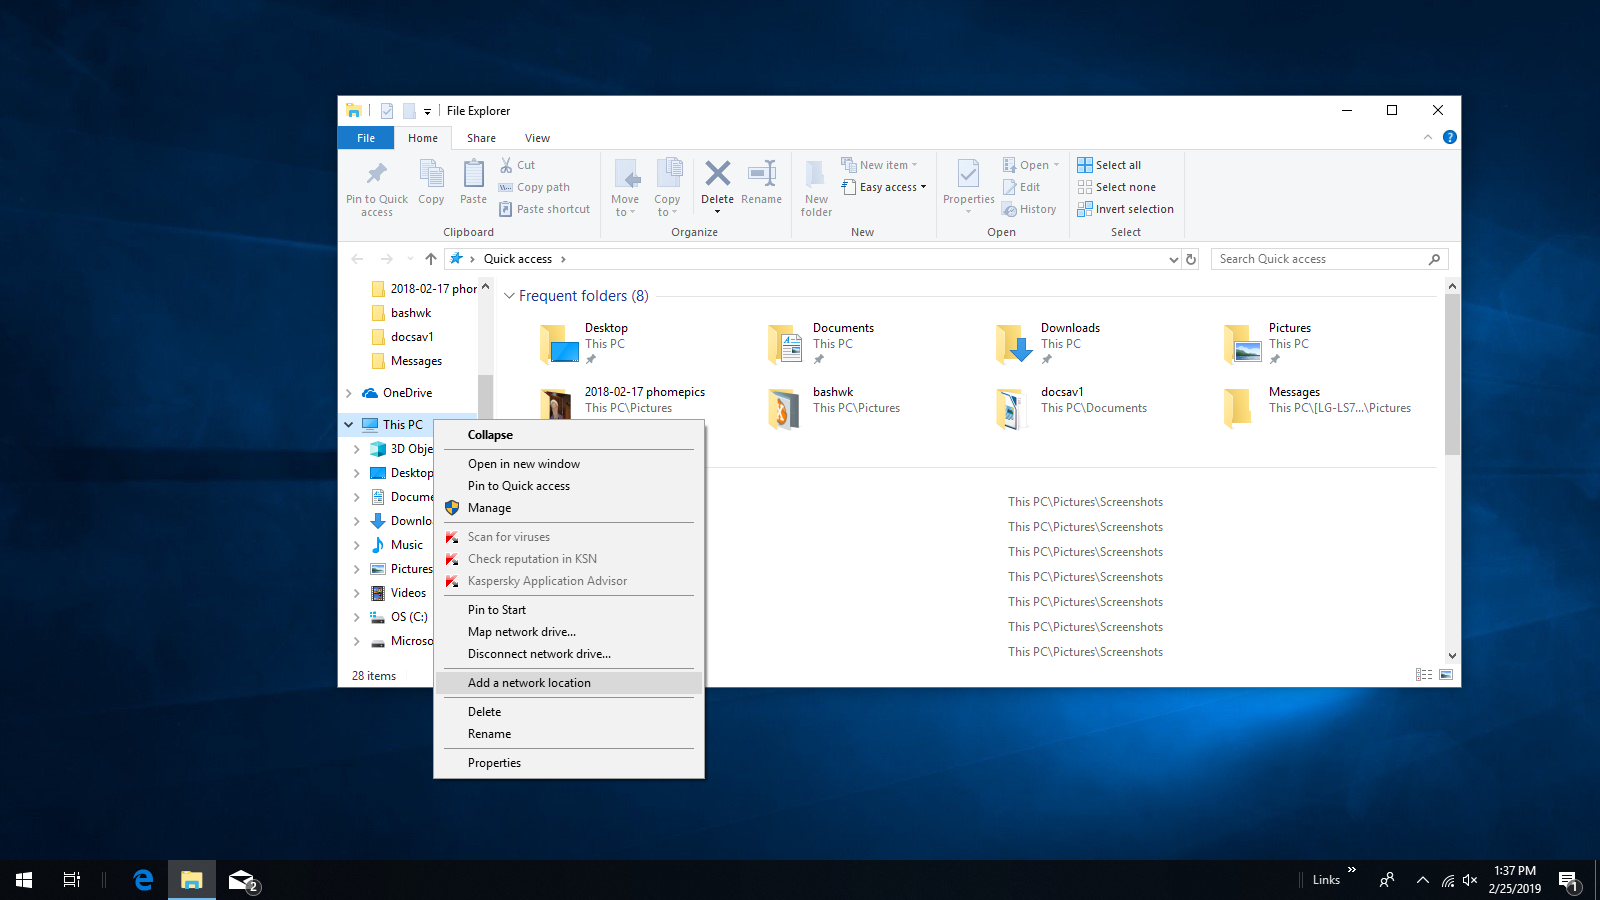
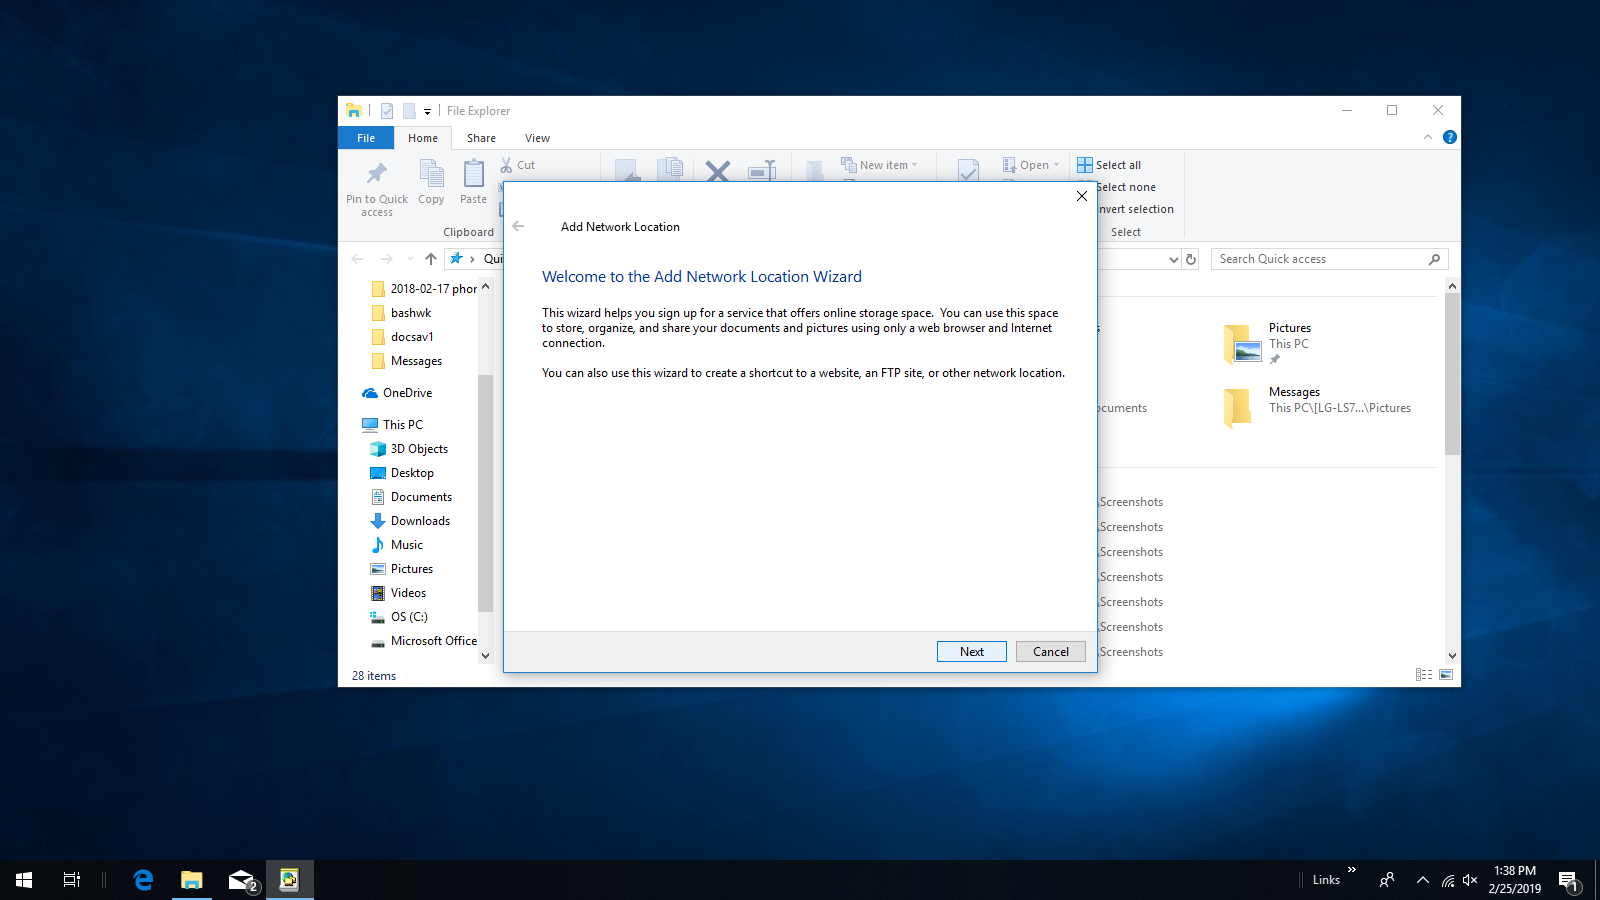
Some Windows 10 updates in the 170x build series have been shown to cause archiving and hiding of Network connections. To fix this quickly just right click on >This PC in file explorer and select Add a network connection from the menu. See menu below:
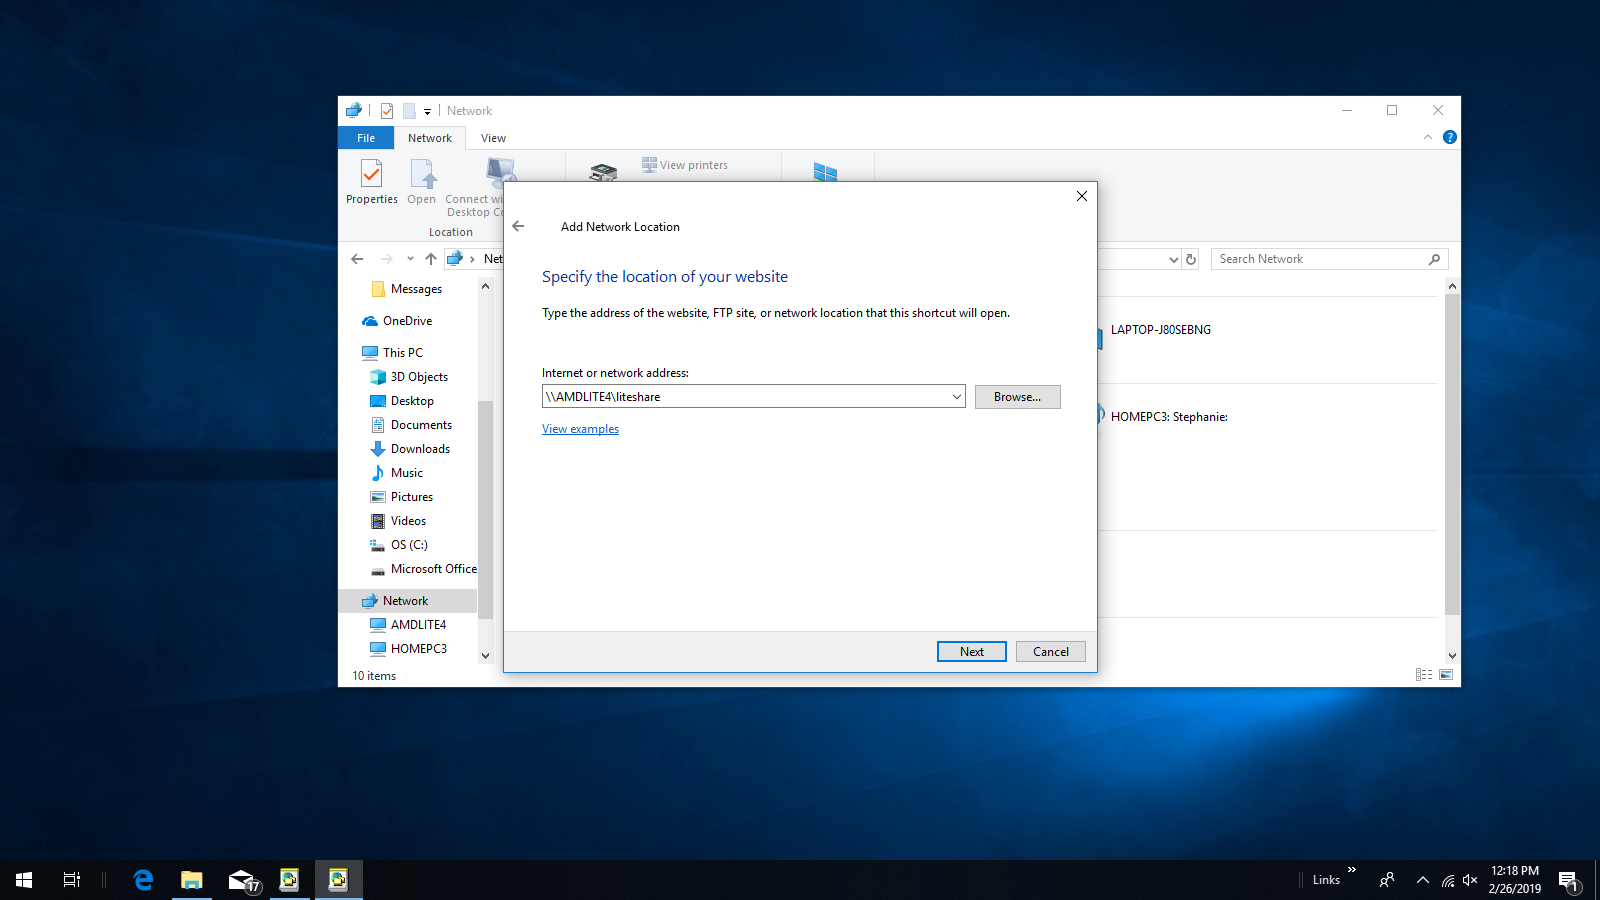
The Add Network Location wizard window will appear. Just click Next. See image below:
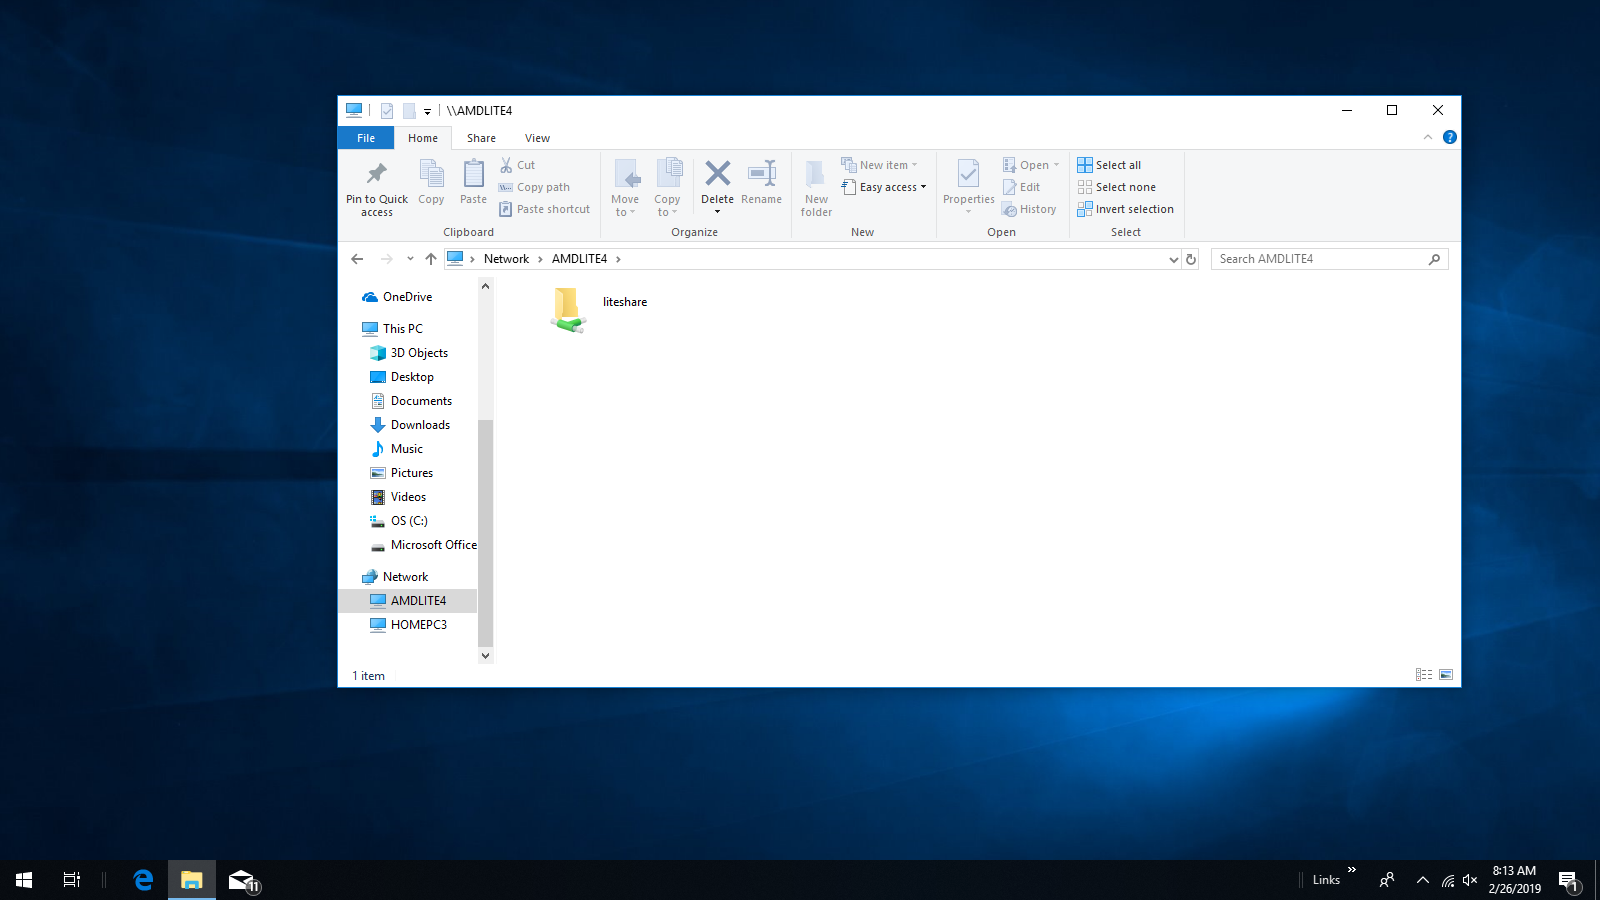
Enter your connection using the syntax and form shown: \\YOURLINUXLITECOMPUTERNETBIOSNAME\your samba share folder; or like it’s shown in the example: \\AMDLITE4\liteshare. Capitalize the netbios name of your Linux Lite computer in the entry. The folder should be however it is written on your Linux Lite desktop’s home folder.