
Part Three: Setting Up Your Web Server For Public Access Pages Via SFTP
Comments:
In the first tutorial I explained installing a Debian system and an Apache 2 Web Server and an SSH server. In the second tutorial I discussed building a simple web site for your web server with LibreOffice Writer Web, gthumb, and a screenshot tool. If you have had success with the first two tutorials you are ready for this one. I’m going to cover this subject first because it is the most likely one you will be interested in. I’m sure your object is to be able to securely connect to your new server over the Internet, not just locally, and SFTP is the easiest and safest way to do so without your own domain name and DNS name server providers. I’ll explain domains, name servers, and several other things in the last tutorial of this series, but if you’re even a little bit like me, like to keep a bare metal web server as a backup to your main server, and/or use it for testing web applications, and you don’t really want or need a web space provider for such things, and you want remote access to your server to be available to others, SFTP is just the ticket. It will allow you to provide over the Internet connections, and completely control who has access to those connections to your web server.
1) Configuring Your SSH Ports & Testing SSH Connections
You should already be connected to your web server privately in one of three ways: ethernet cable direct connection, ad hoc Wifi connection, or a regular private network NAT connection. I’m going to use an ethernet direct connection here but any one of the three connection types will work. I’m using two Debian machines, but you can connect with Windows or any other Linux system the same ways.
For more information on setting up these connections and SSH in Debian see my tutorial at the link below:
SSH SFTP SCP VNC Connections To & From Debian 9
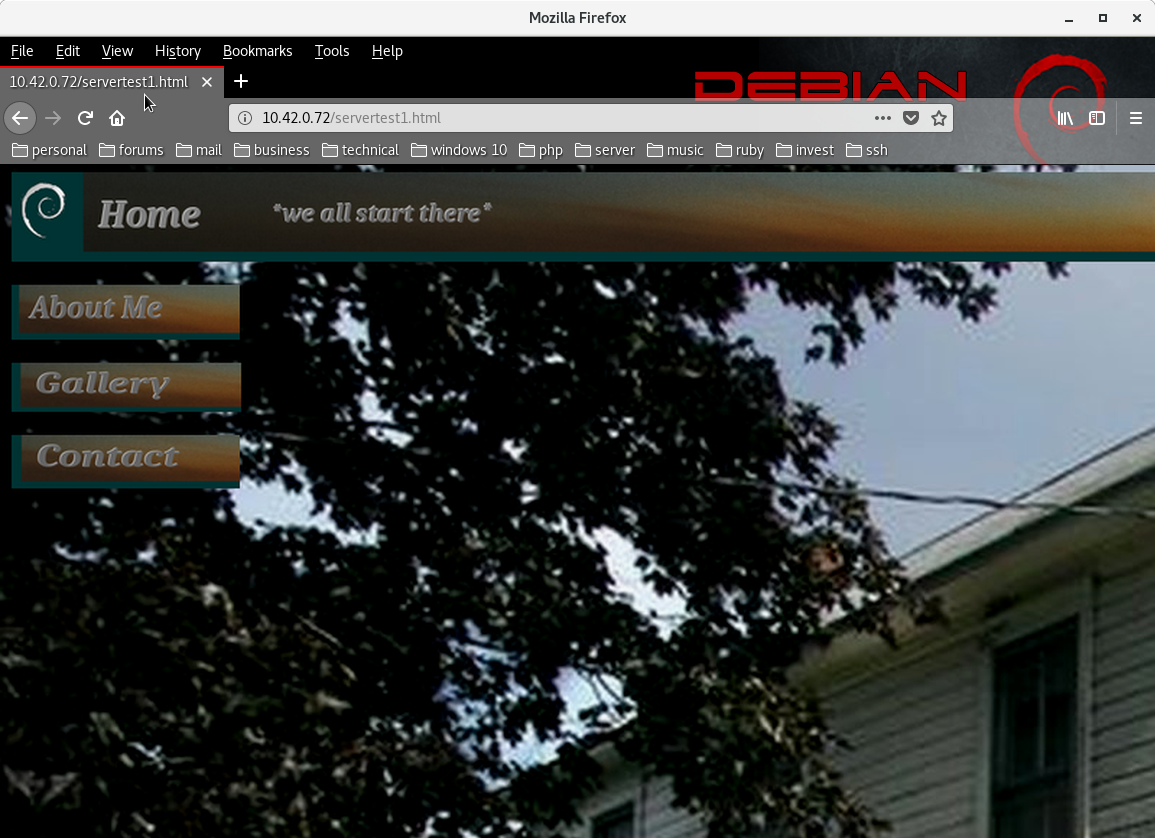
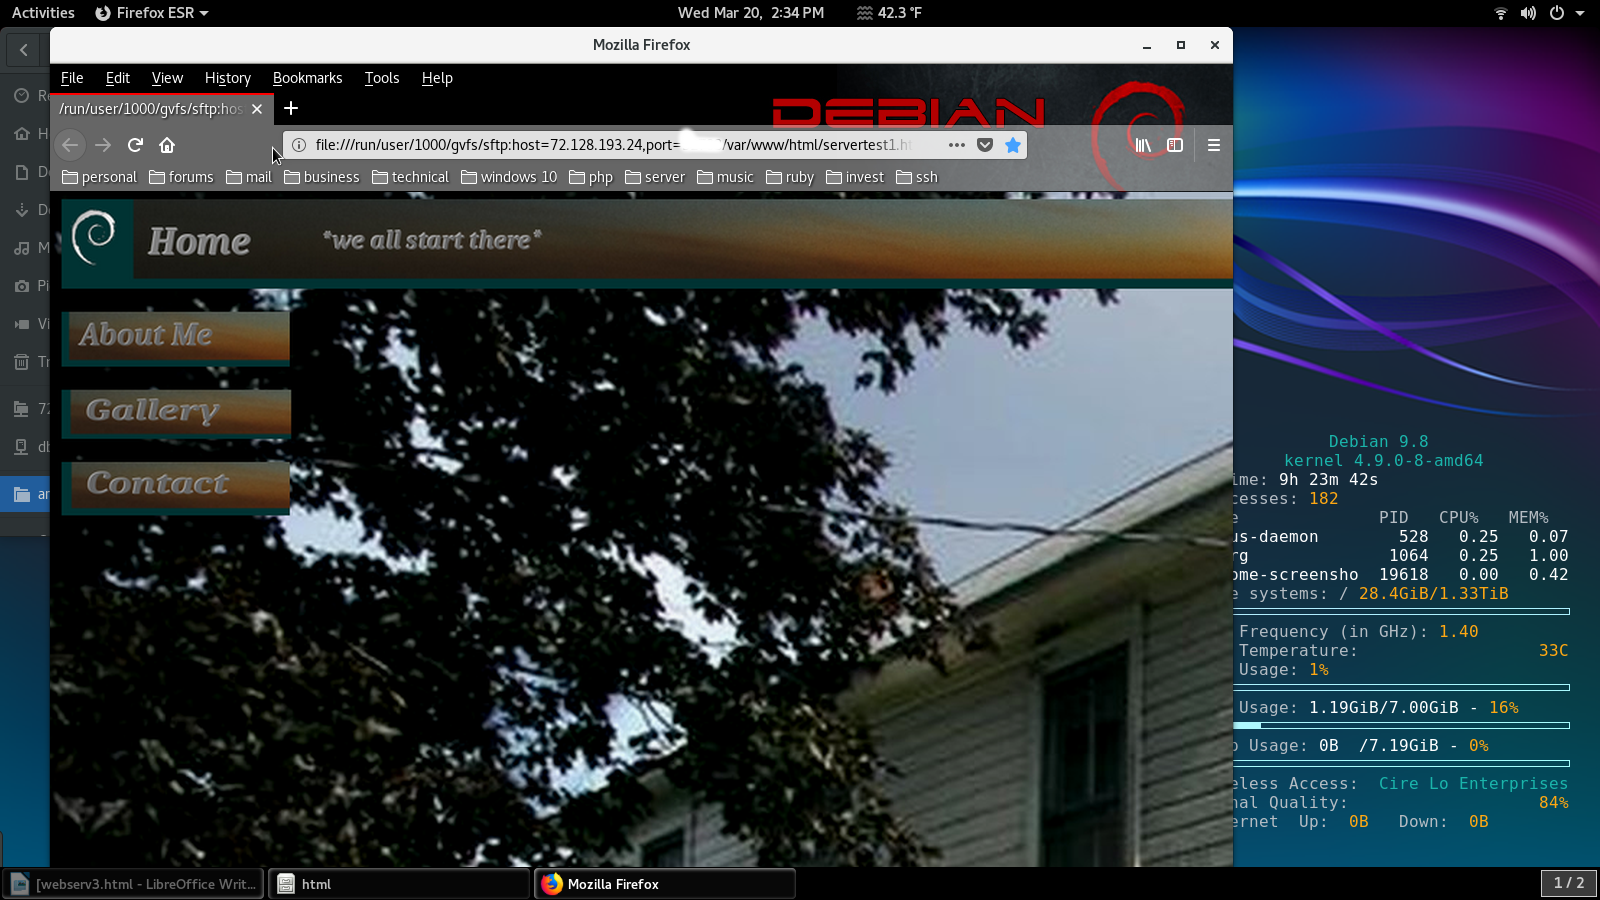
If all has gone well and your two machines are connected one of the three ways above you should be able to view the web page you created in the browser of your client machine using the IPv4 connection address of your web server, and the file name of your web page. See image below:
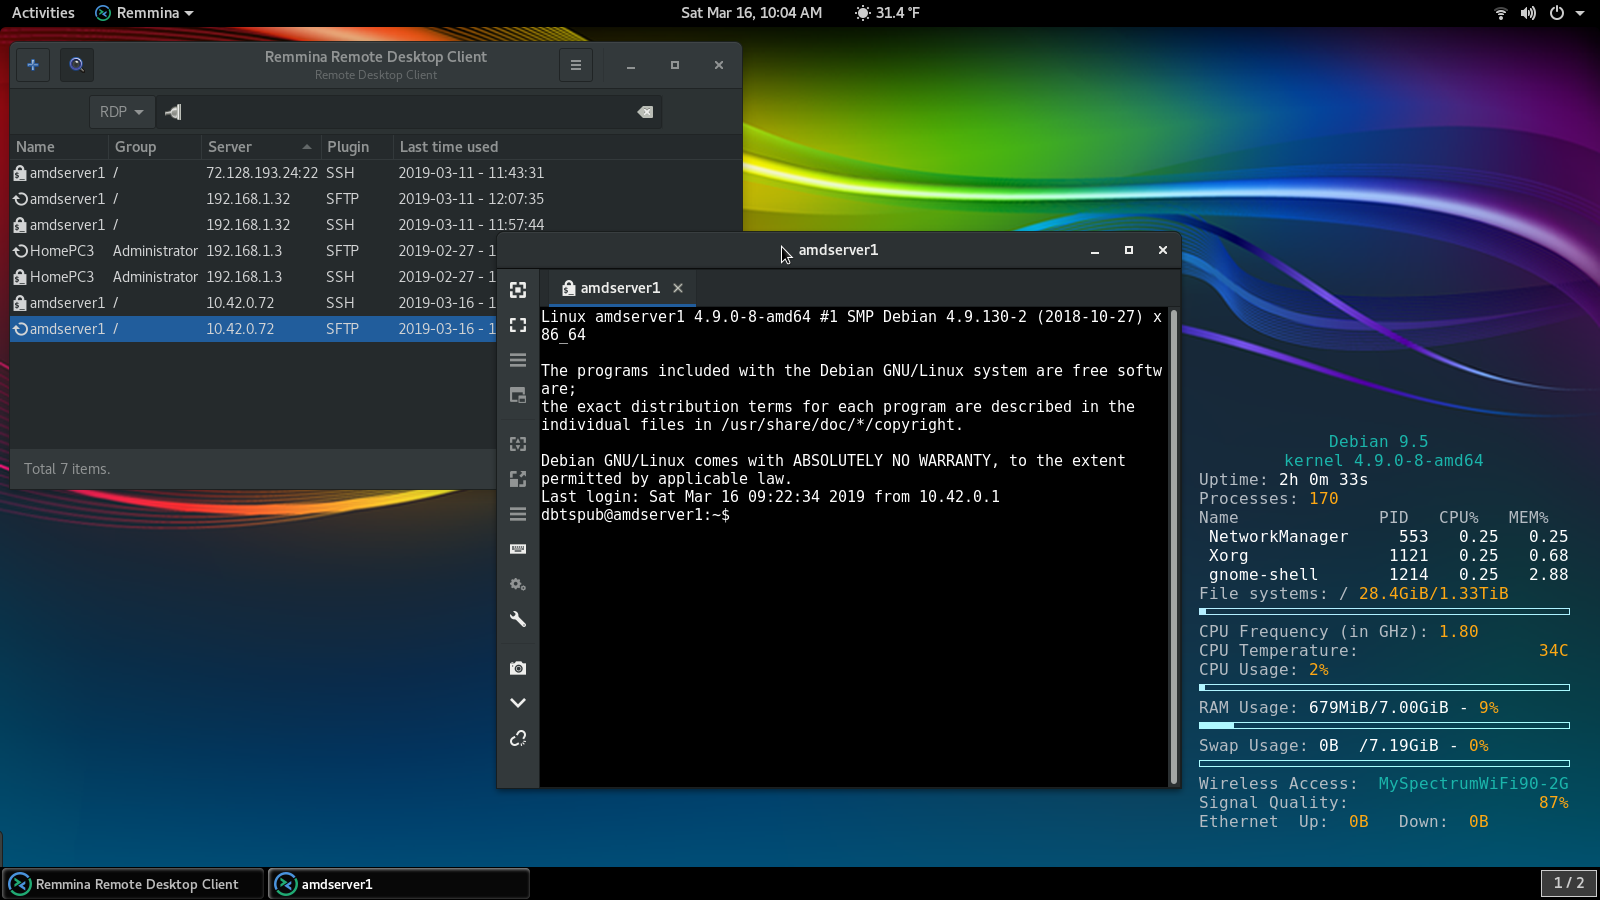
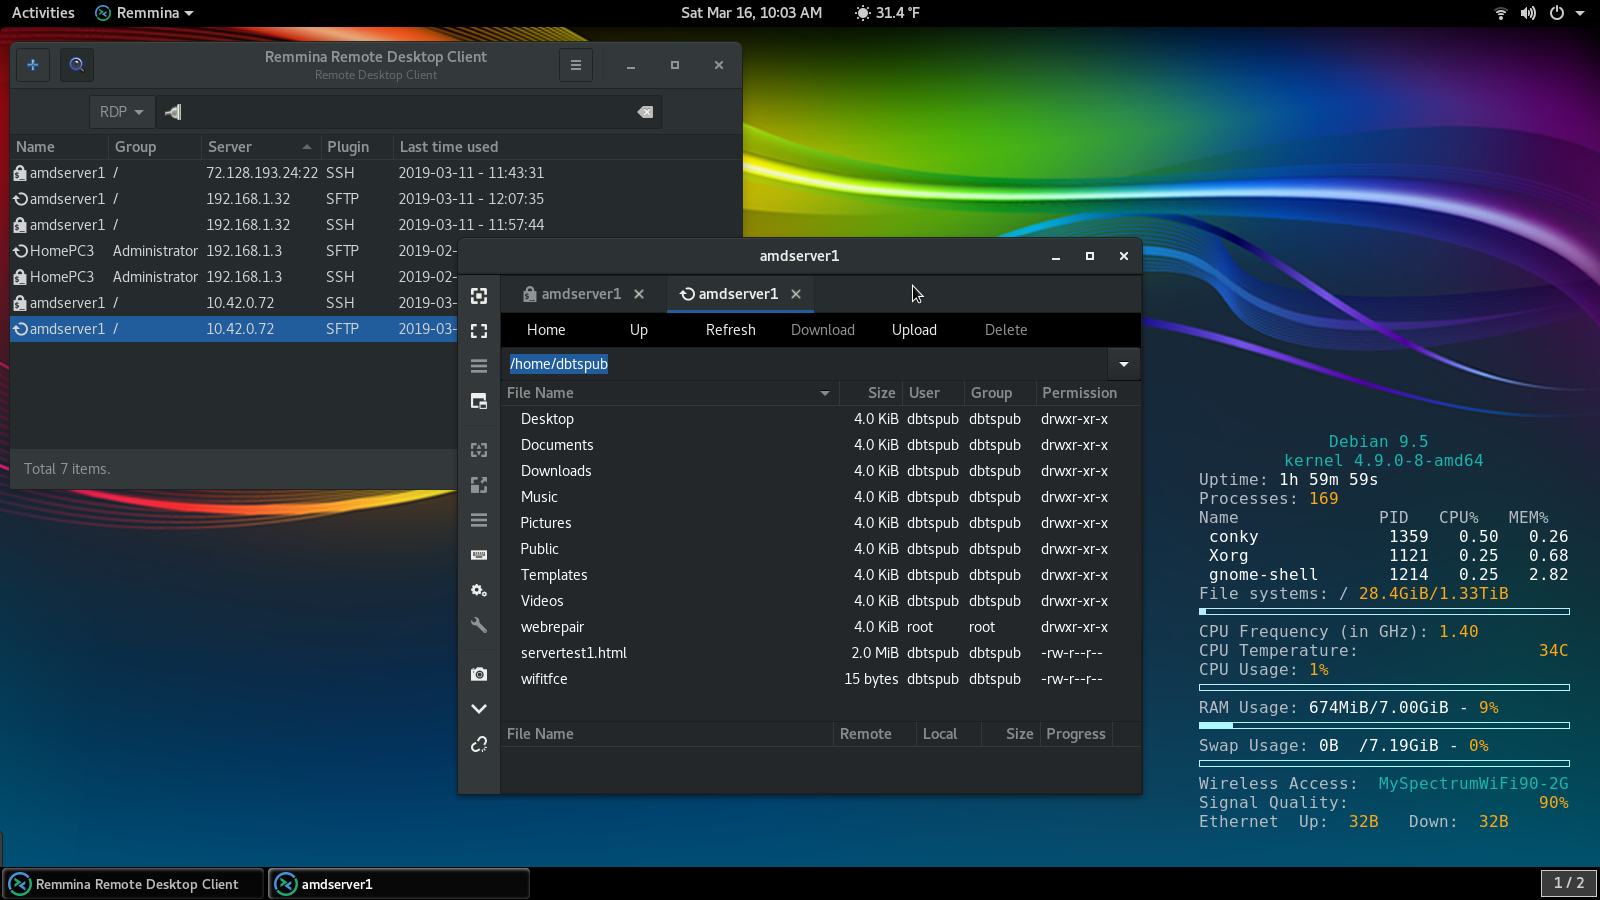
If all has gone well with SSH you should be able to SSH/SFTP to your server. I’m using a Remmina client here because I like the ease of its SFTP interface, and since I have a local user Debian system on my web server I can transfer files in both directions for editing etc. without worrying about working in my server’s root account until the files are ready for my server. I can then just login as root on my server and move the completed files to my /var/www folder or wherever needed. See the images below:
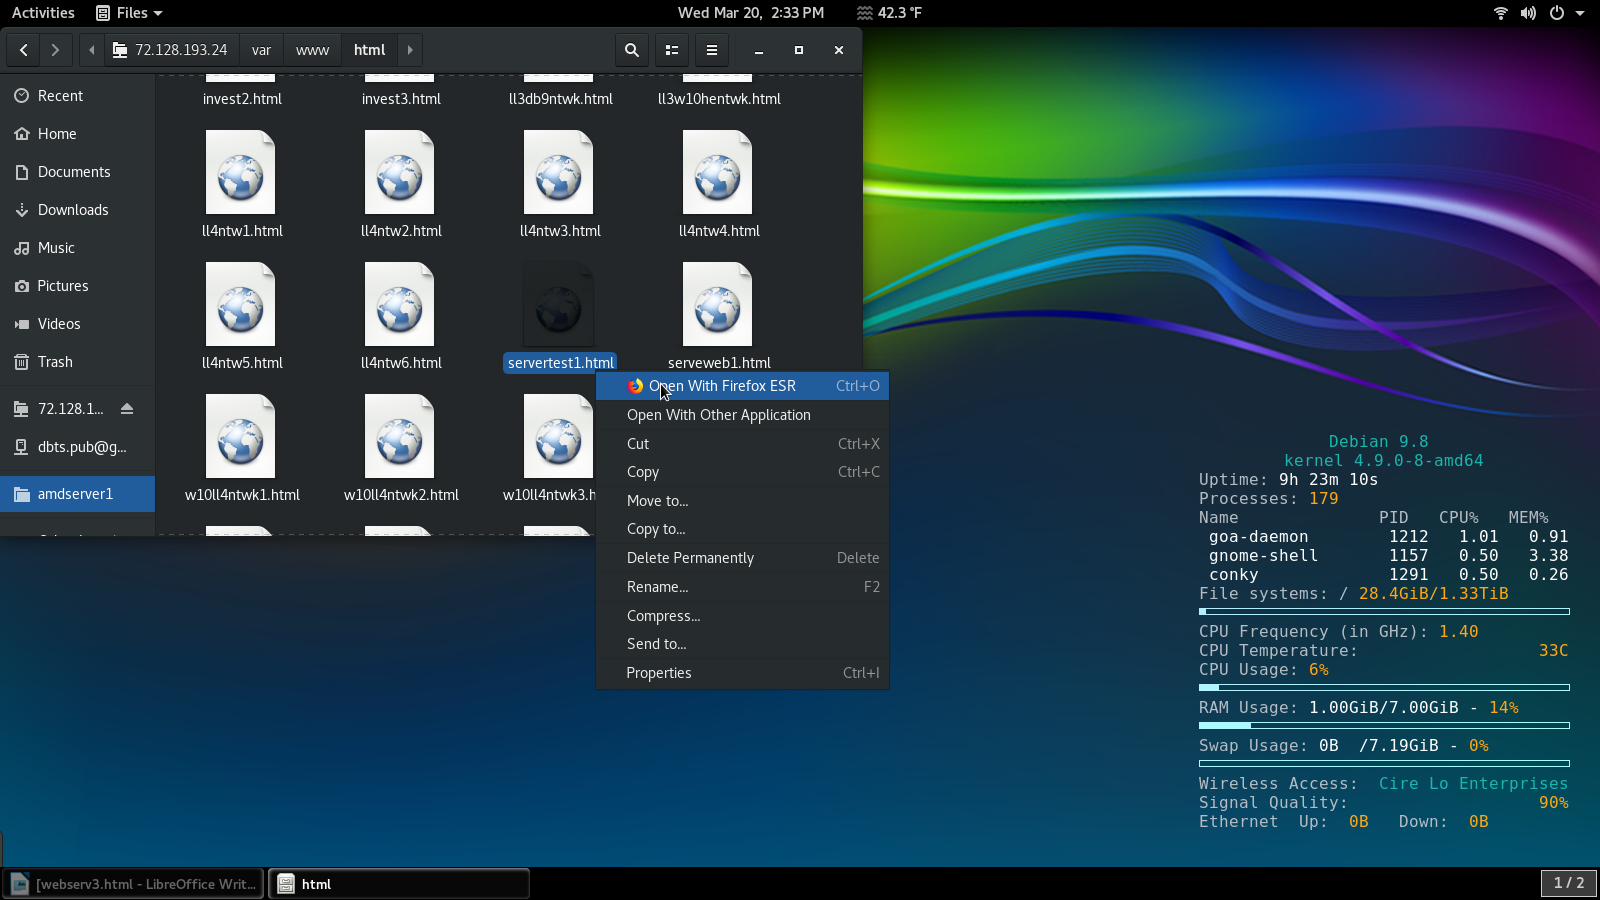
What I’m about to discuss here is the simplest way to allow connections to your web server over the Internet. With Debian there is no simpler way, other than exposing ports 80 and/or 443 through your routers firewall, the former being a generally bad idea, and the latter requiring a certificate. You could use an SSH tunnel, or a Socks proxy, but each have their own disadvantages the former requiring user setup for each user you allow and incomplete link performance, the latter requiring switching back and forth in your browser and incomplete link performance. What always works, with all links working normally, is to SFTP from your file manager to your /var/www/html/index.php or .html file and open the file with Firefox from your file manager using gvfs. To make it even more convenient you only need to add a bookmark in your file manager to save the connection. SSH has always been the black magic of the Internet.
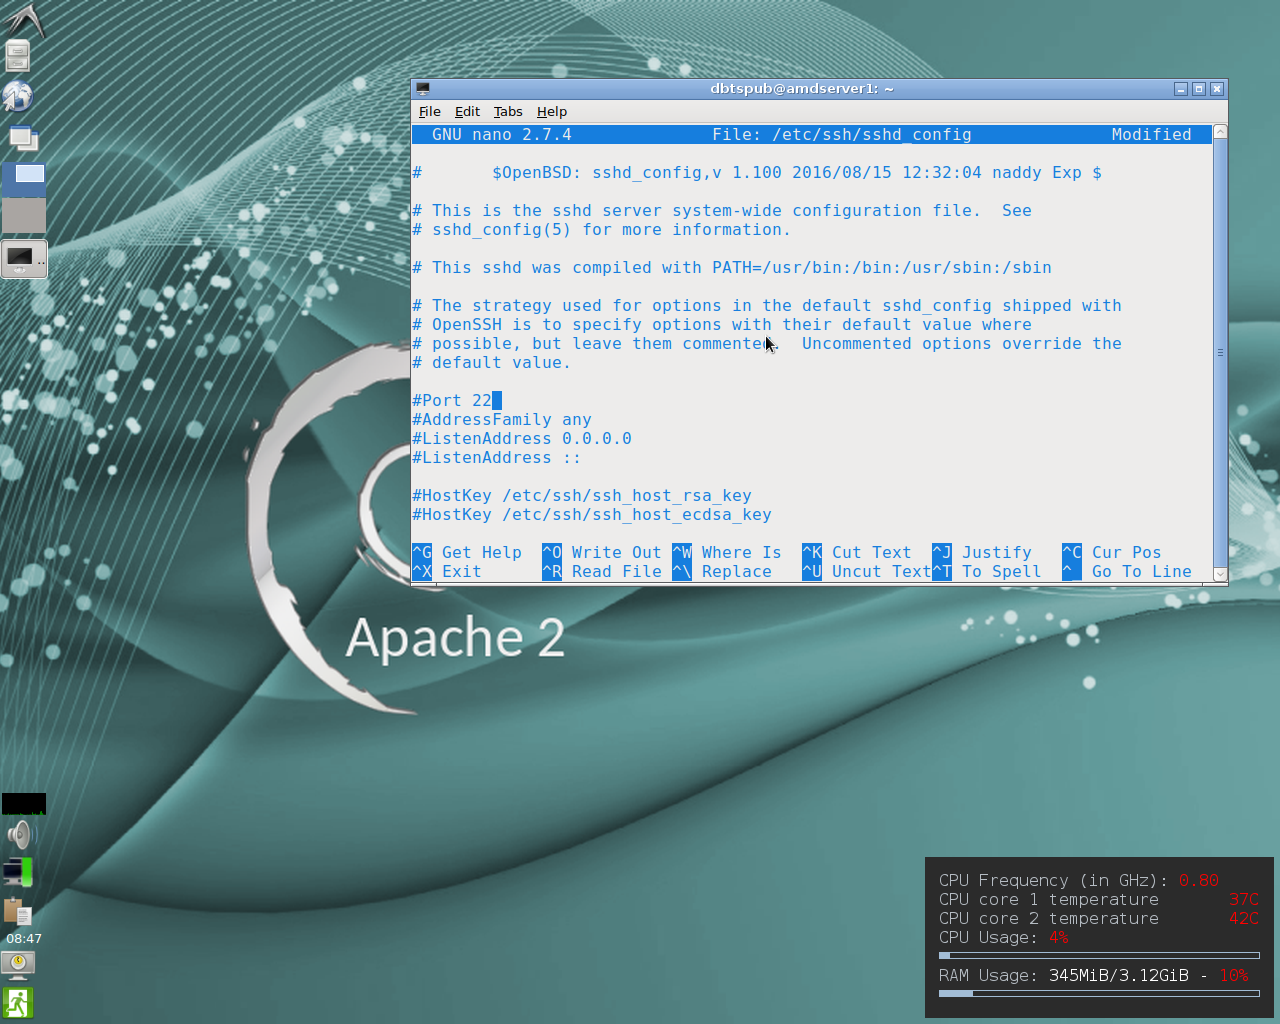
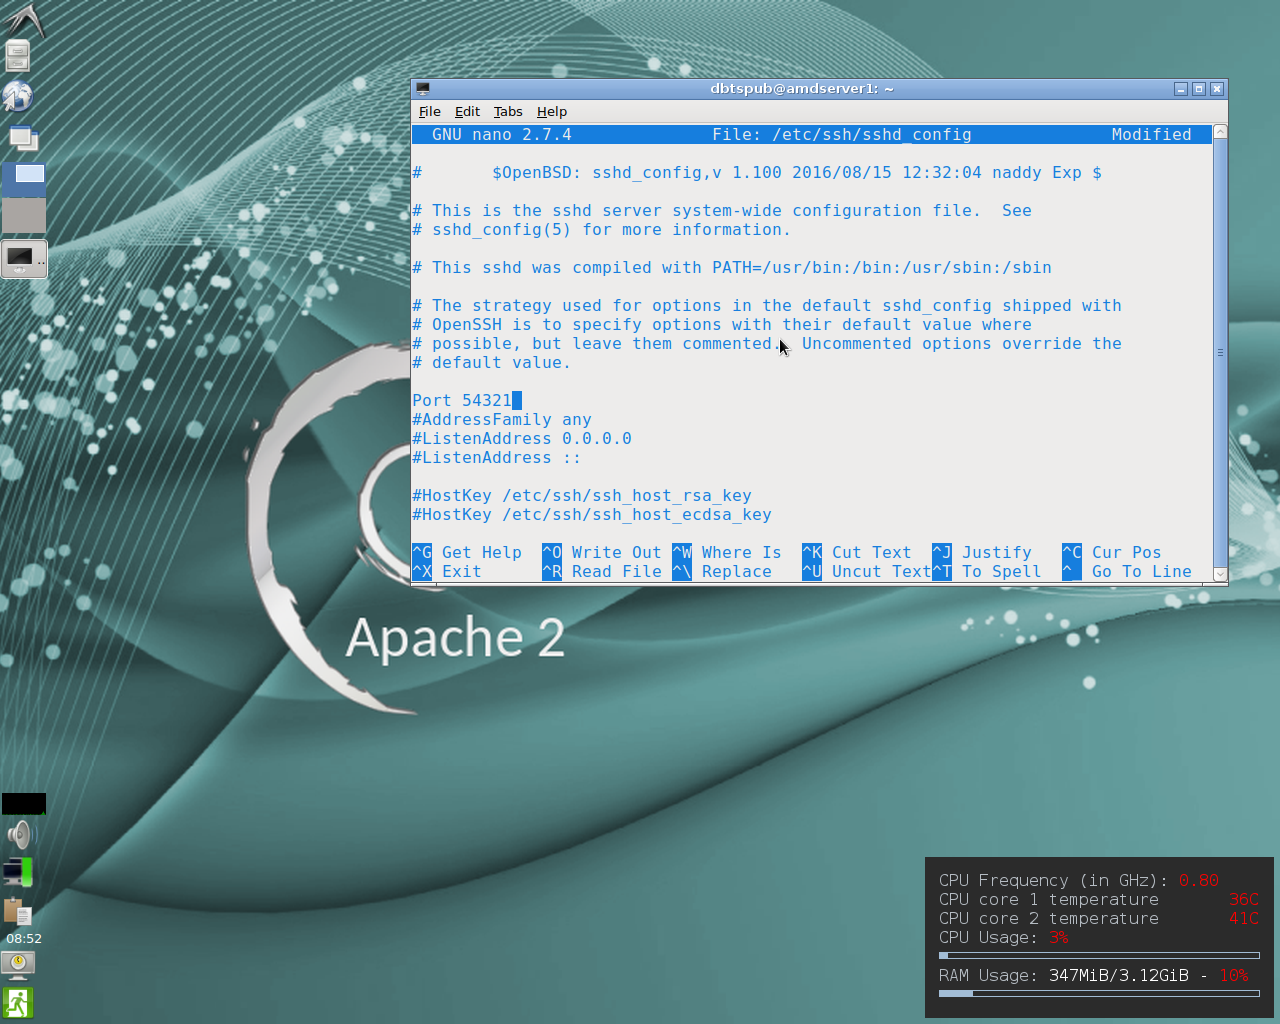
Having said that the first thing you’re going to want to do is change your SSH port on your server. The SSH default port 22 is widely hunted on the Internet by brute force bots. On your server open up a terminal and su to root and type the command: nano /etc/ssh/sshd_config When the file opens use the cursor arrow keys to navigate down to the line #Port 22 and uncomment (backspace out the hash #) the line and change the port number to something like 54321. Hit Control +x then y then Enter to save the file. Most ports between 49,999 and 69,000 are usable. See images below:
Next you need to allow the new port connection through the firewall on your server. Again su to a root terminal on your server and type the command ufw status verbose As you can see in the image below the firewall is active and the default settings are to deny incoming and allow outgoing connections. You can see that I have connection interface and port rules for port 22 and 80 and 443 /tcp connections to allow my direct ethernet connections to my web sever and my SSH server, and another utility port enabled.
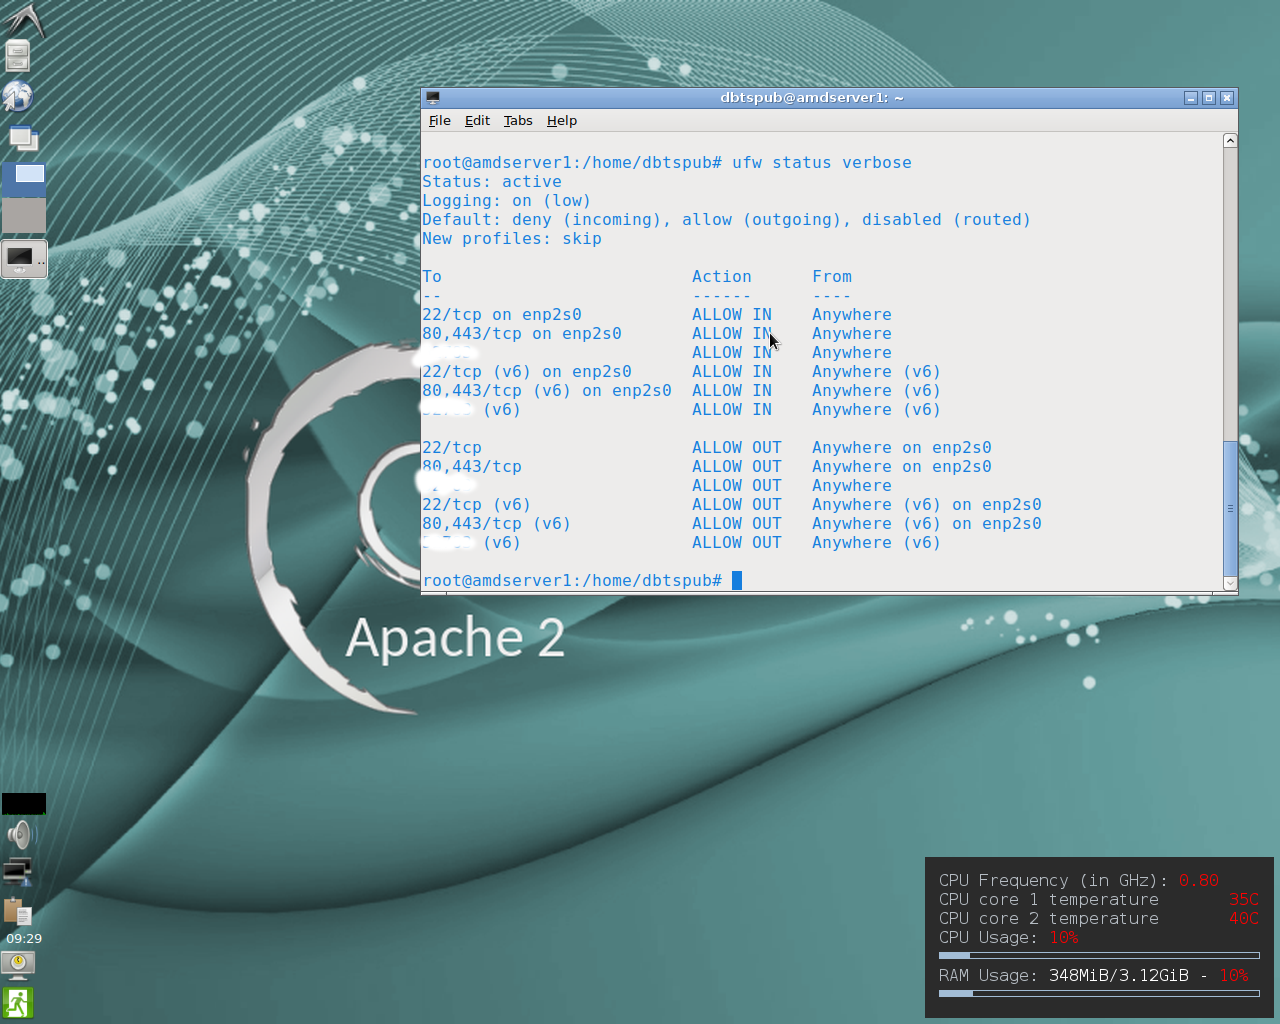
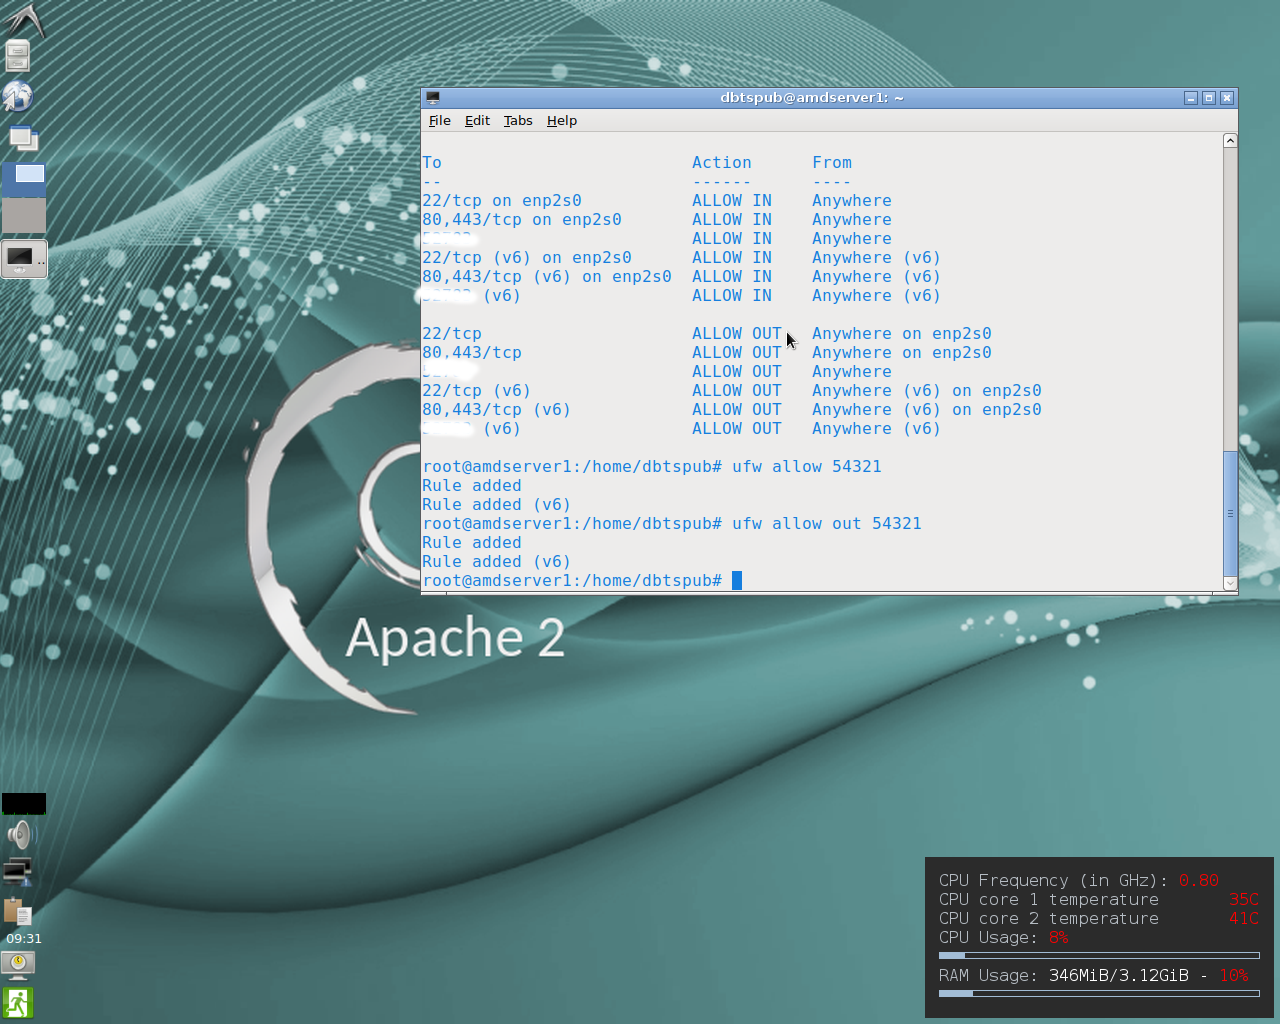
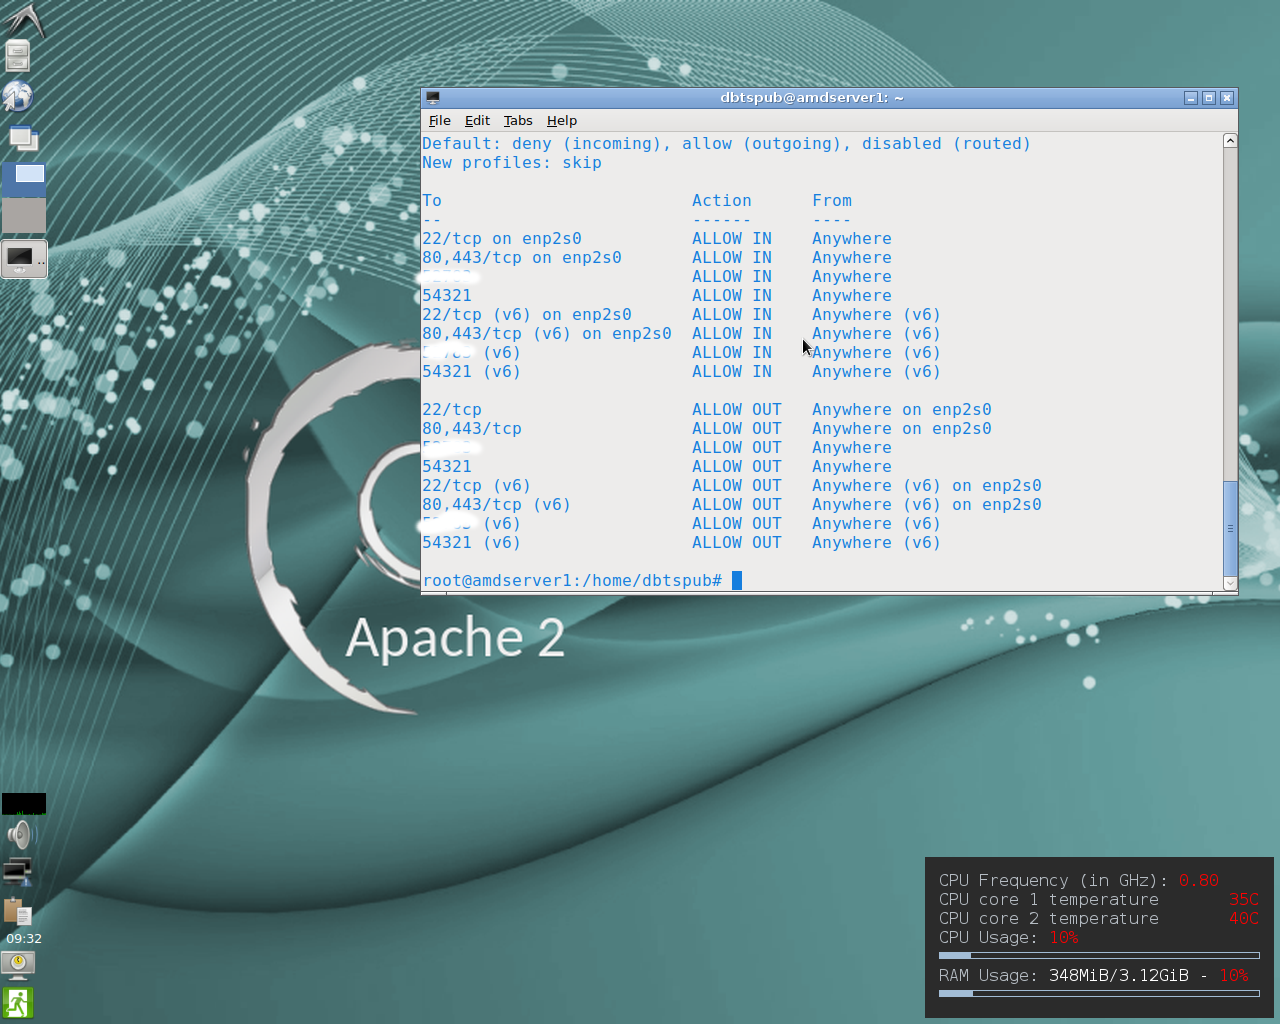
Your display won’t be the same as mine, but just make sure the defaults deny (incoming) and allow (outgoing) are the same. To allow your SSH port through your firewall type the command: ufw allow 54321 or whatever port number you chose and hit Enter. When prompted hit y then Enter and the rule will be added. Do the same thing for the next command: ufw allow out 54321 and the outgoing rule will be added. See images below:
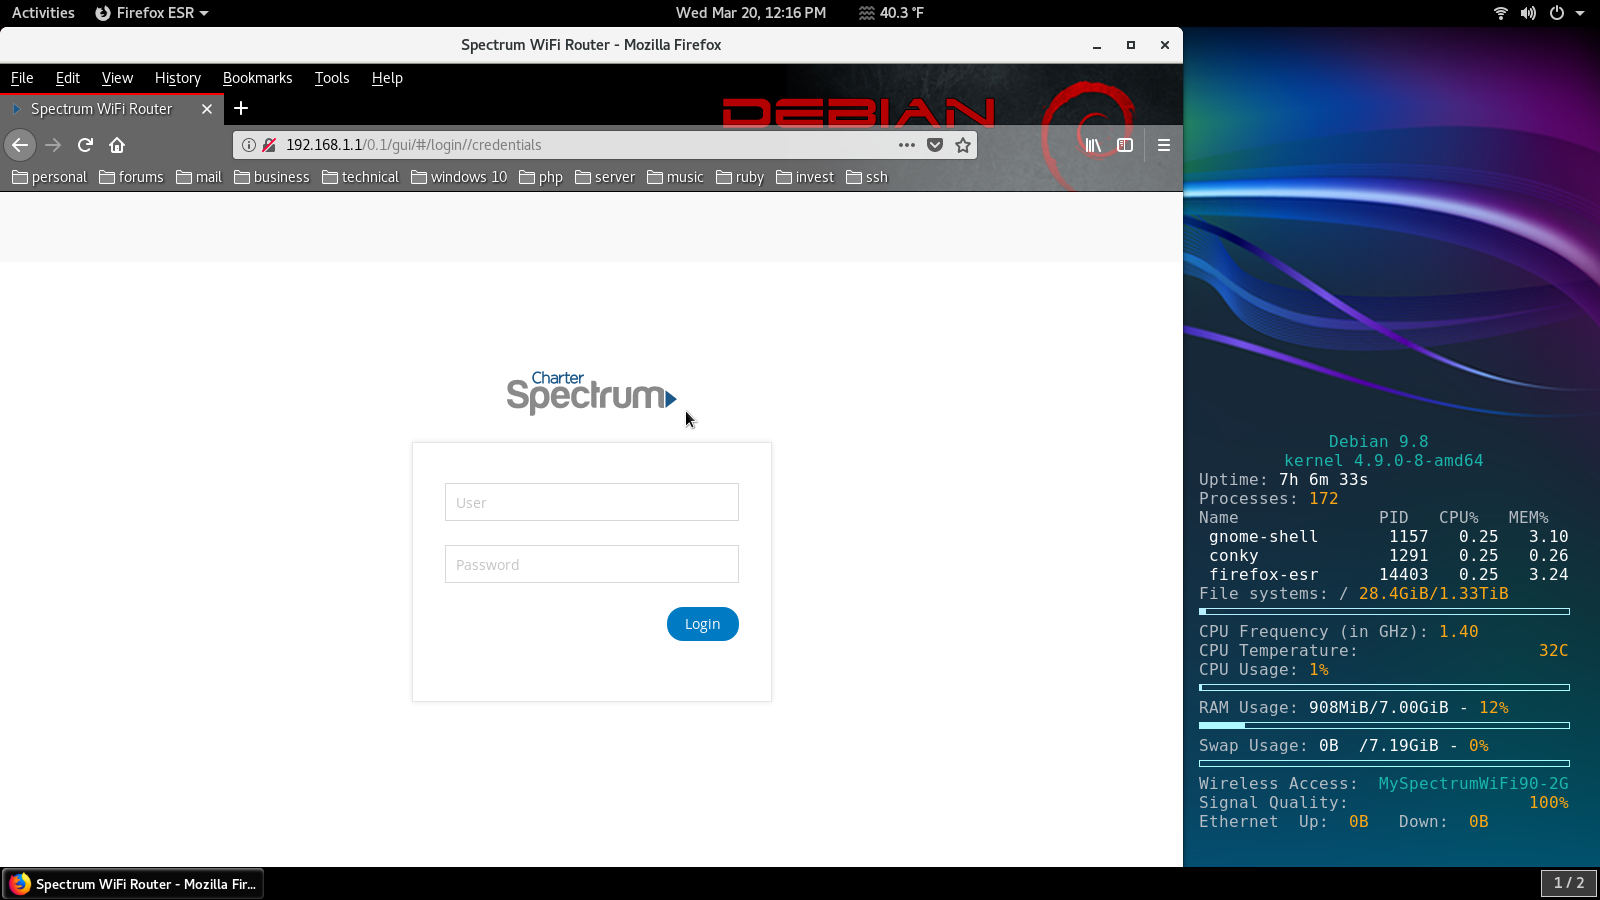
Now you need to forward port 54321 (whatever port number you chose) to your server from your router. My ISP is Spectrum so I’m going to illustrate how on their router, but the process will be similar on most routers. On a US broadband network with NAT these days the router’s IPv4 address is usually 192.168.1.1 or 192.168.0.1. In any case a tag on the back of the router will have that gateway address and usually its user name and password. On your server type the gateway address from the back of the router into the address bar of Firefox and hit Enter. When the login interface comes up enter the user name and password from the back of the router, and click on login. See image below:
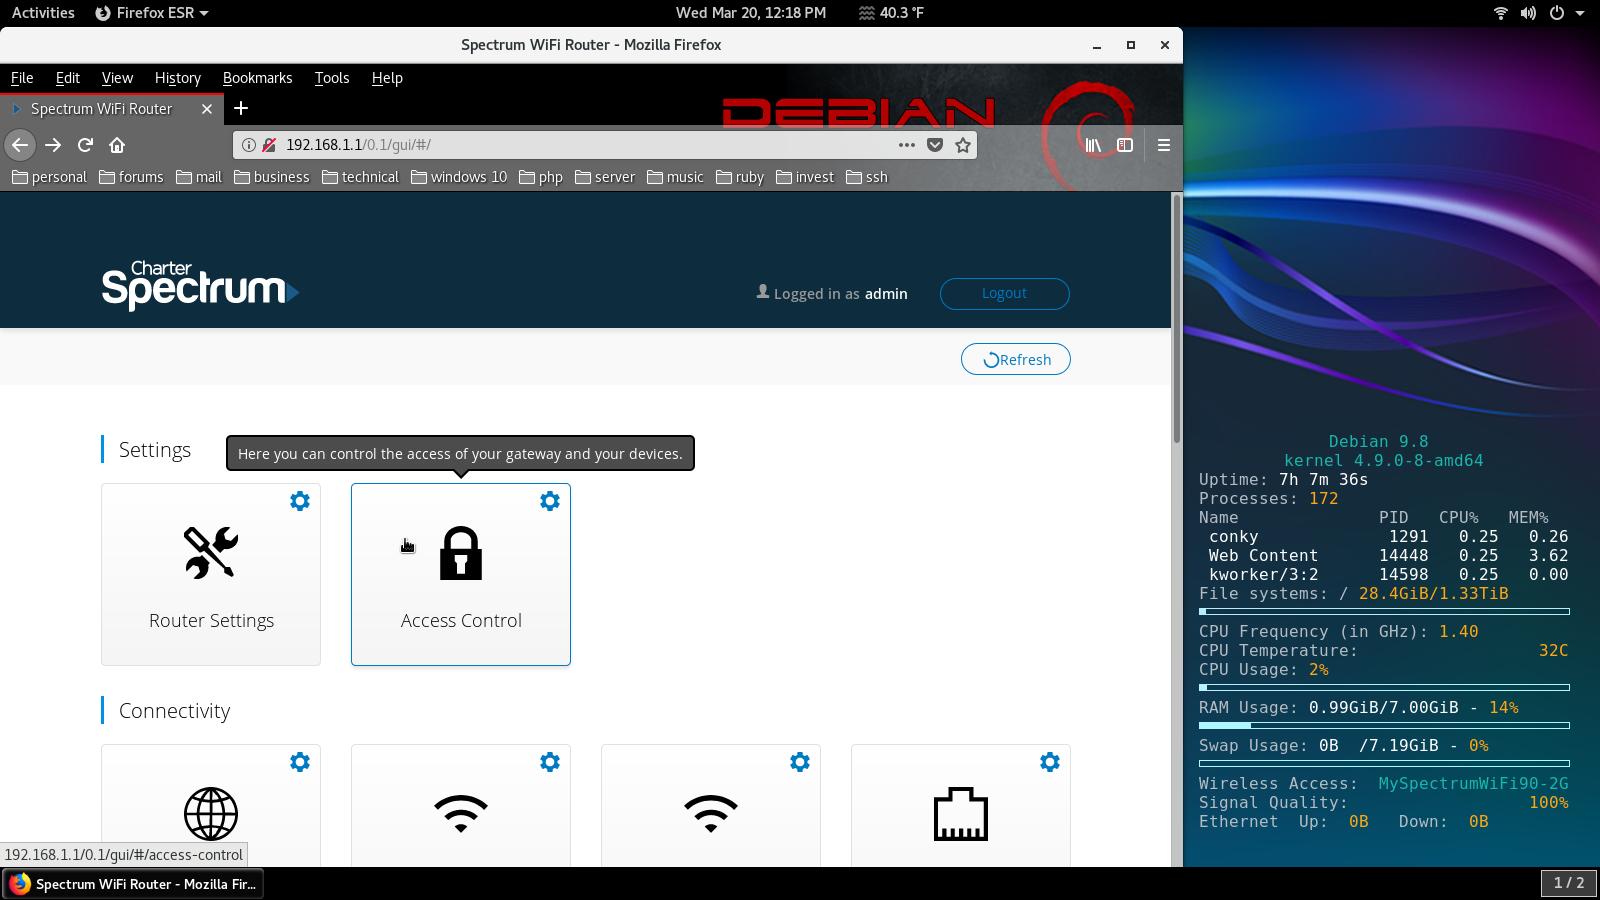
Click on Access Control. See image below:
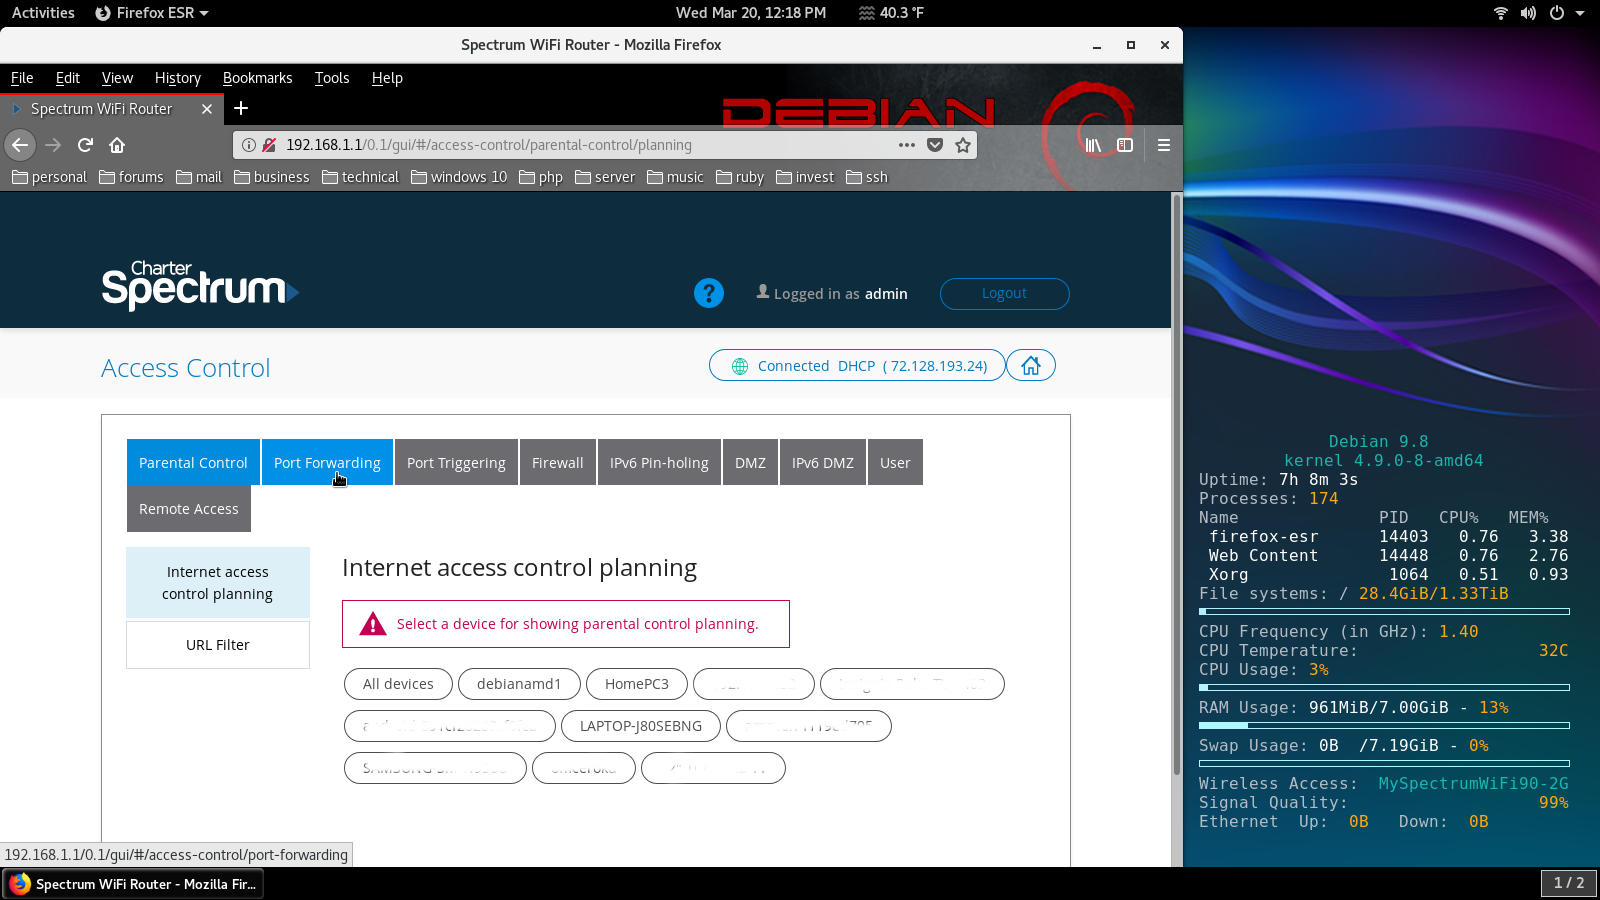
Jot down the DHCP connection information at the top of the page because that is your public IPv4 address. Click on Port Forwarding. See image below:
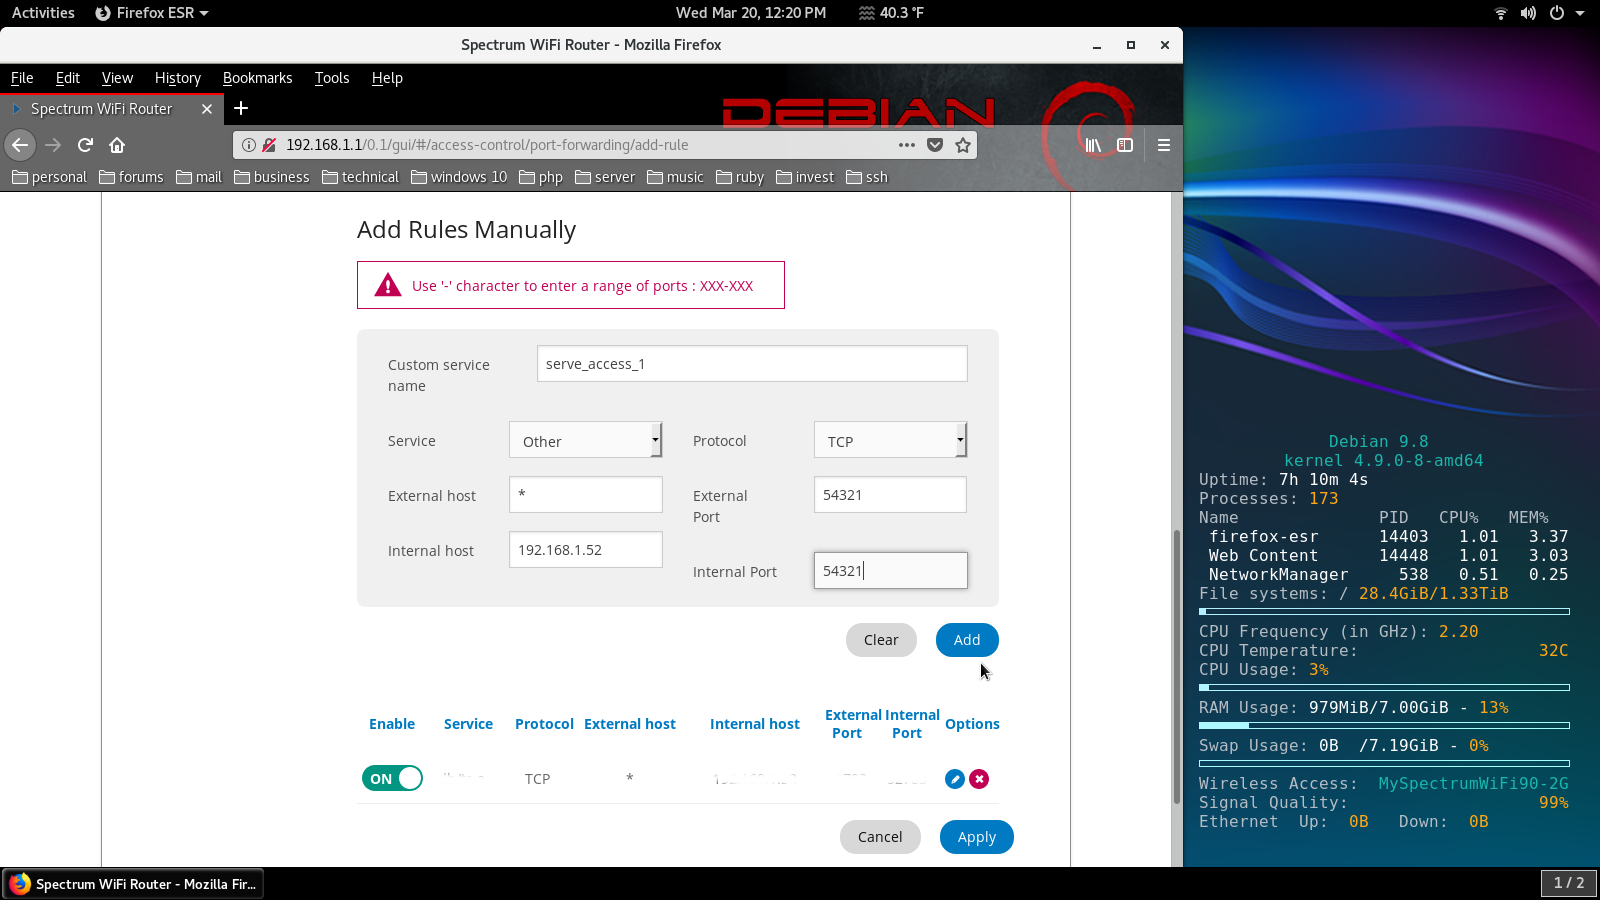
When the page opens scroll down to the Add Rules Manually interface. Fill in the blanks like the example below i/e: give it a custom service name, leave the Service menu set to Other (selecting SSH will automatically designate port 22), Protocol should be TCP, External host should be wild card sign *, External Port should be example 54321 (the port you chose earlier), Internal host should be 192.168.1.52 i/e (the NAT generated IPv4 address of your server) and the Internal port should be the example 54321 (the port you chose earlier). Click Add and your port will be forwarded to your server for incoming and outgoing connections. Make sure the Enable button slider is on. See image below:
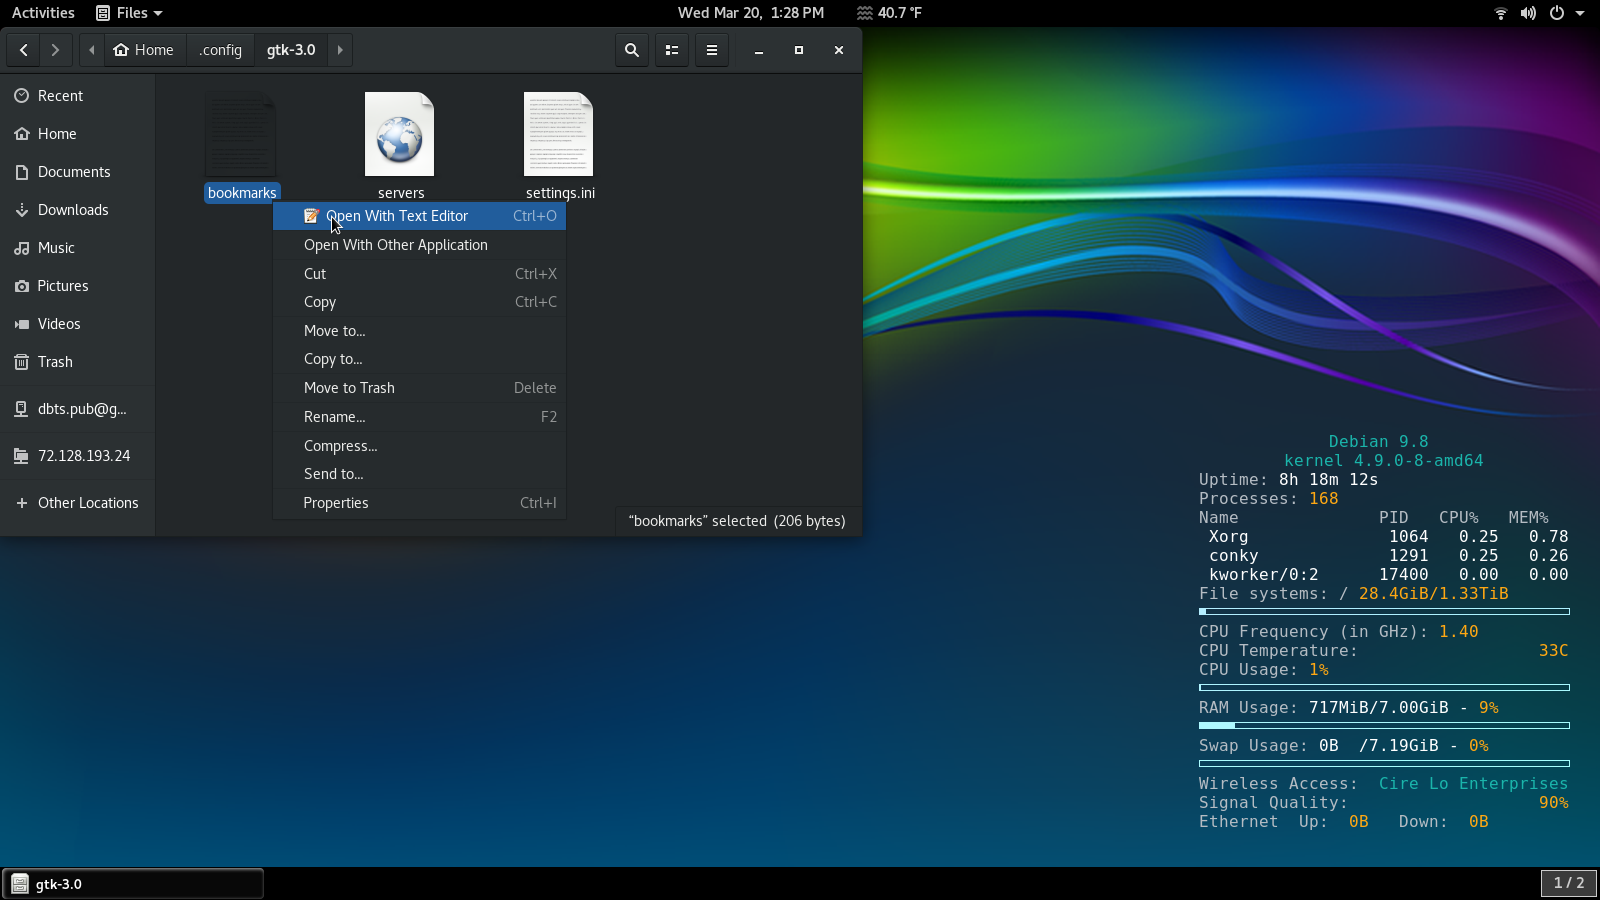
For the last little bit you need to bookmark the connection in nautilus (file manager) on your Debian 9 client machine for future convenience. You won’t be able to do this by right clicking on the SFTP connection after you type it in to connect because the file path passes through root on the web server and though the connection can be bookmarked because its pages are public, the next time you use it it will revert to home/username/ because you are connecting to your server with a user name (not root) via SFTP. To make the file path persistent open up nautilus (file manager) and go to ~/.config/gtk-3.0/bookmarks and right click on it and select open with text editor. See image below:
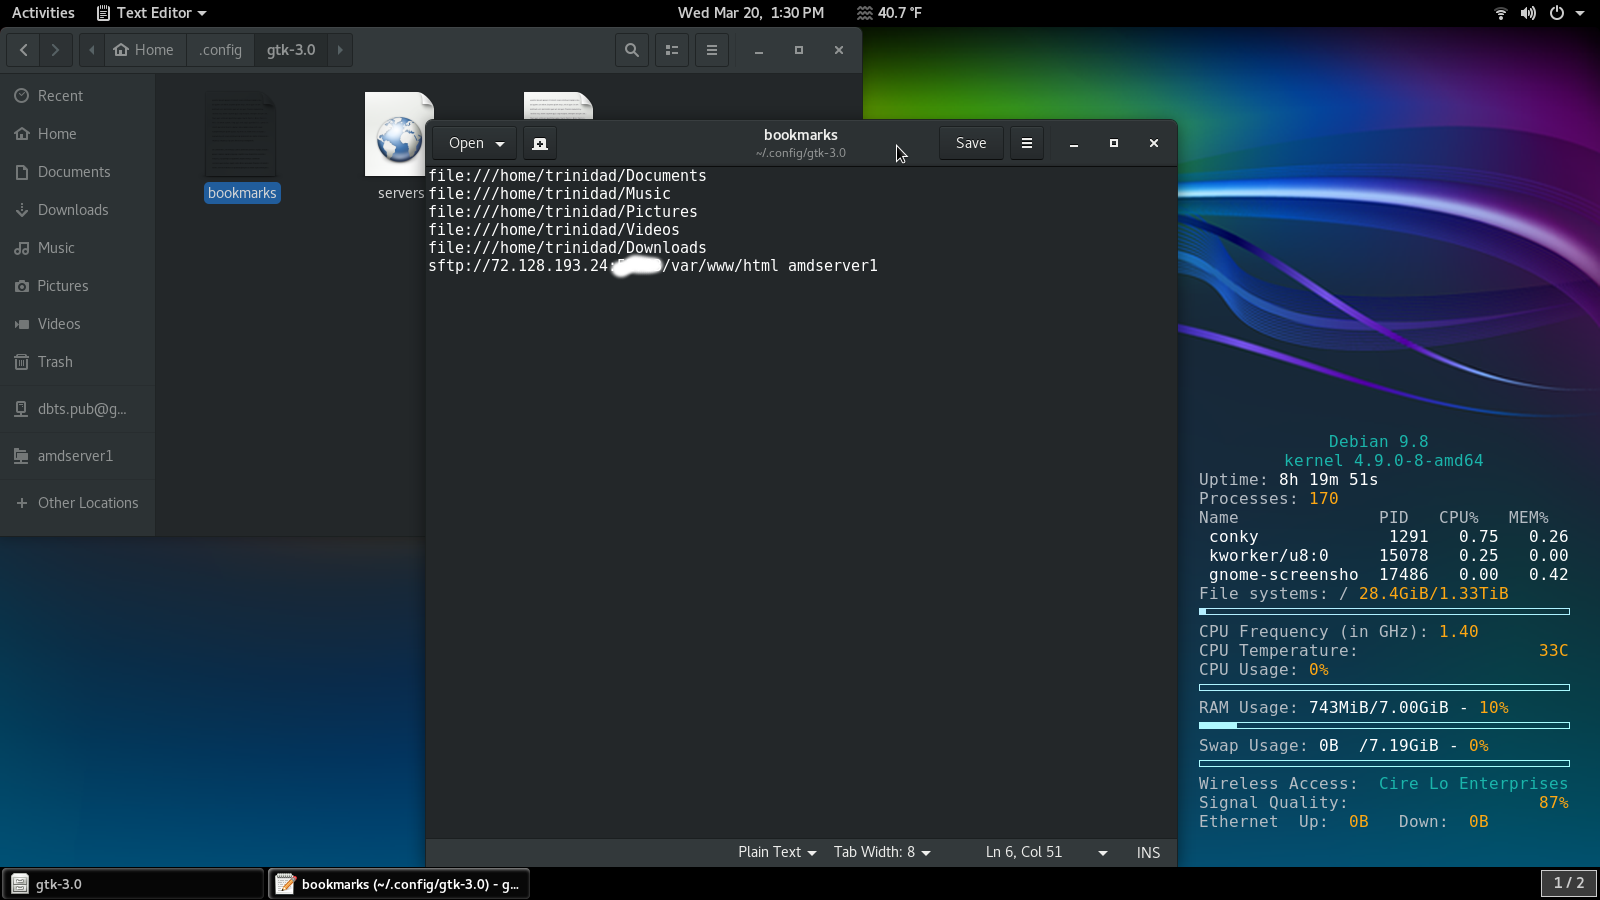
Use the syntax as shown below: sftp://yourpublicip:yourportnumber/var/www/html leave a space and then give the connection a short name. See image below:
To use your new connection to view your web server’s pages over the Internet your client machine will have to be on a different network than your server. Walk down the block with your laptop to a coffee shop or library and connect to one of their networks. If all has gone well the results should be like the images below:
In the next tutorial I’ll discuss connecting to gnome-boxes running a virtual OS on your server via SSH.
*This tutorial prepared entirely in Debian 9 with LibreOffice Writer Web, Gthumb, Gimp, and screenshot tools.*