
Simple Power Networking With Linux Lite Diamond 4.x Series
Comments:
Like no other Linux distribution the Linux Lite Diamond 4.x series succeeds at providing a user friendly transition for users coming from a Windows desktop environment. Most Windows users never use the CLI (command line interface) on their systems, so it is important for tutorials concerned with Linux Lite that the GUI (graphical user interface) is the main teaching tool in any demonstration about configuring its wonderful software. Some CLI work is unavoidable because after all it is Linux, but such usage can be kept to a minimum if the GUI tools are properly used. Here I am going to discuss configuring some of the best power networking tools in the Linux world: SSH, SFTP, SCP, x11vnc (VNC connections), Remmina, GUFW (graphical firewall), and Network Manager, and illustrate as best I can with enough images of their specific GUIs in action that most new Linux Lite users should be able to understand. I realize that many new users can muddle their way through by researching this subject on the Internet, but my intent here is to provide new Linux Lite users a simple comprehensible help resource on this subject. Because this tutorial contains so many images I have broken it up into six sections. See the links below for convenient navigation. I am using a Debian 9 computer here as the second machine, but a Linux Lite machine can certainly be both the first and the second machine, and many other Linux OSs can be connected in the same ways.
This particular tutorial applies to Linux Lite 4.x series and Debian 9 connections. If you are using Linux Lite 3.x series or Debian 8 click the link below to view an older group of tutorials on the same subjects. There are no images but they are fairly thorough discussions.
SSH SFTP VNC Remmina Linux Lite 3.x & Debian 8
Section 1 This section contains the page you are on right now with Section 1a) that describes and illustrates how to setup a direct ethernet shared to other computers connection between a Linux Lite 4.xx series computer and a Debian 9 computer using network manager’s graphical user interface. In Section 1b) that follows it also describes and illustrates how to set up an ad hoc Wifi connection to connect the two computers together.
Section 2 This section in Section 2a) describes and illustrates installing SSH components and the Remmina client to Linux Lite 4.xx and Debian 9. Section 2b) describes and illustrates configuring the firewalls (GUFW) on Linux Lite 4.xx and Debian 9 in preparation for an SSH connections.
Section 3 This section describes and illustrates installing to and configuring x11vnc on a Debian 9 computer in preparation for a VNC connection via an SSH tunnel from a Linux Lite 4.xx computer.
Section 4This section in Section 4a) describes and illustrates setting up an SSH secure shell connection from Remmina in Linux Lite 4.xx to a Debian 9 computer. Section 4b) describes and illustrates generating and configuring SSH keys for the connection and configuring Remmina to connect with keys.
Section 5 This section in Section 5a) describes and illustrates configuring and using SSH & SFTP from a Remmina connection using SSH keys. Section 5b) describes and illustrates configuring and using the Remmina client connected with SSH keys with a VNC connection through an SSH tunnel.
Section 6 Section 6a) of this section describes and illustrates configuring gnome key ring to autostart. Section 6b) describes and illustrates connecting via Wifi on the normal router IPv4 assigned address scale and describes and illustrates securing connections via local router, via ad hoc Wifi, and via direct ethernet connection on an SSH server with the AddUser(s) restrictions. Section 6c) briefly describes and illustrates syntax and usage for SCP Unix utility.
1a) Connect With A Direct Ethernet Connection
For the purposes of this demonstration I’m going to connect a Debian 9 computer to a Linux Lite 4.x series computer. I’ll start with the Debian 9 end of the shared to other computers connection as it is slightly different than the Linux Lite 4.x end, though both systems use a version of the gnome network manager. Go ahead and plug the two computers together with an ethernet cable. Open a terminal in Debian and type: nm-connection-editor, if you intend to use Remmina from Debian to connect SSH and VNC. What follows below is how to set up a shared to other computers ethernet direct connection in Debian 9. See image below:
The connection should be there as wired 1. Click the Edit button. See image below:
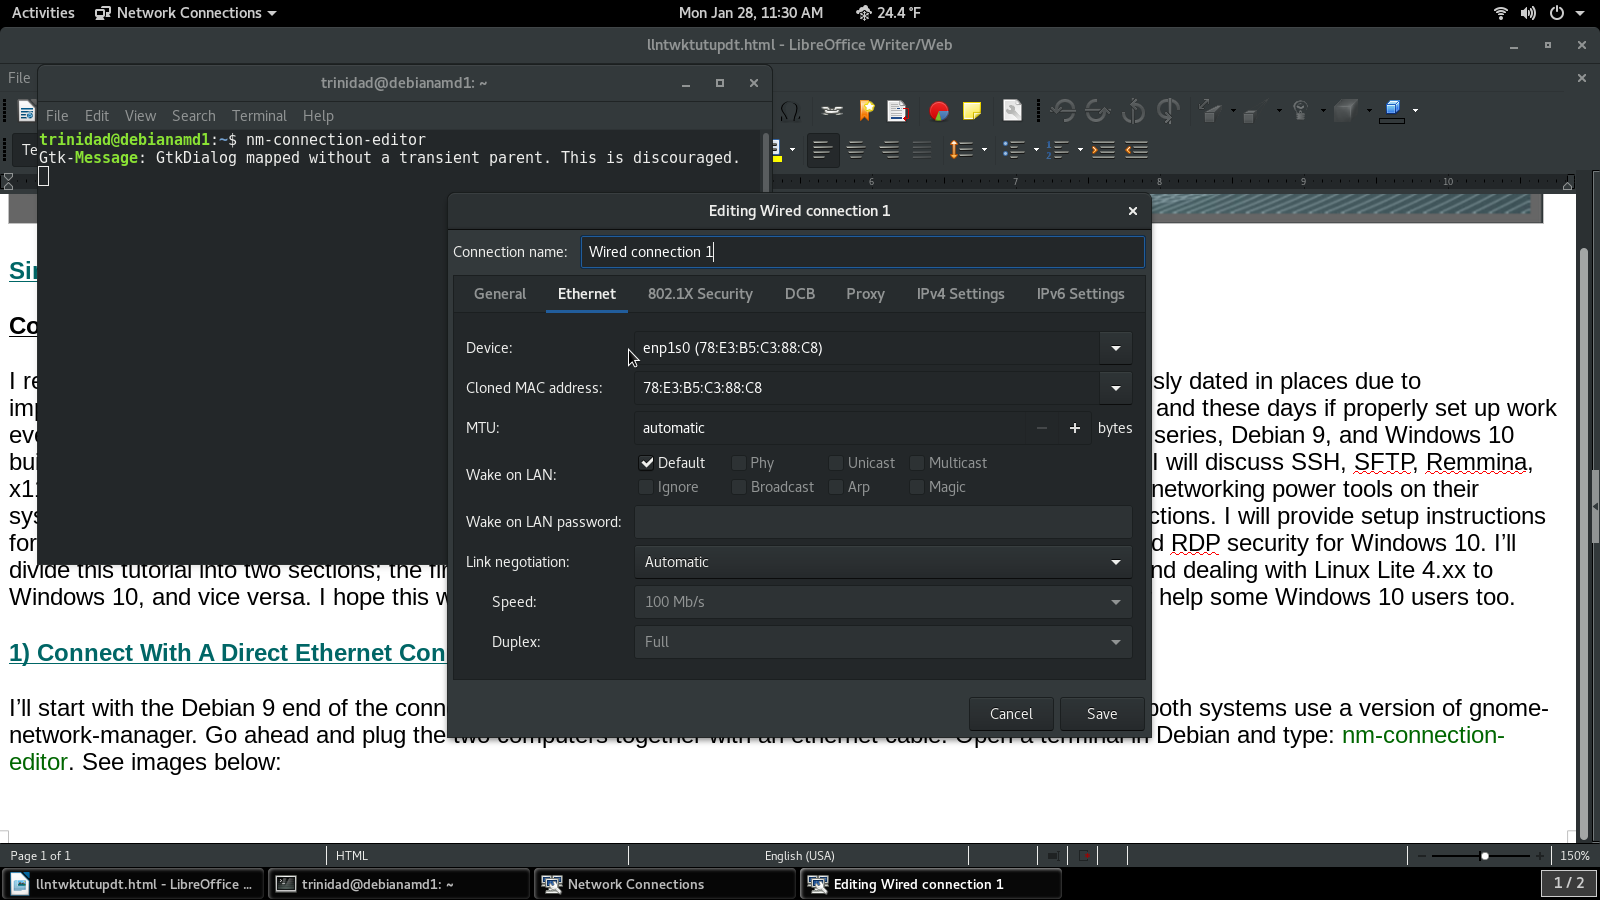
Take note of the interface id: enp1s0 in this case. Next click the General tab in the upper menu. See image below:
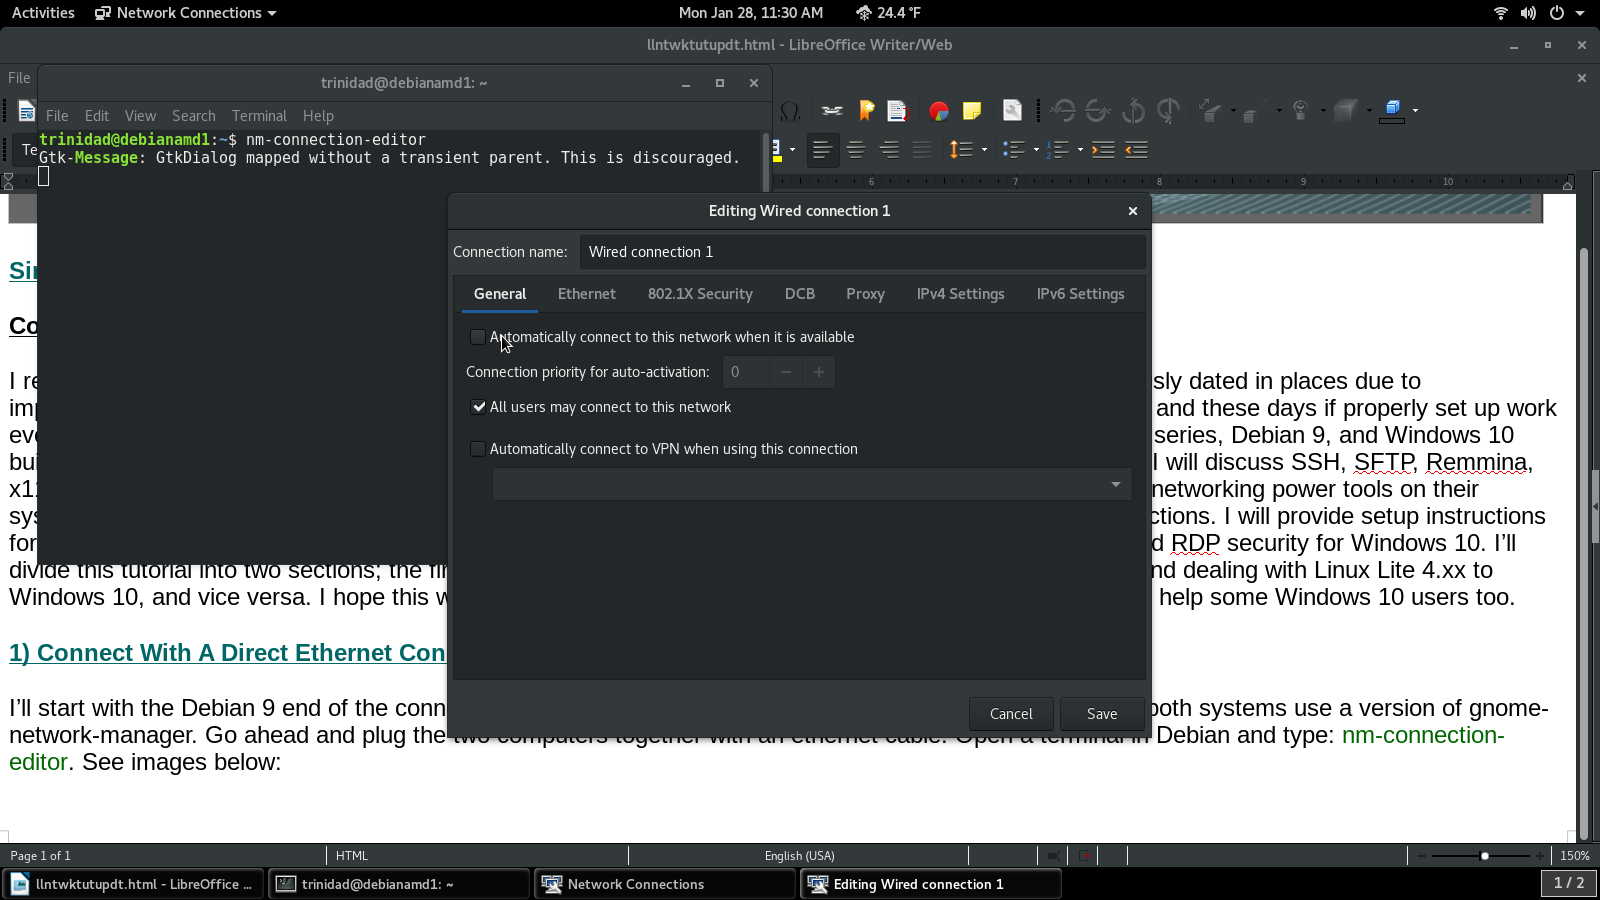
Uncheck the Automatically connect box and check the All users may connect box. Next click the IPv4 Settings tab in the upper menu. See image below:
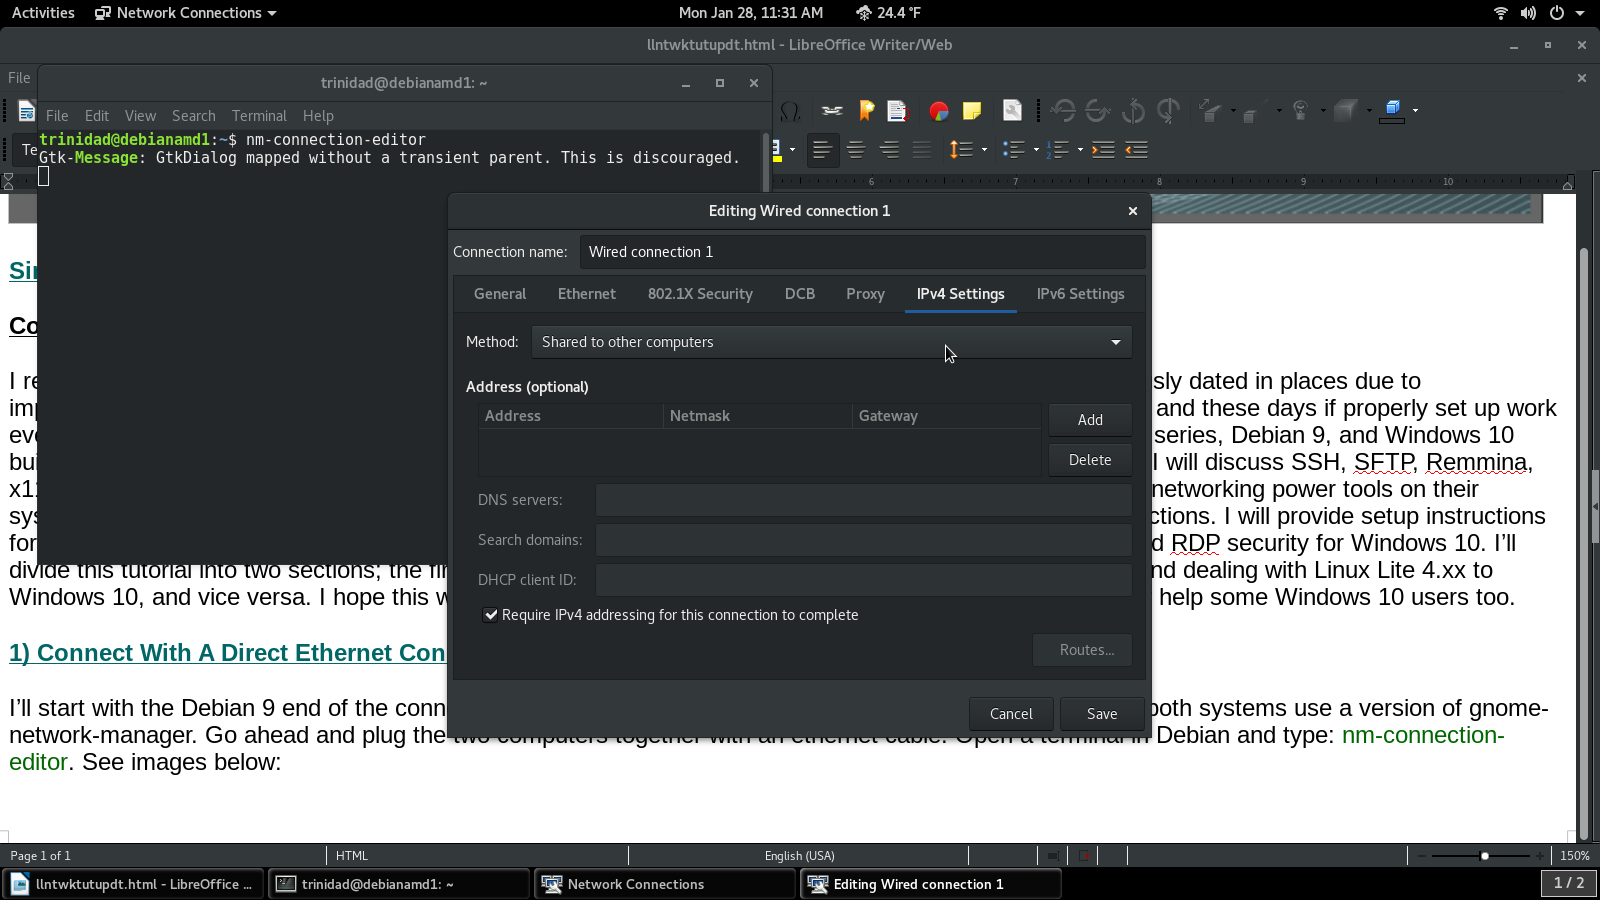
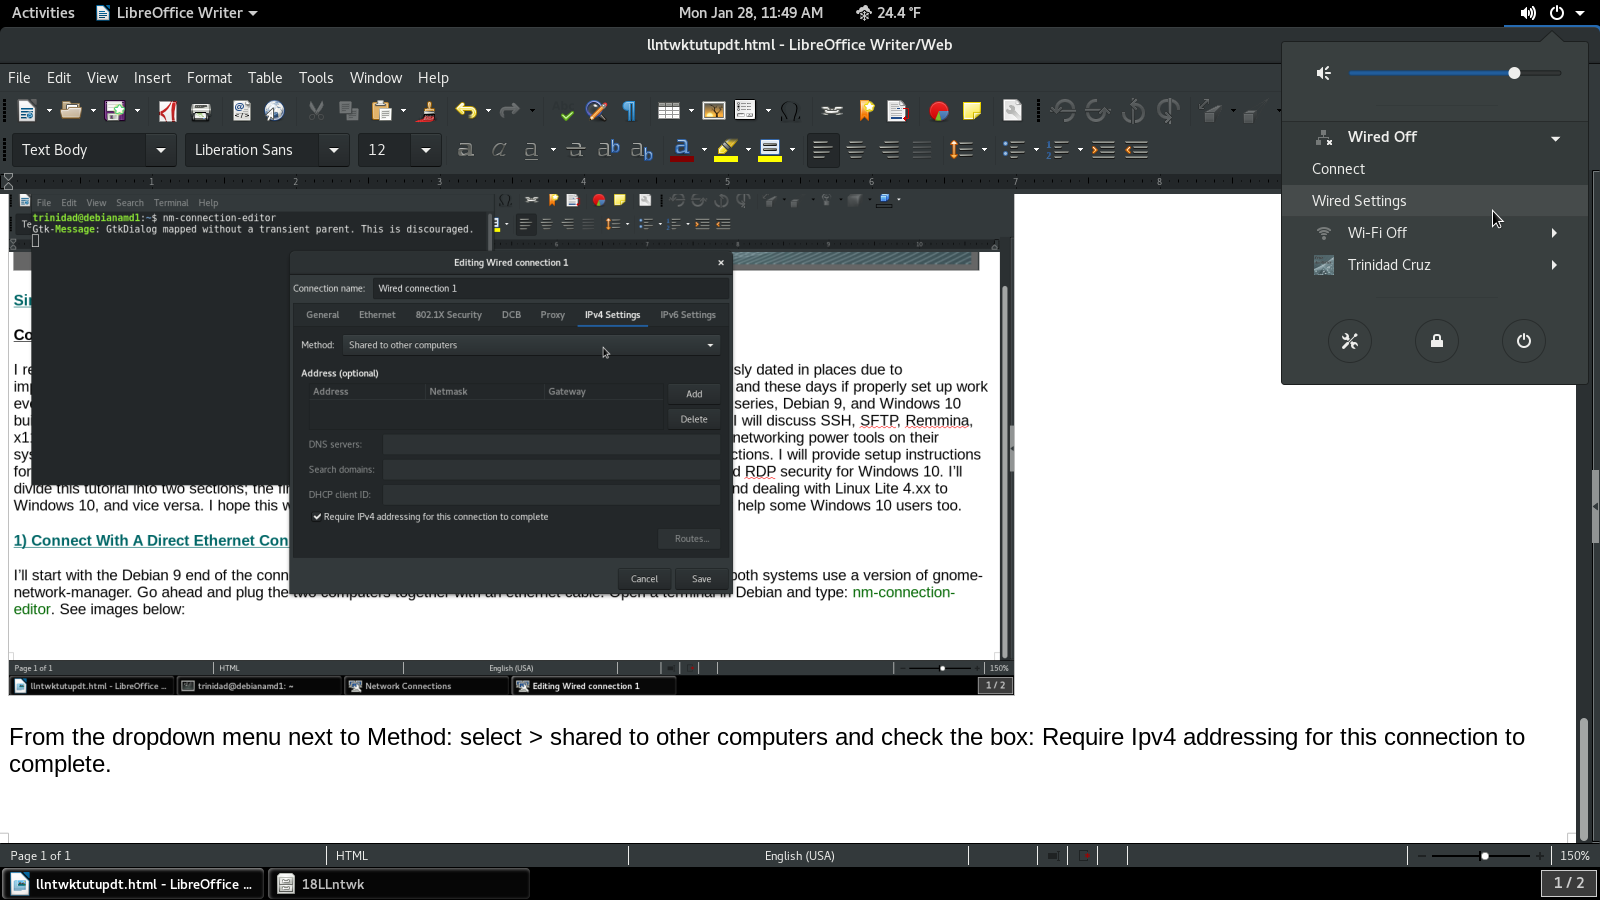
From the dropdown menu next to Method: select > shared to other computers and optionally check or uncheck the box: Require IPv4 addressing for this connection to complete. Save the connection. Next open network manager from the upper right panel icon and select: Connect. Then open it again and select: Wired Settings. See images below.

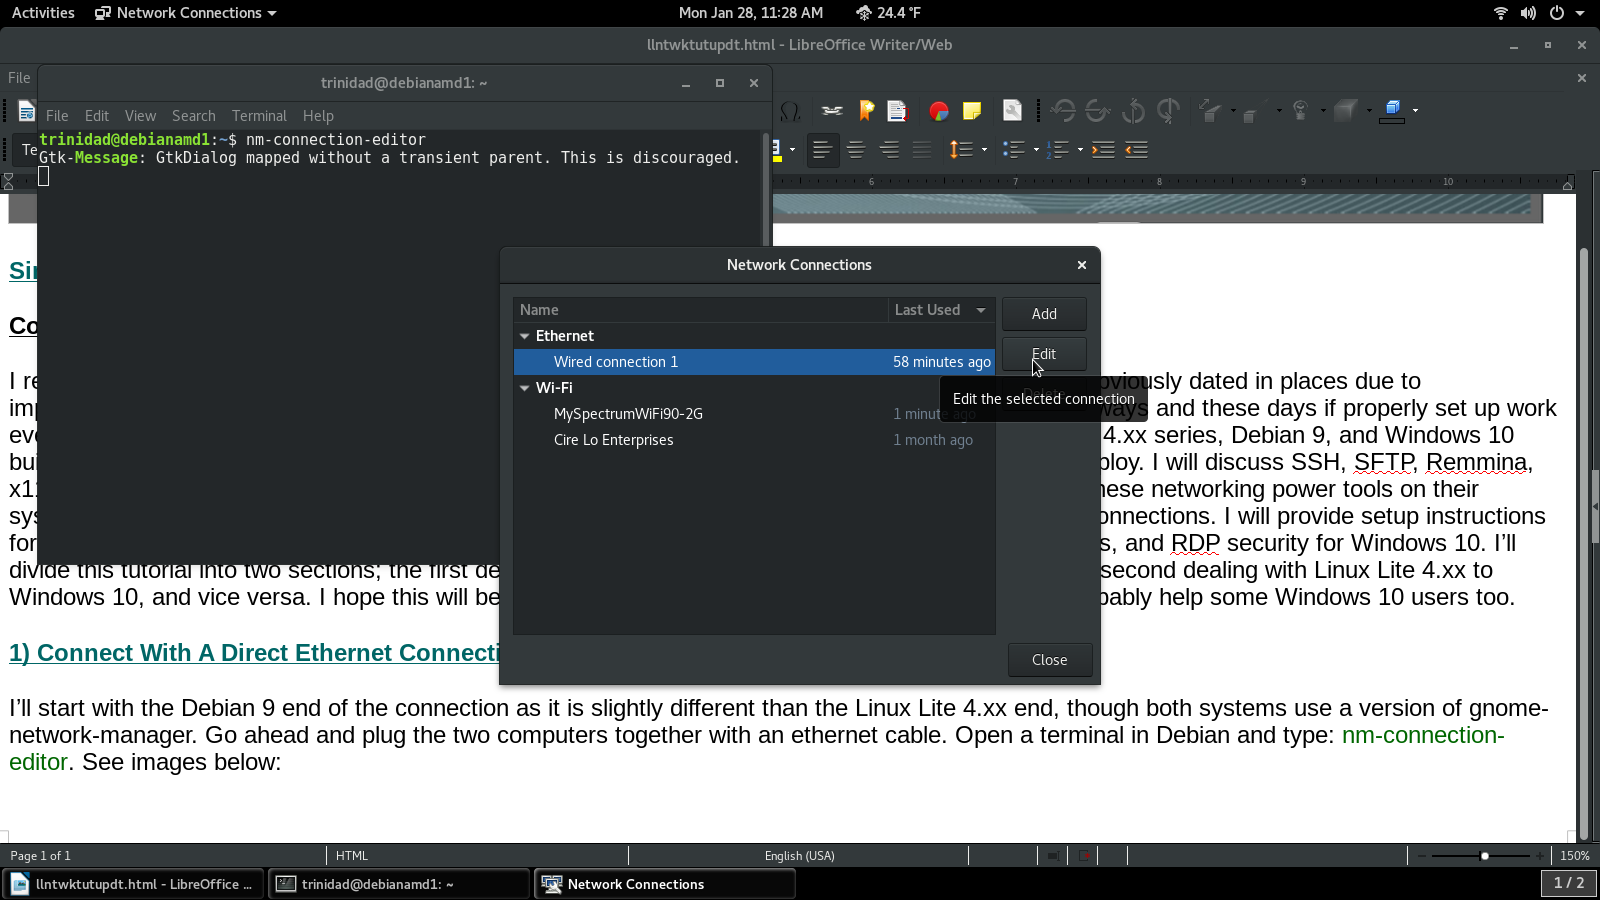
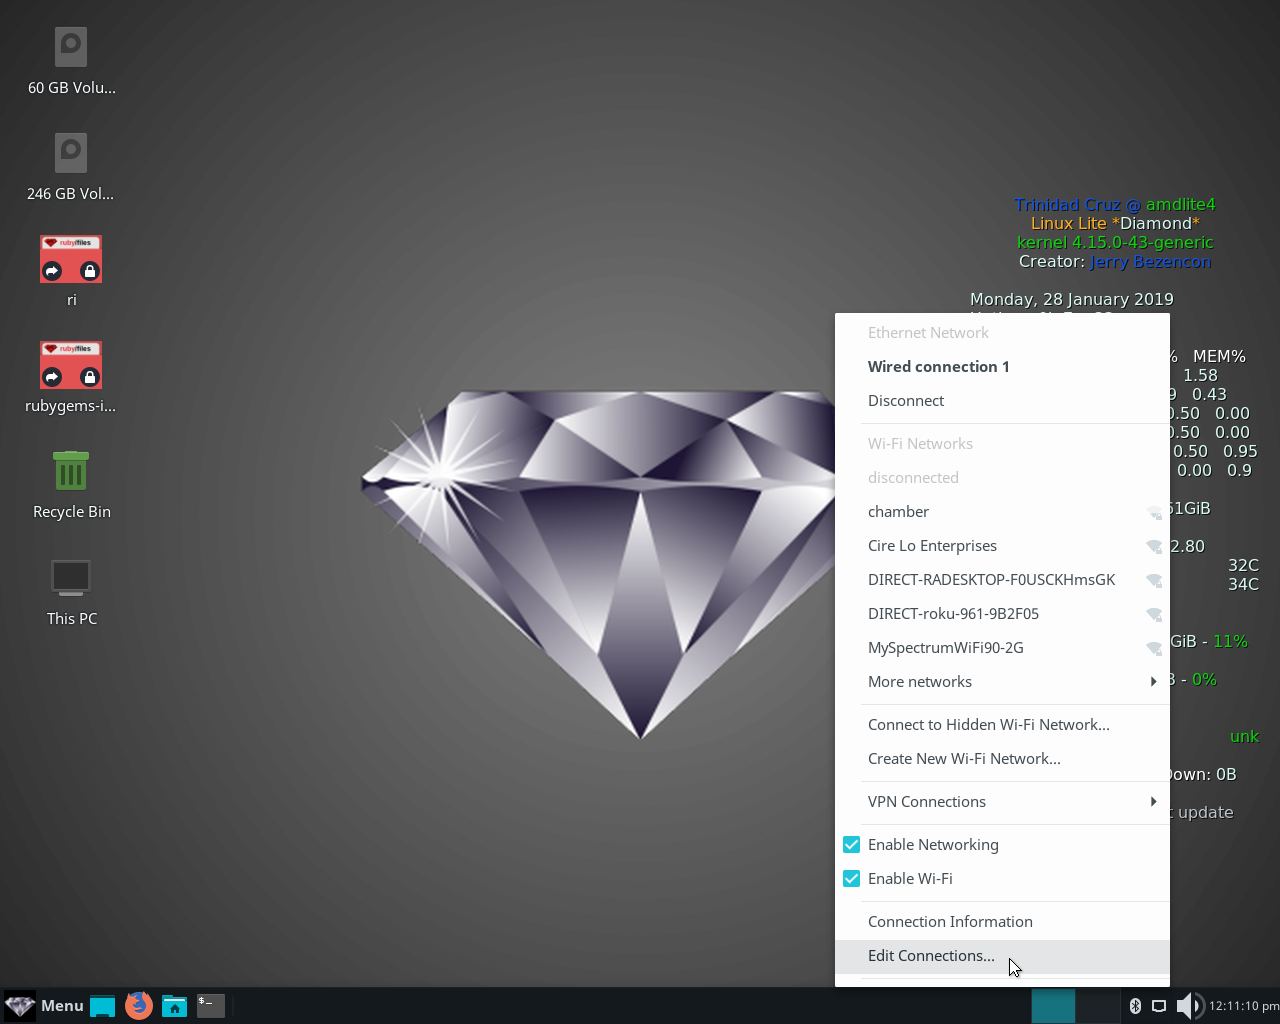
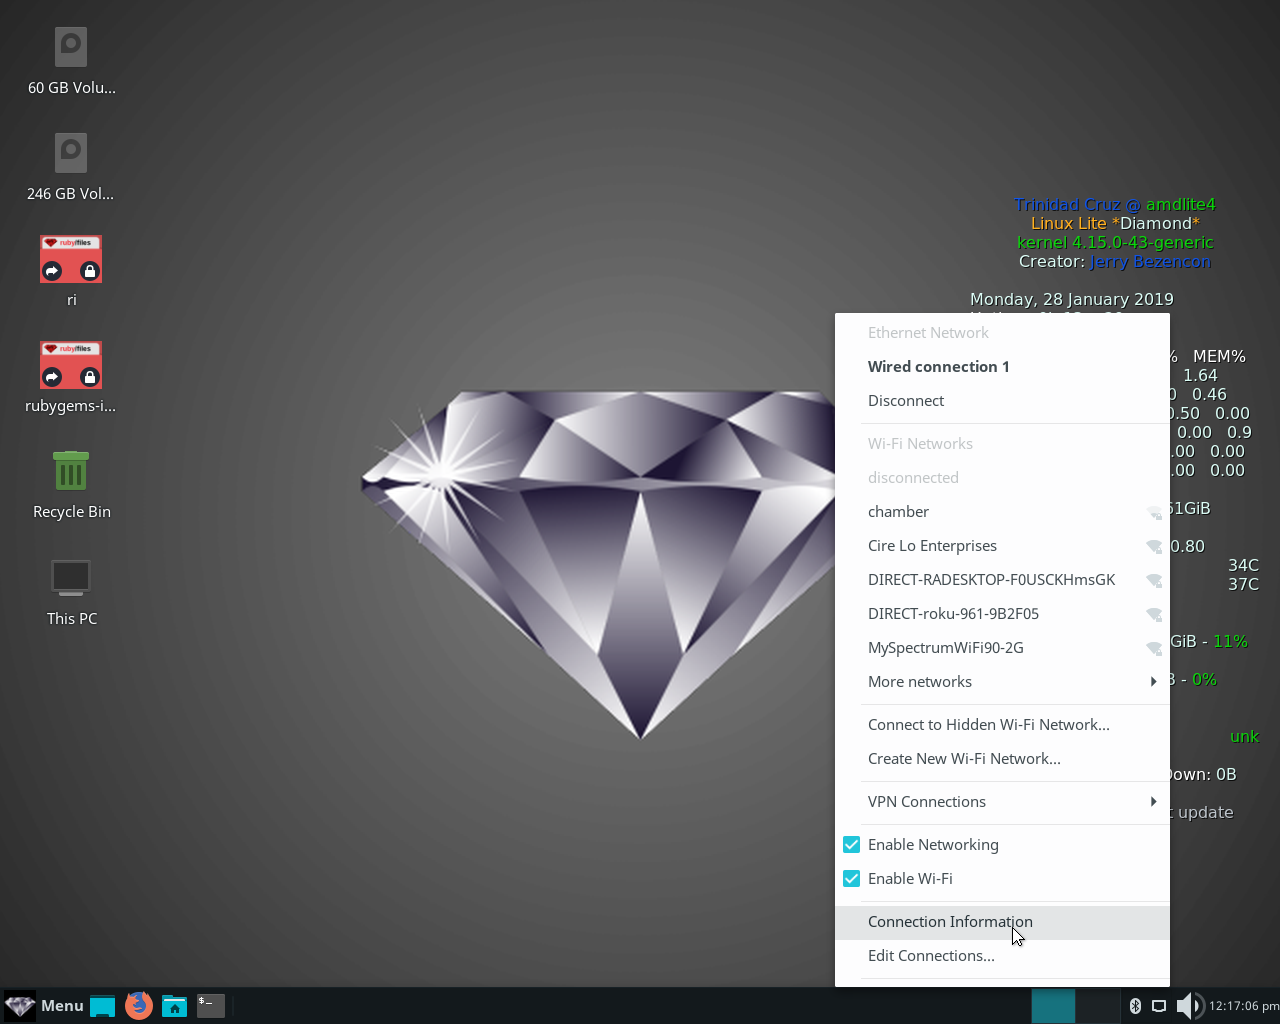
Take note of the IPv4 address: 10.42.0.1 in this case. Okay that’s it for a Debian shared to other computers connection. Take a look at a Linux Lite machine now. Click the network icon in the lower right corner of the panel and select: Edit Connections. See image below:
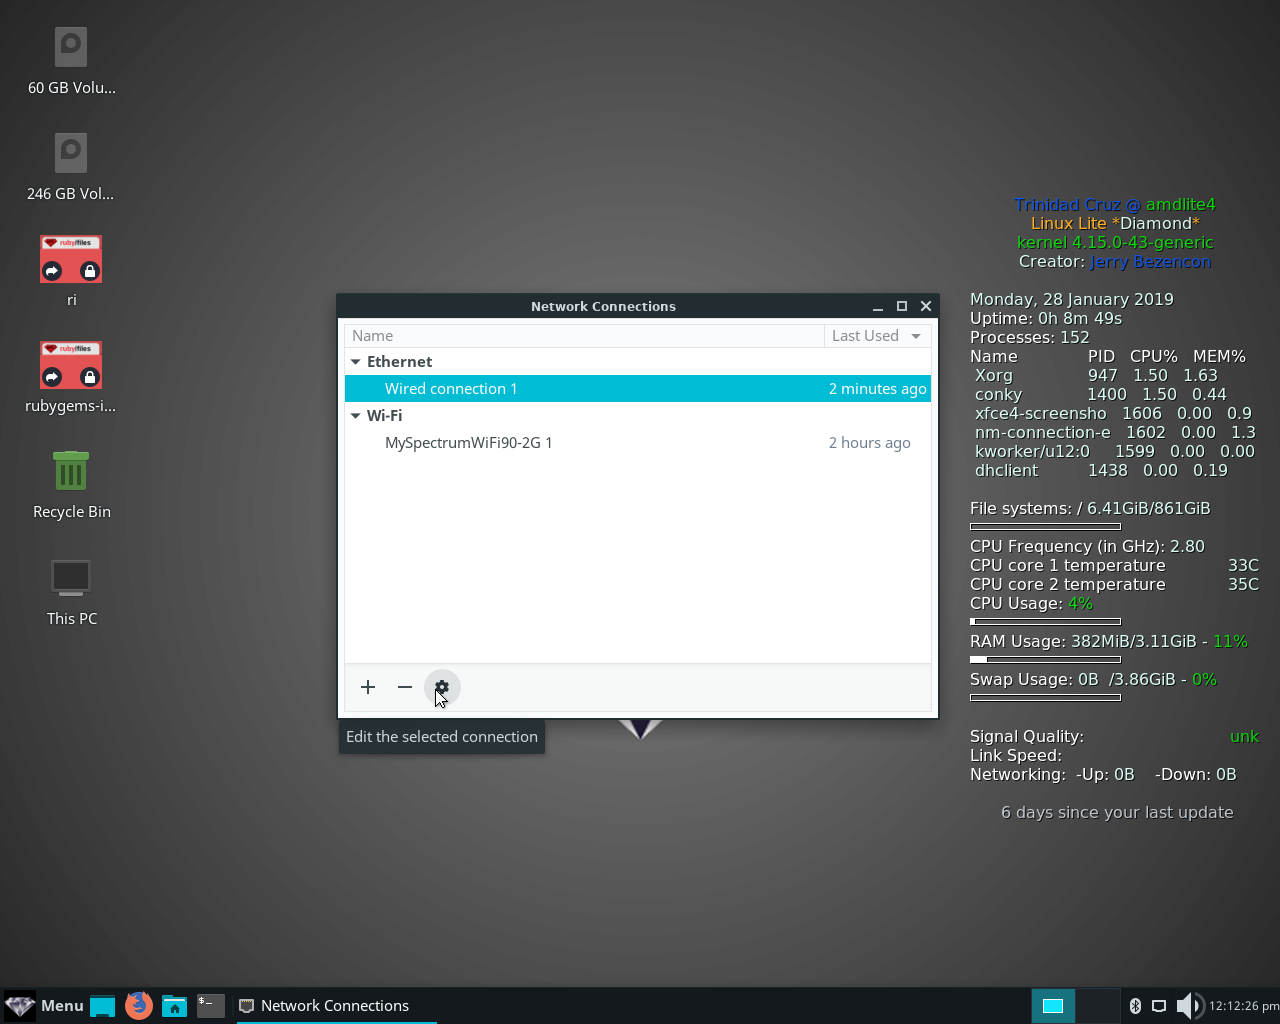
When the Connection Manager opens hi-light the wired connection and select the little gear at the bottom left to edit the connection. See images below.
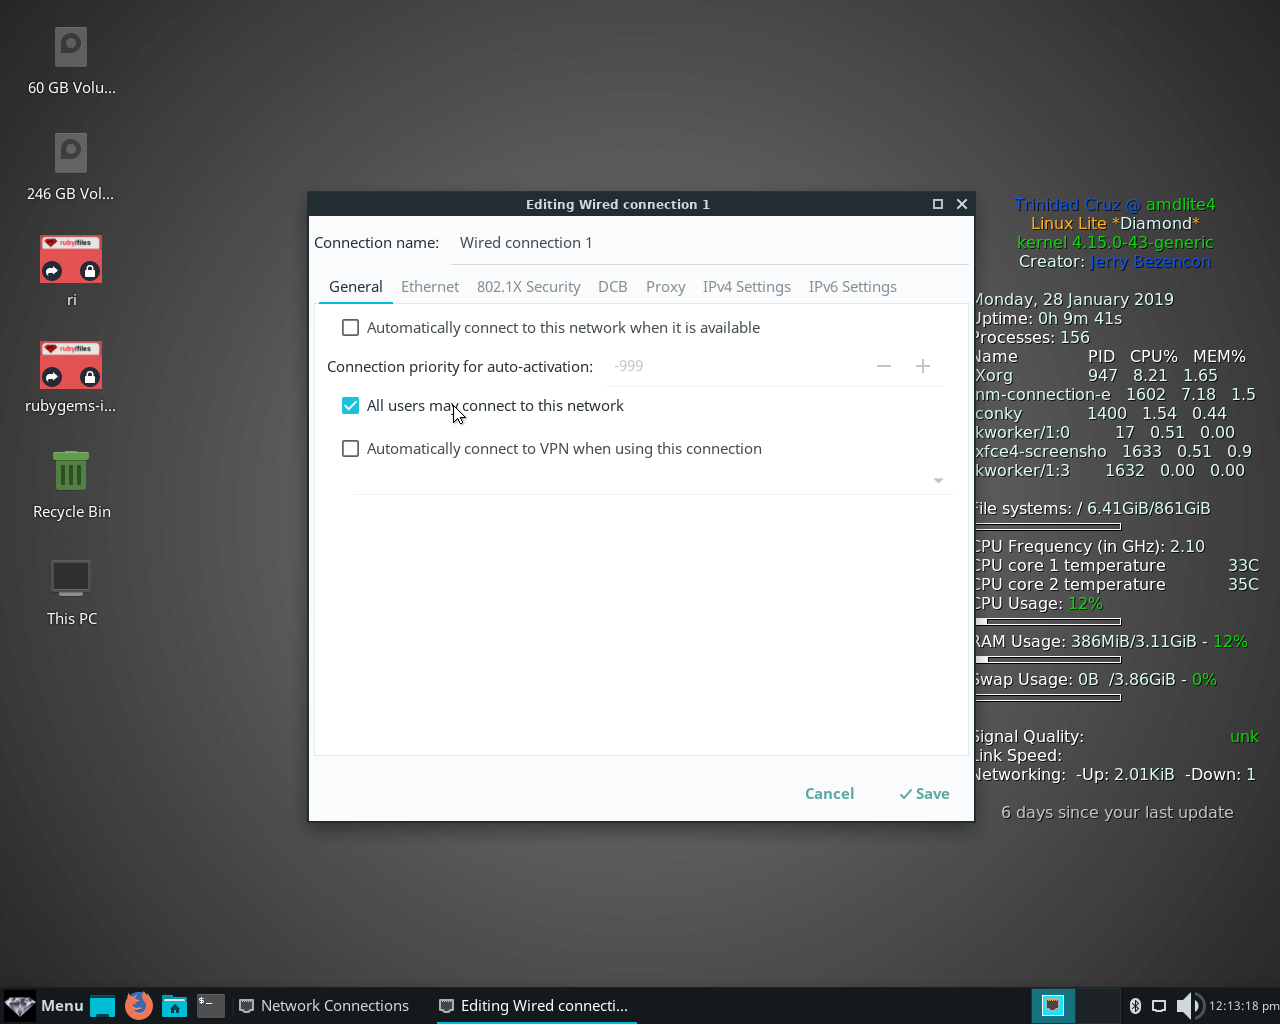
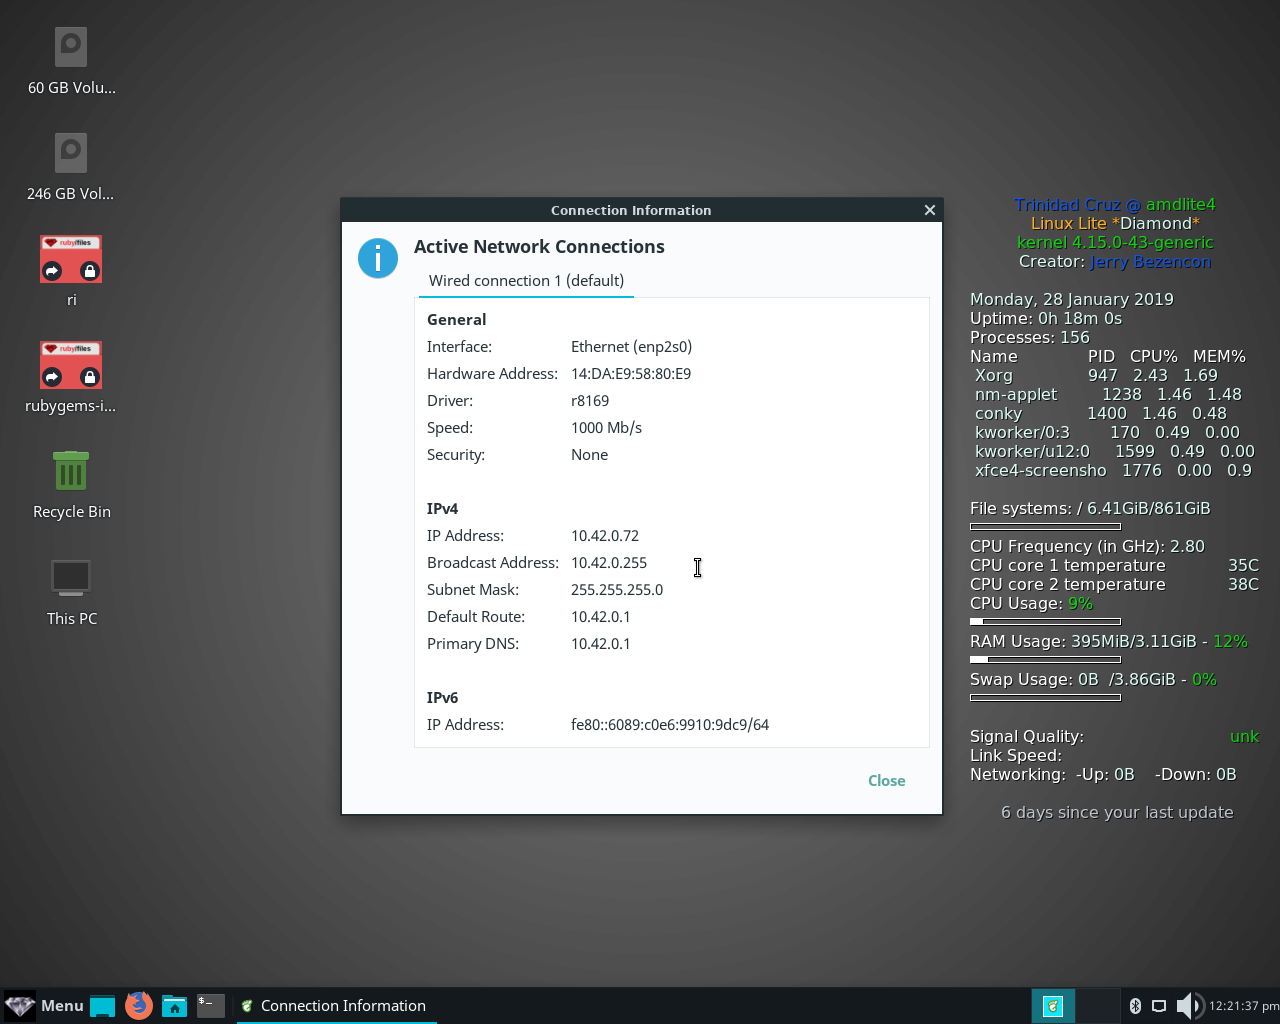
Uncheck the Automatically connect box, and check the All users may connect box. **Note** Because there is no router, if you intend to use Remmina and VNC to get a remote desktop of Debian on your Linux Lite OS desktop, select: Shared to other computers from IPv4 tab on the Linux Lite machine and not the Debian machine. When using the shared to other computers selection for a direct wired connection whichever computer sets up that shared connection via network manager will set the default IPv4 address scale automatically i/e as 10.42.0.1. Save the connection. Next click the networking icon in the right hand lower corner of the panel and select: Connection information. In the information window that appears take note of the ethernet interface id: enp2s0 in this case, and 10.42.0.72 or 10.42.0.1 if you set up as a shared connection, which we will use later configuring our firewalls. See images below:
That’s basically it for connecting your Linux Lite 4.xx box to your Debian 9 box via ethernet direct connection. Simply done with the GUIs and only one CLI command.
1b) Connect With An Ad Hoc Wifi Connection
Ad hoc Wifi can be convenient in the office or shop especially for occasional connections from computers not yet set up to connect via ethernet, or those it would be inconvenient to direct connect with an ethernet cable, such as desktop computers in different rooms. It offers the added security of a smaller signal radius (50 feet or less usually) than your ISP’s wifi router, which can reach a lot farther than you may think in some cases, my own reaches out about two blocks in my neighborhood. It also will always run at the highest mb/s rate your hardware allows, unlimited by ISP throttling, so it is quite fast in most cases. I’ll only illustrate how to create this kind of connection on Linux Lite since it is essentially the same on Debian the only difference being the need for nm-connection-manager.
**CAUTION** You can have both an ad hoc wifi connection, and a direct ethernet connection on the same computer, but you must create them both on the same machine that you created the shared to other computers ethernet direct connection setting on if you use the GUI network manager to do so. You cannot create one on one machine, and then another on another connected machine just using the GUI network manager. This will break the SSH server connection if it’s already installed by changing its public key; very inconvenient if you have already set it up. In other words the initial IPv4 connection addresses for both connections need to be the same, for example the lower scale address of the connection in this case 10.42.0.1. You must create the ad hoc wifi connection on whichever machine already has the lower scale example 10.42.0.1 address.
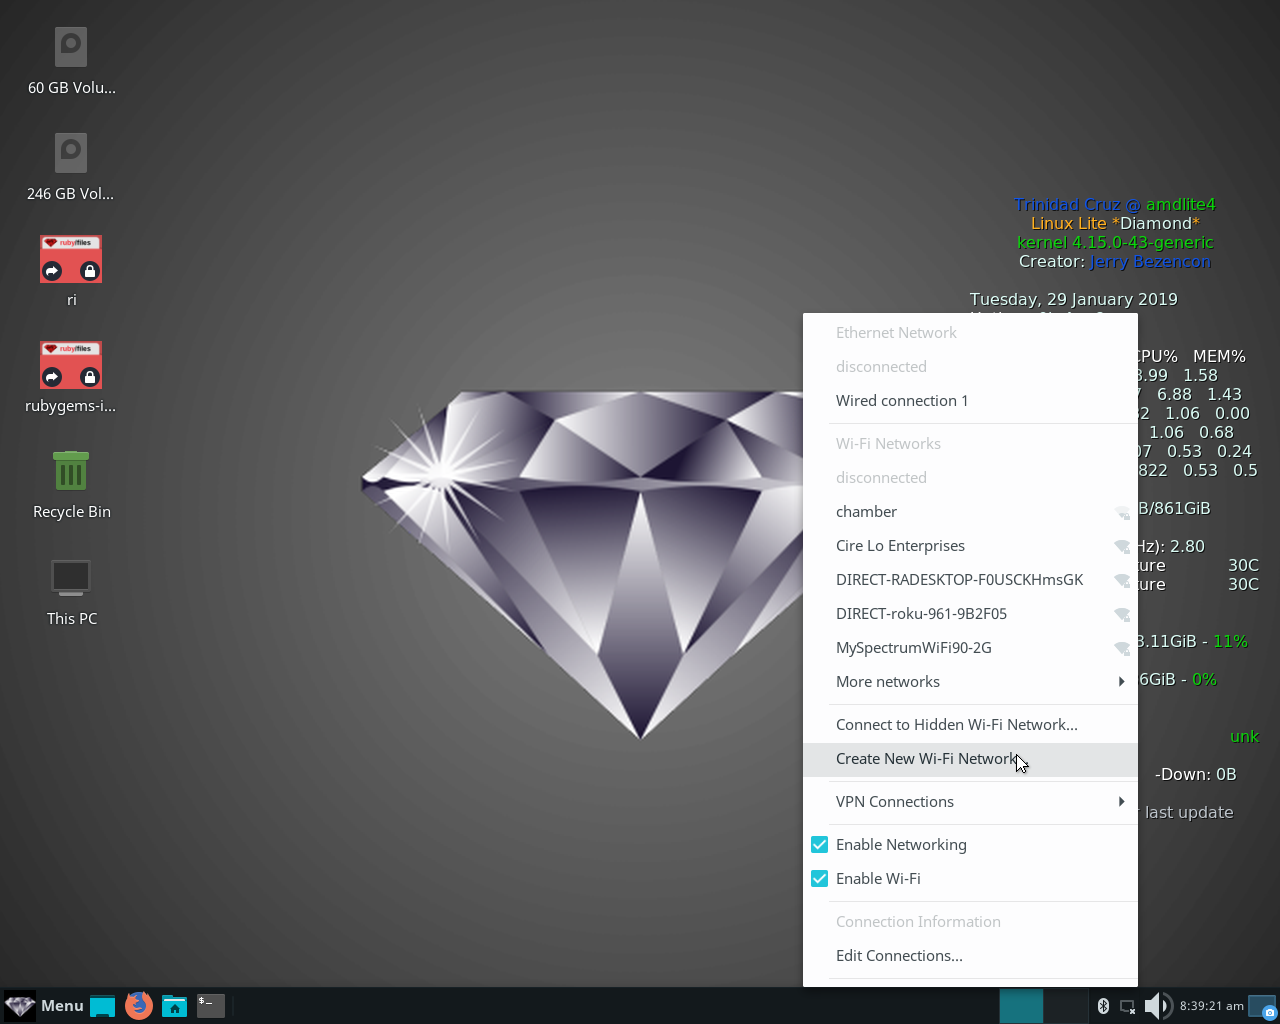
To get started click on the network panel icon in the lower right corner of your Linux Lite desktop, and select: Create New Wifi Network, from the menu. See image below:
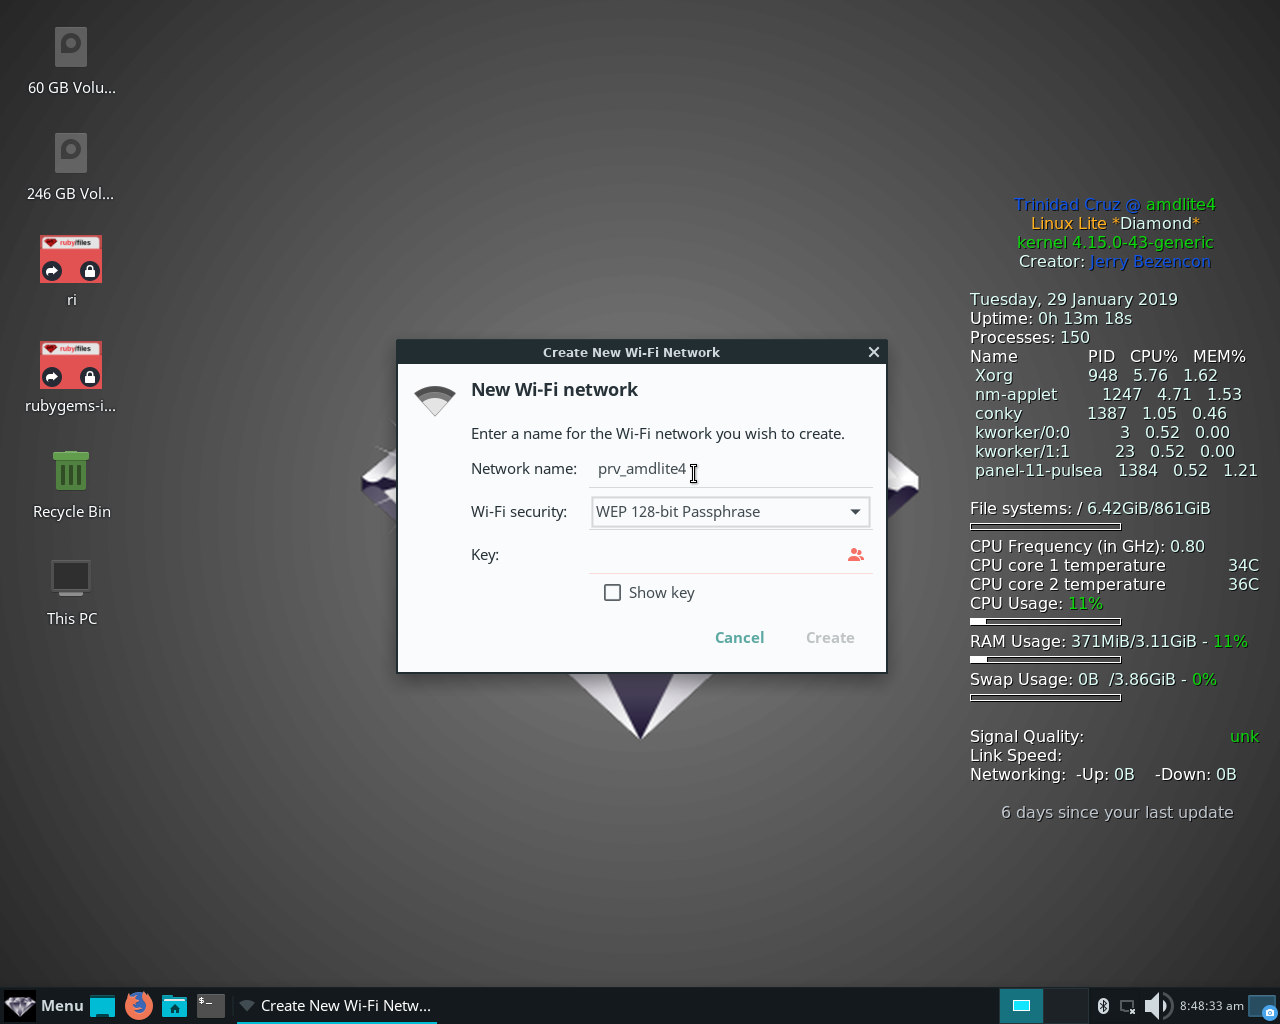
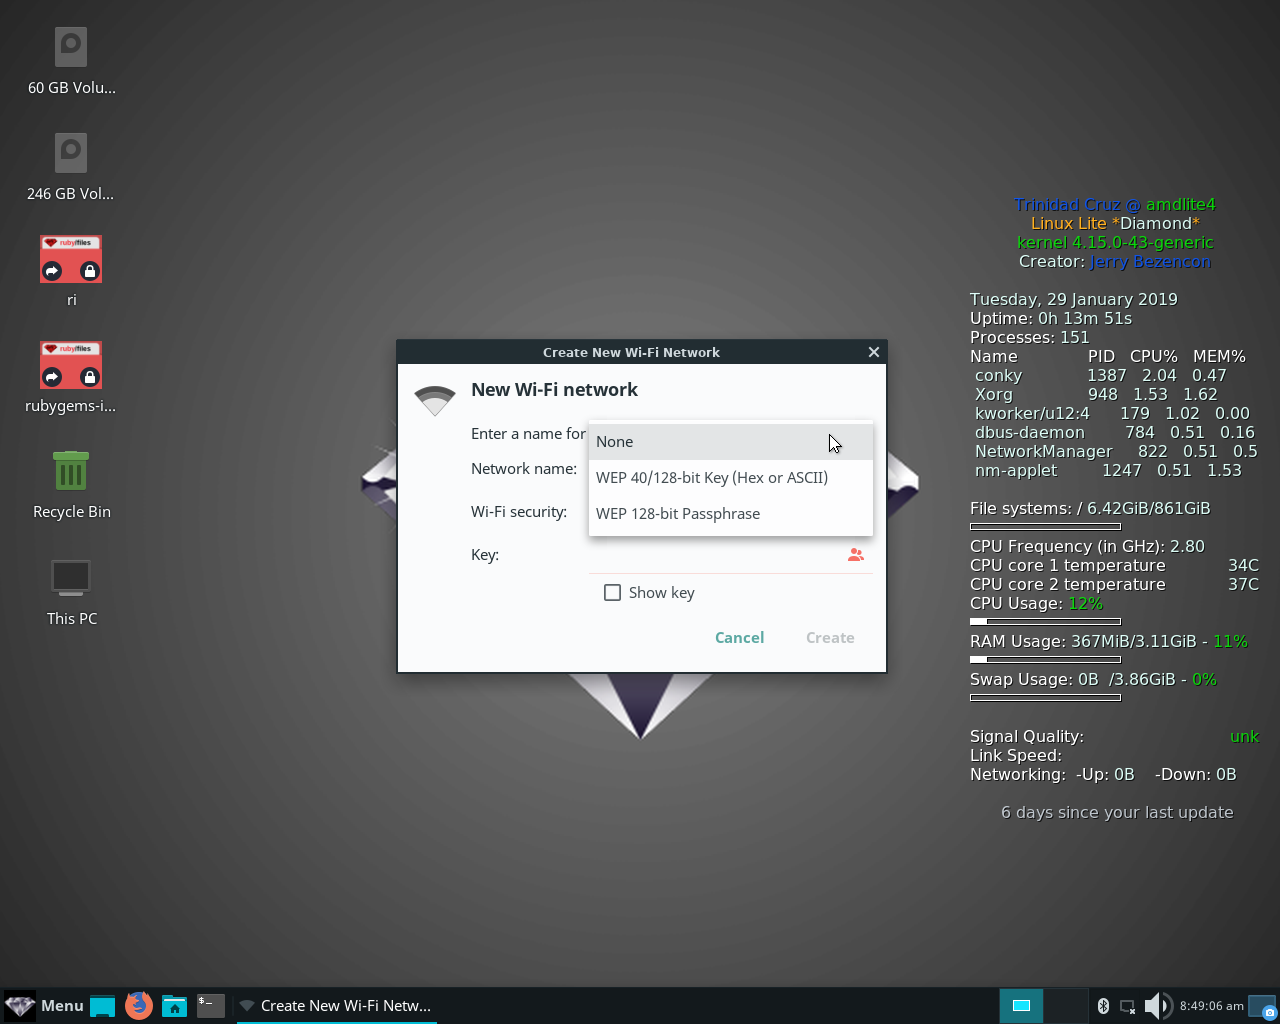
On the menu screen that appears give your new network a name for example: prv_amdlite4 anything you like, but avoid special characters. See image below:
Select none from the menu next to Wi-fi security. This is important because the WEP package is deprecated and some Debian machines, and other Linux machines won’t even connect with WEP. This kind of connection when setup from network manager GUI is best used as an only occasional use connection. Something to briefly use for file transfers as a matter of convenience. See image below:
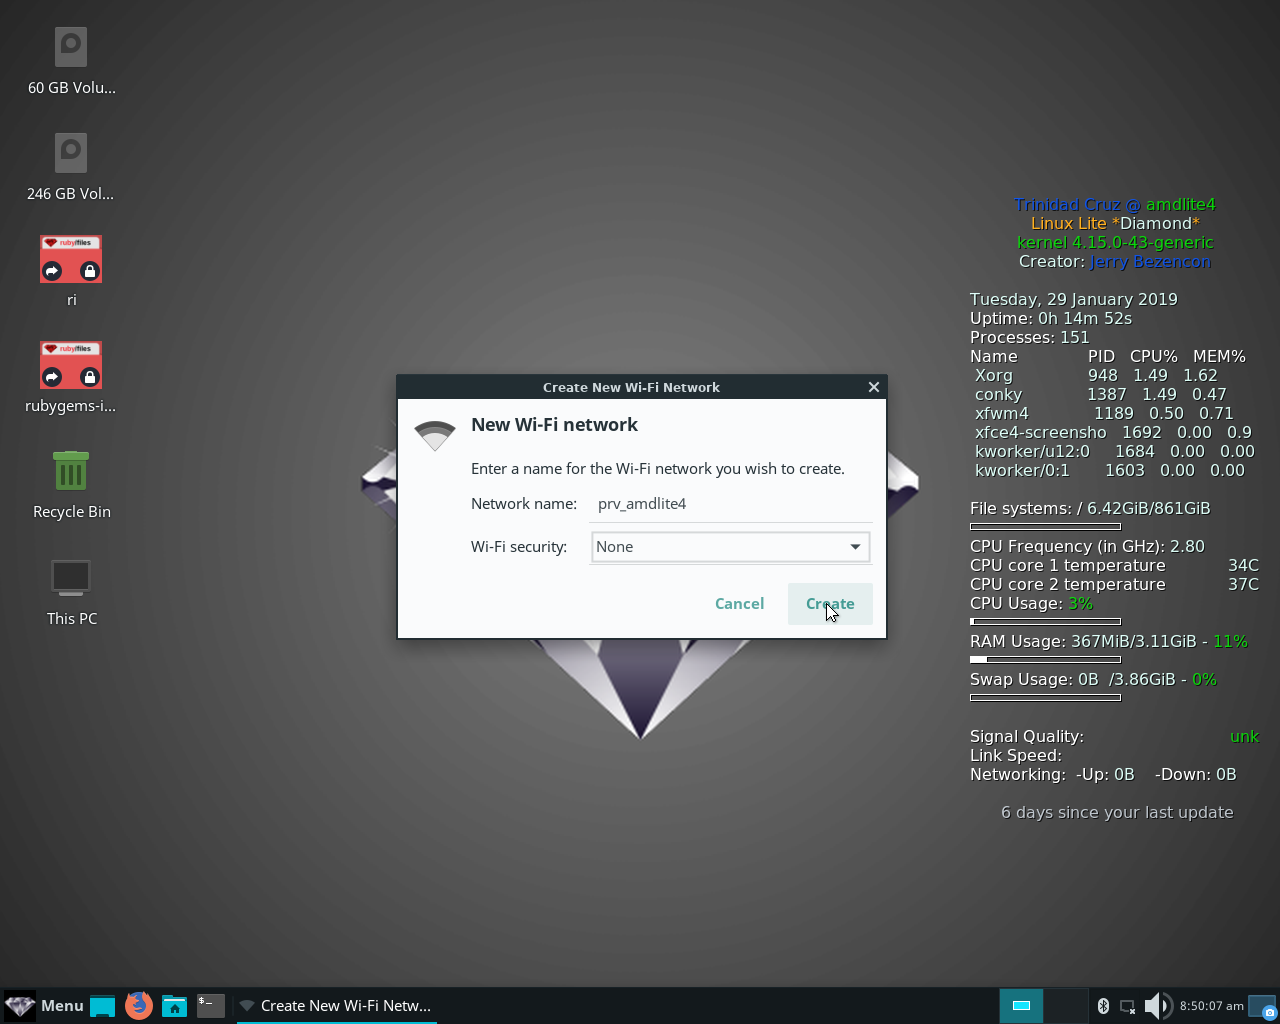
Once you select none the screen menu will change to the one like the image below. Click create to create your new ad hoc wifi connection.
Your new network should connect immediately. Click the panel network icon and it should be there. See image below.
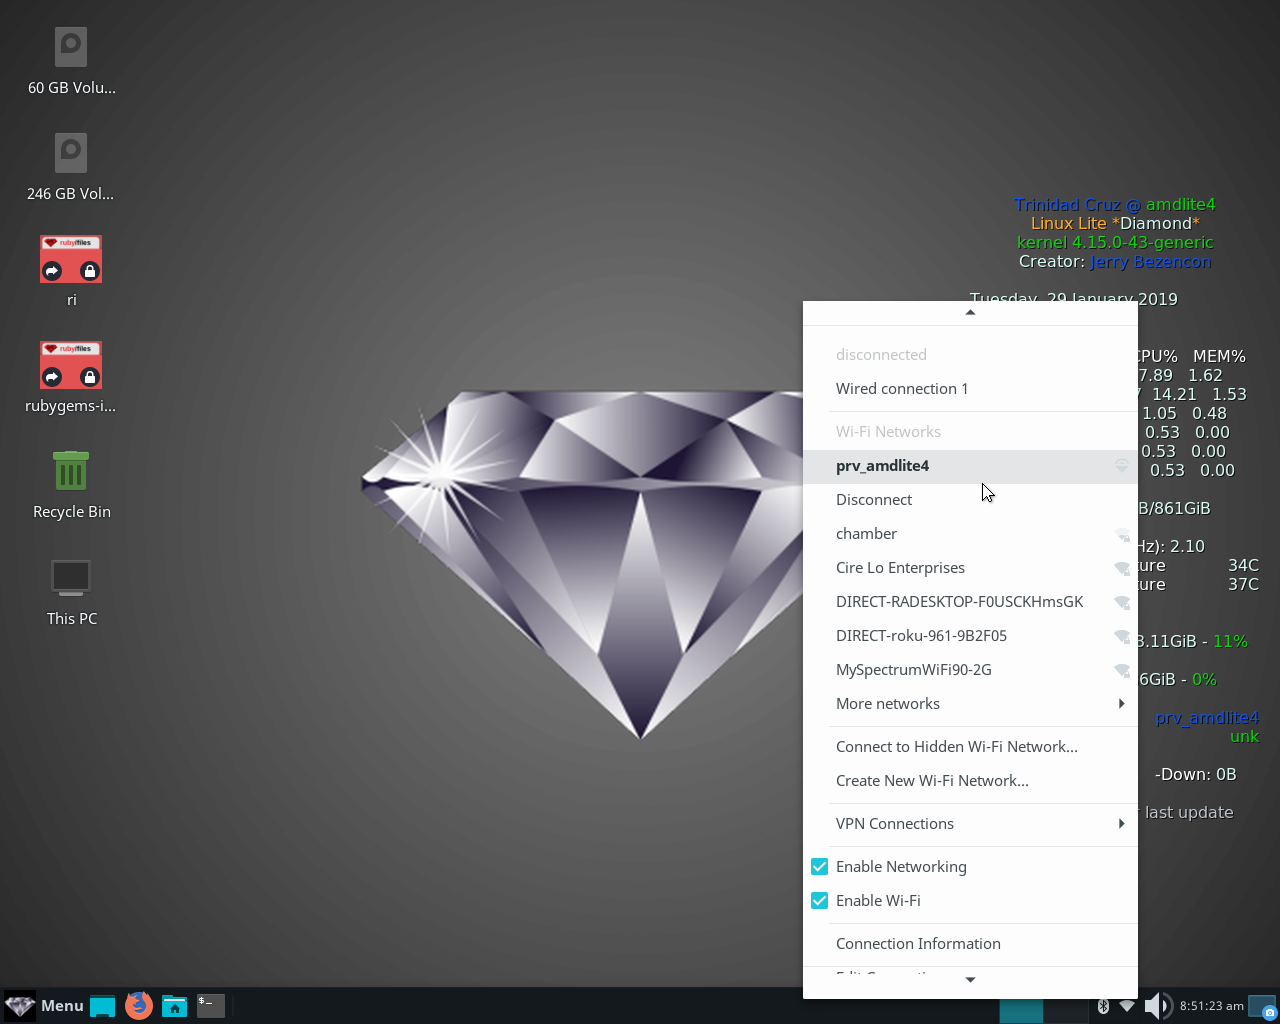
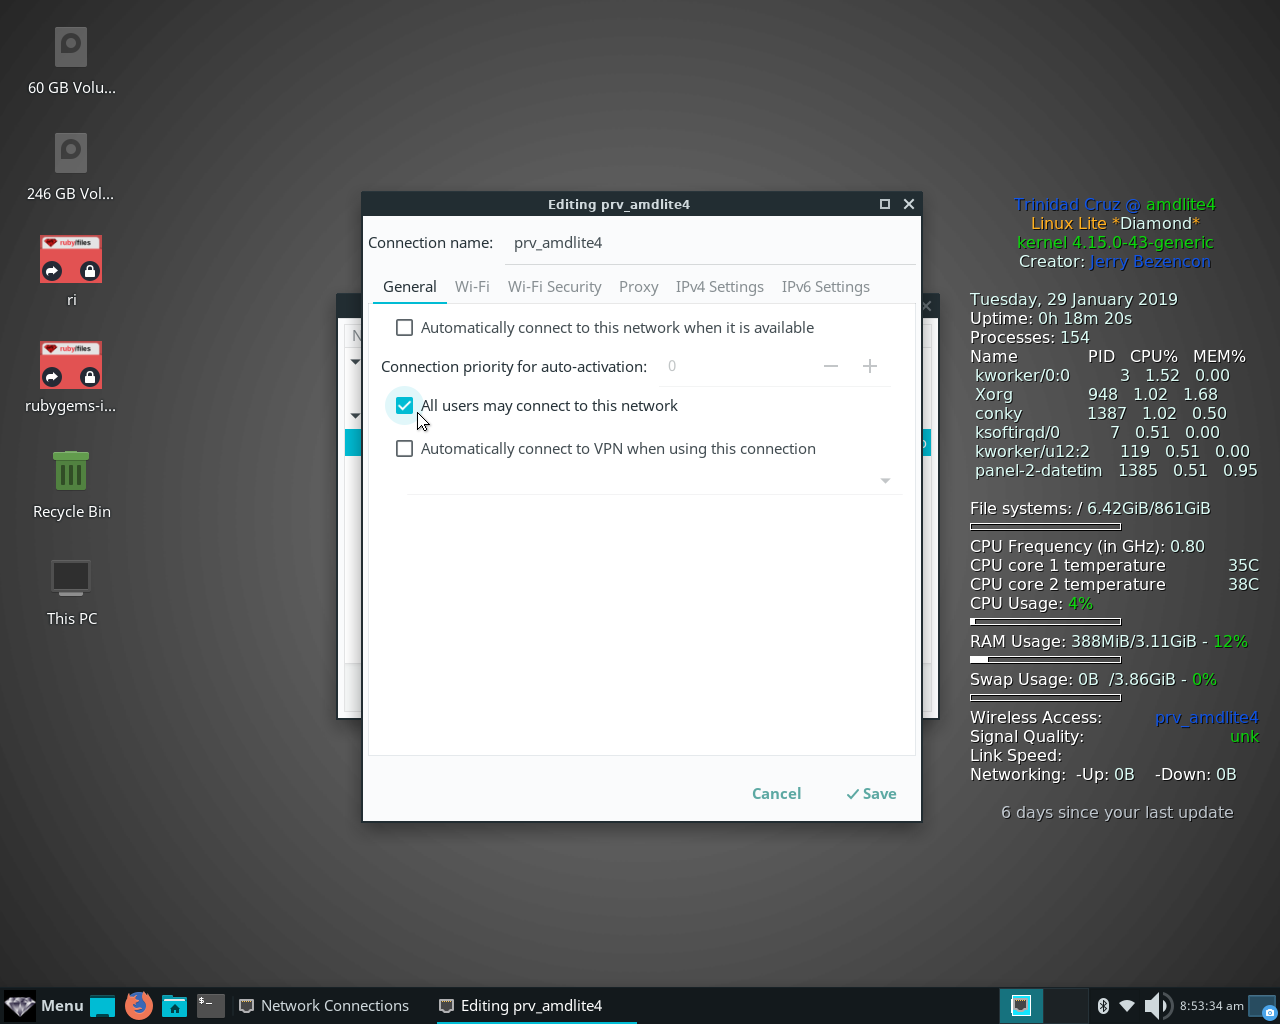
Click disconnect, and then Edit Connections and select it from the menu. It should look like the image below.
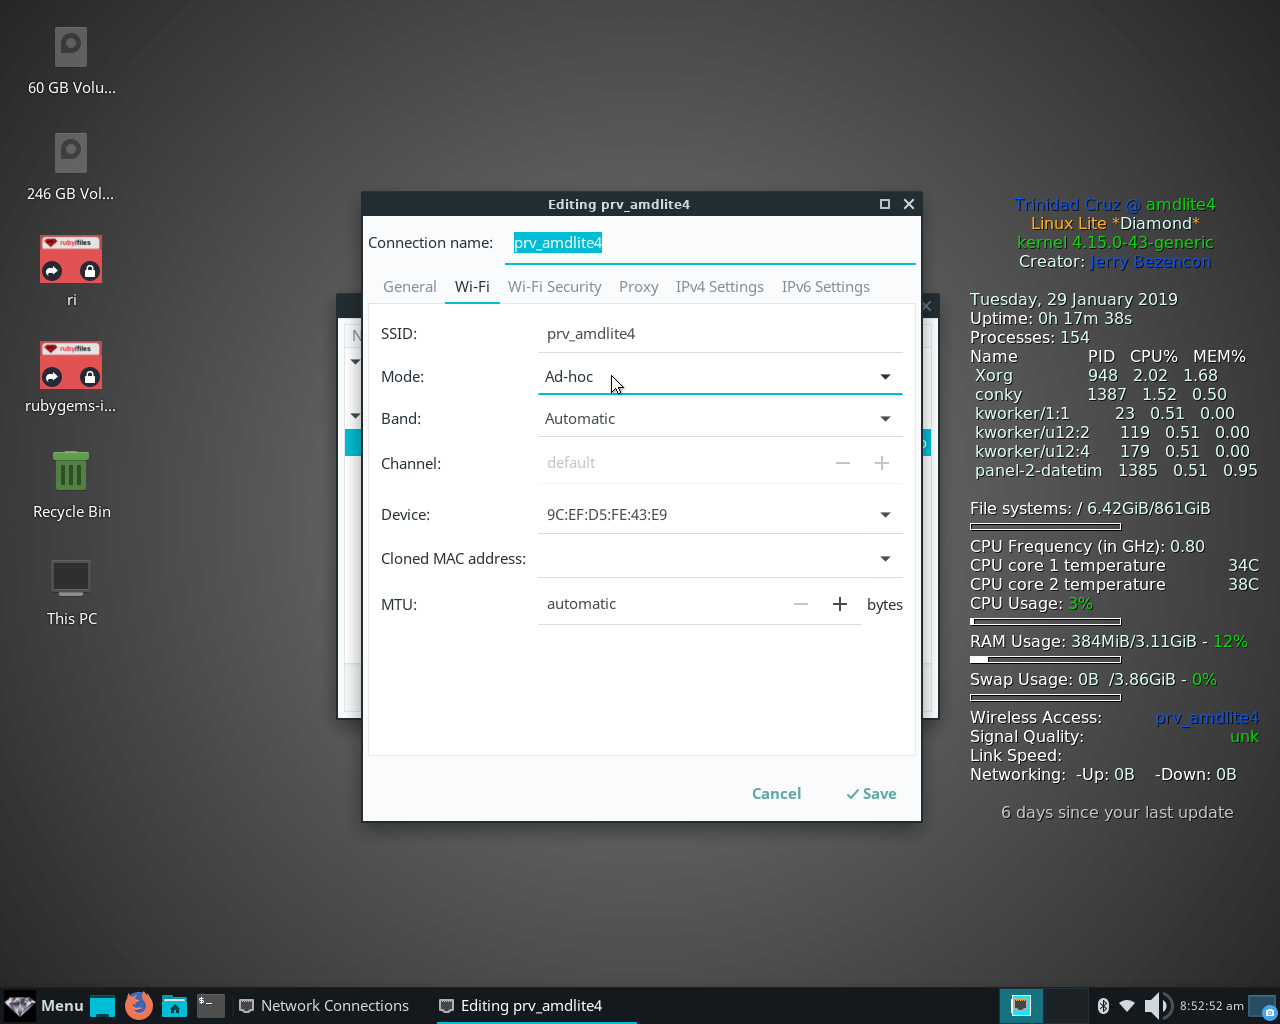
Click the General tab and check the box for All users, and uncheck Automatically connect. See image below:
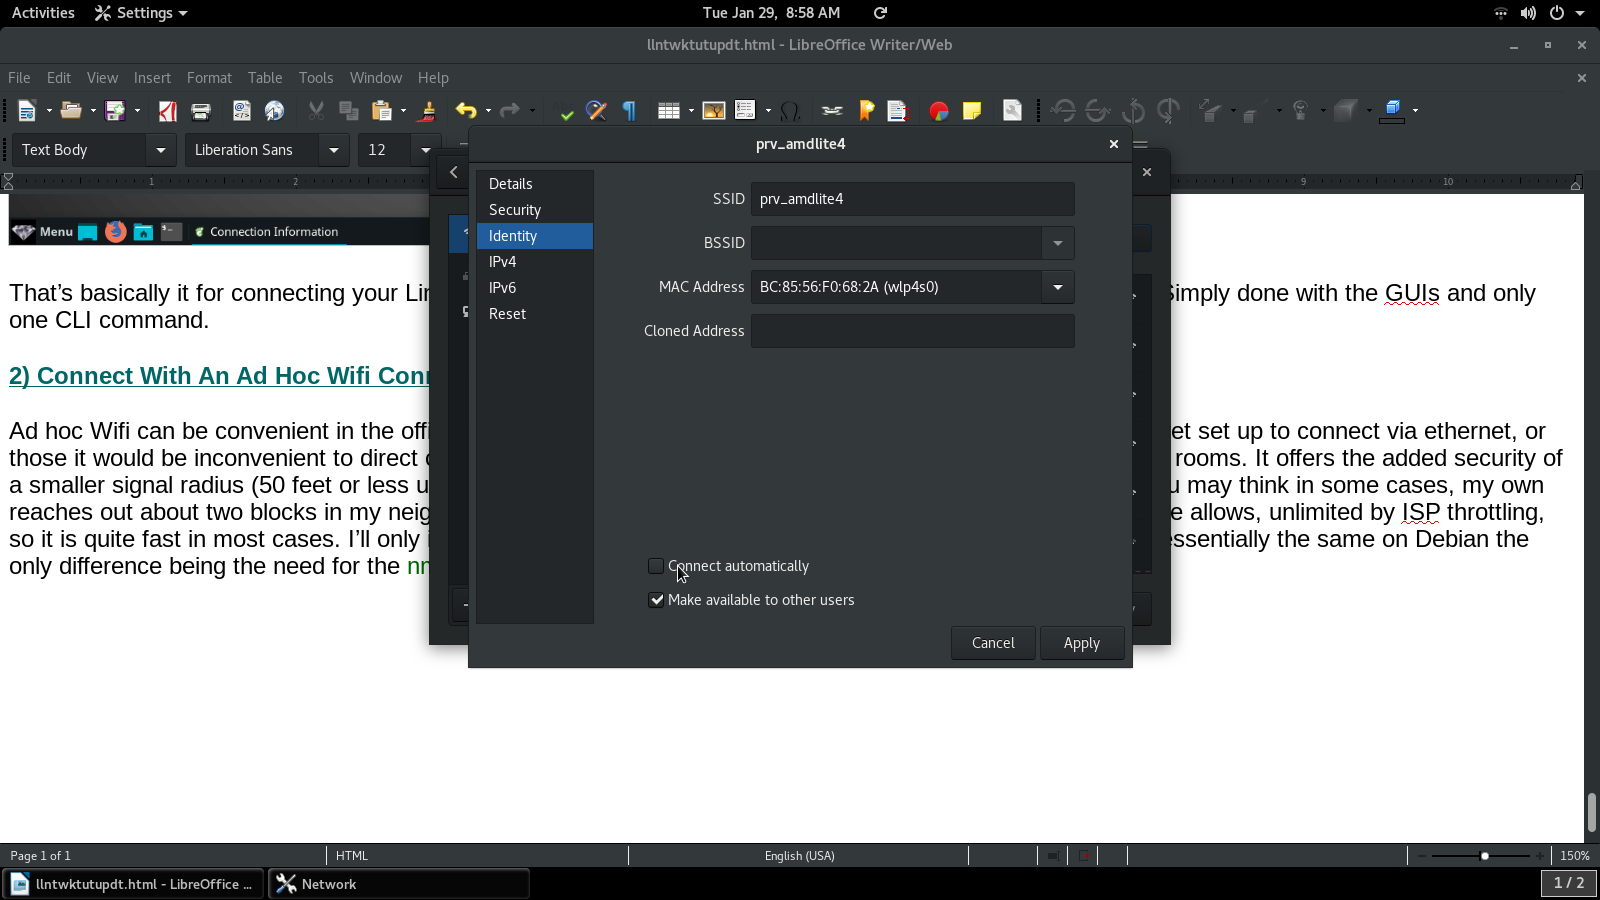
Now go back to the Debian machine and find your network and edit the settings. Uncheck the Connect automatically box. See image below:
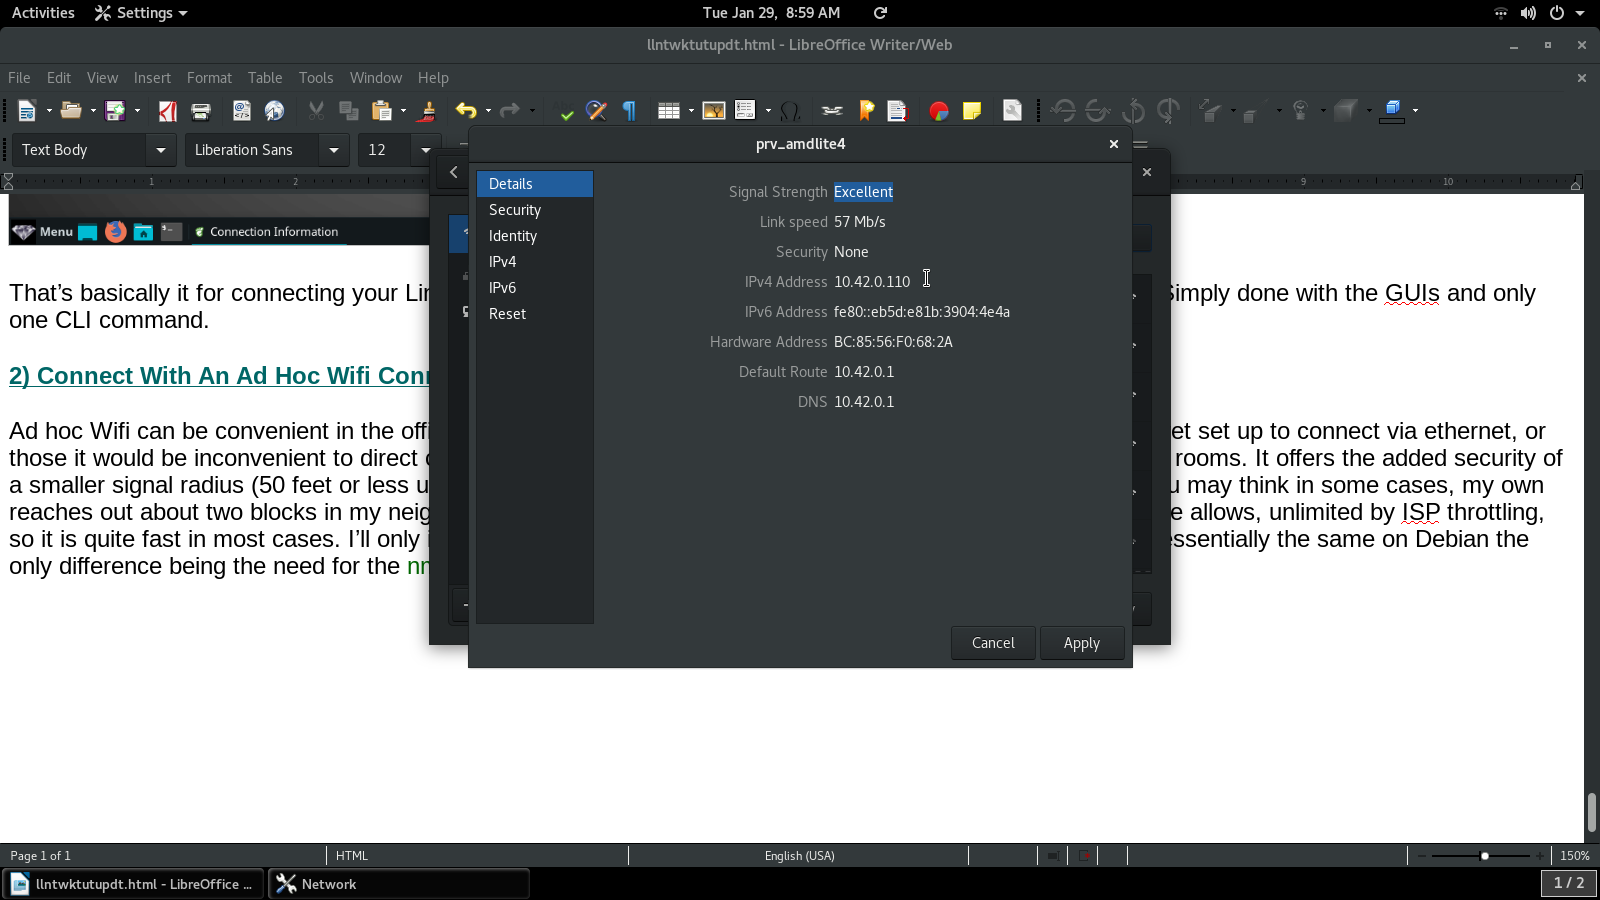
Check the details to find the IPv4 address.
This should be enough information for even a new Linux Lite 4.xx user to create a direct ethernet connection, or an ad hoc wifi connection to any Debian computer, and a lot of other Linux OS computers. I will cover the upper scale address connections commonly assigned by most routers at the end of the section on SSH.