8) Installing Open SSH In Windows 10 & Connecting To Linux Lite 4.xx
On Windows 10 build 1709-1809 & 1803 Professional or Enterprise, SSH is now offered as an optional feature. The SSH client is basically designed to work with other Windows computers, and is not the complete solution for connecting to and working with a Linux file system. The SSH server however can be connected to from any Linux client computer and configured to allow complete file access to Windows 10. What this means is: that installing the SSH server to your Windows 10 computer will allow you to use your Remmina client from Linux Lite with an SFTP connection that allows you to upload files to your Windows 10 computer, or download files from your Windows 10 computer, with the superior security of an SSH connection. It will also give you secure remote access to your Windows 10 user CLI from Linux Lite. Installation is simple in this case.
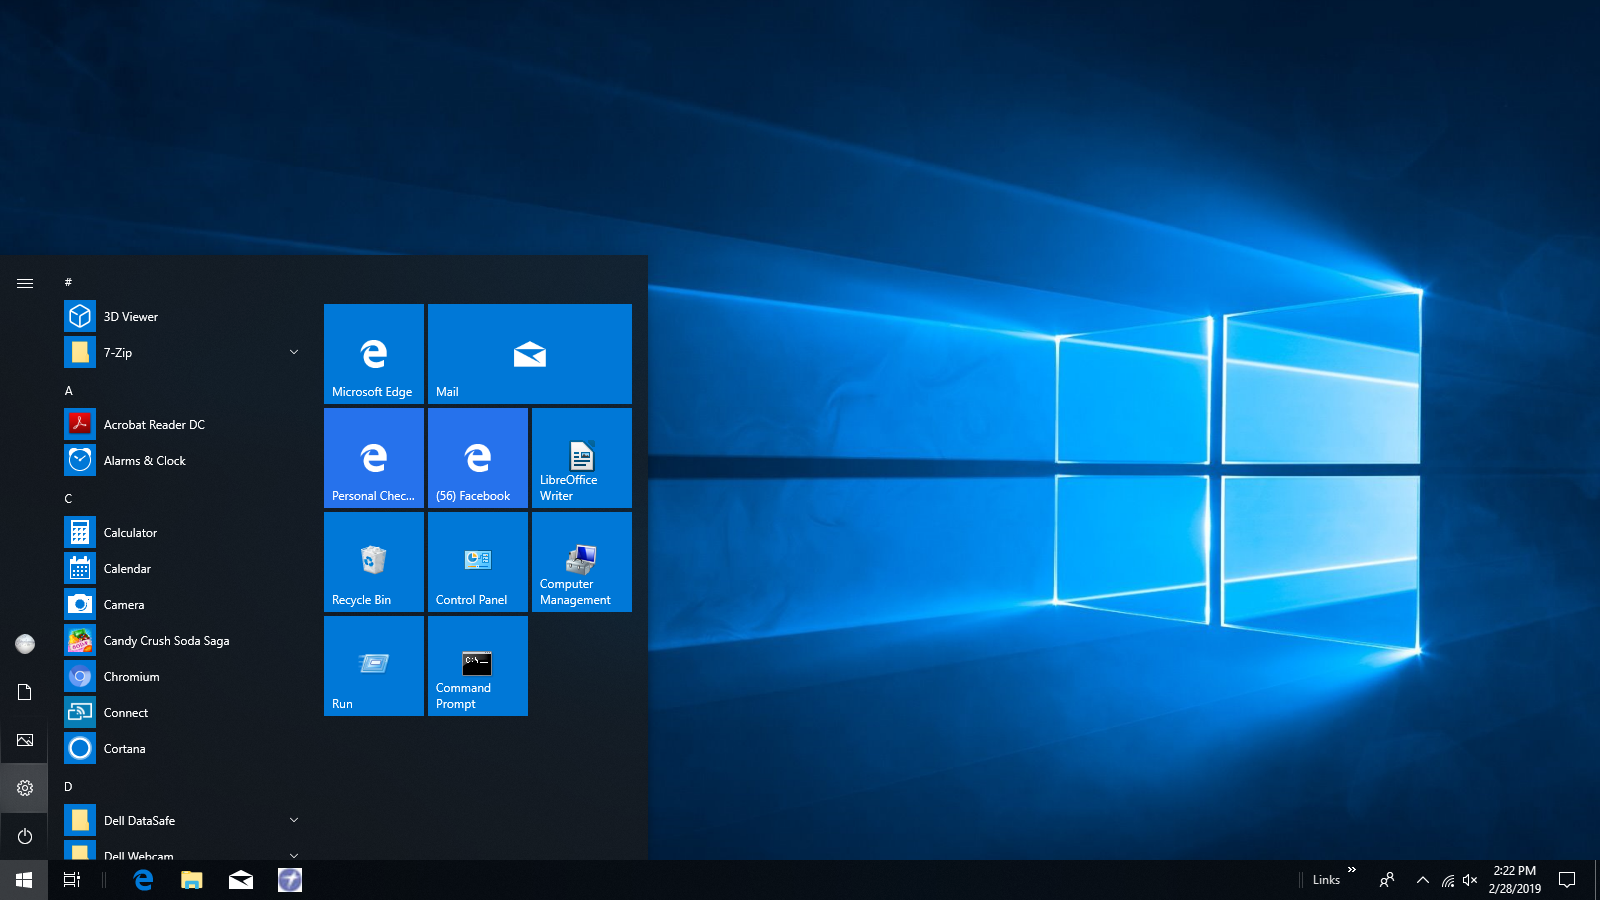
Hit your Windows key and open Settings. See image below:
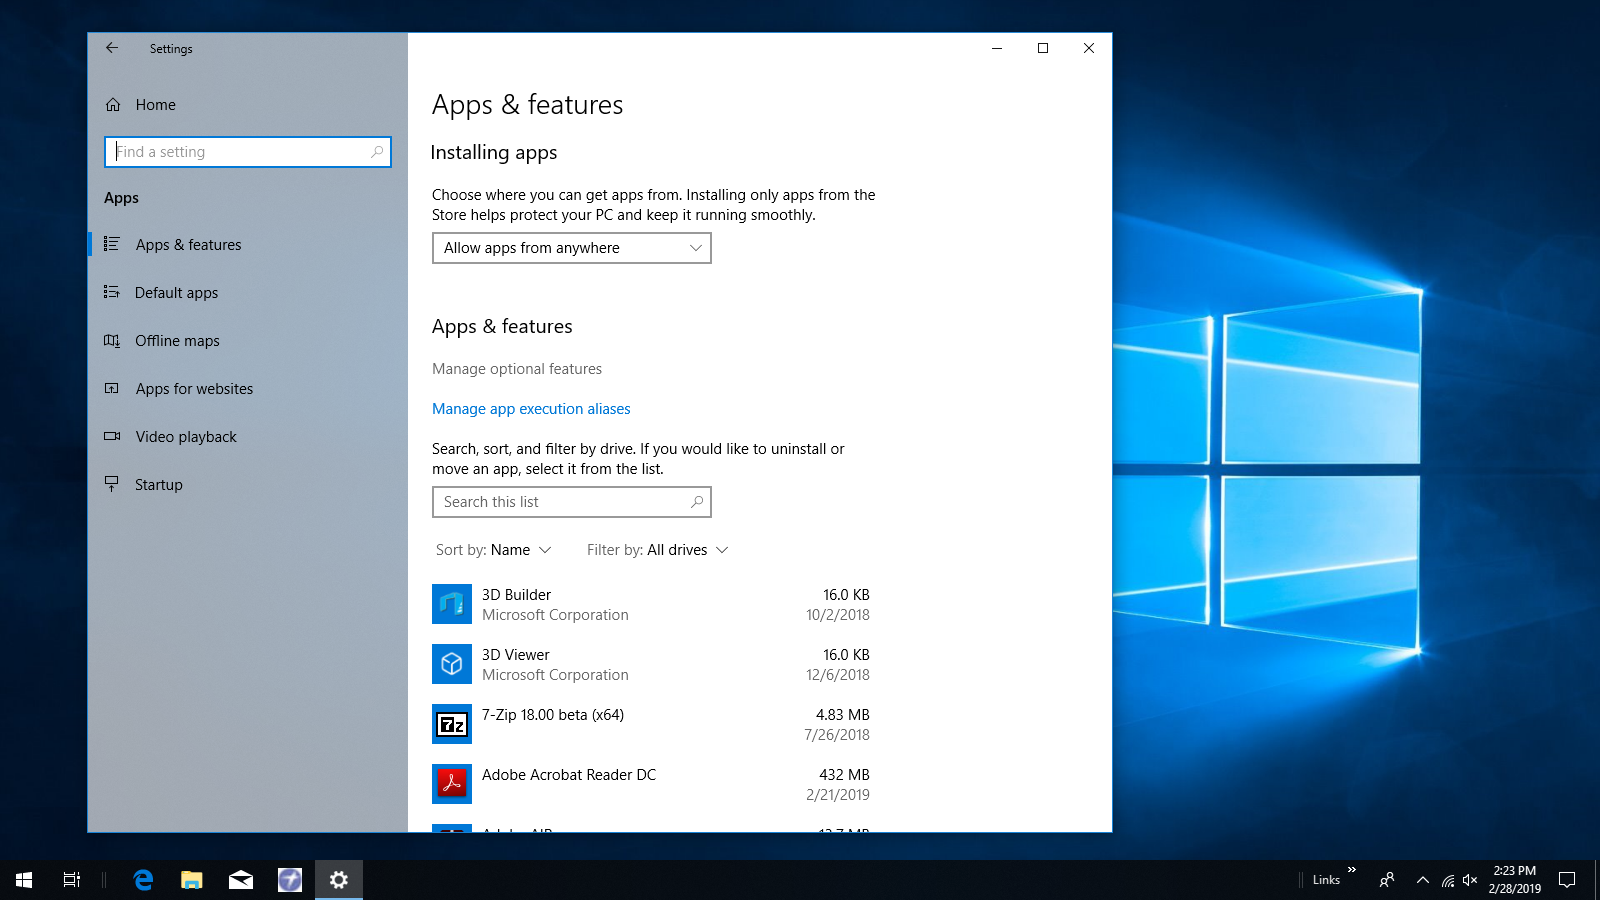
Click on the Apps selection. See image below:

Select Manage optional features under Apps & features. See image below:
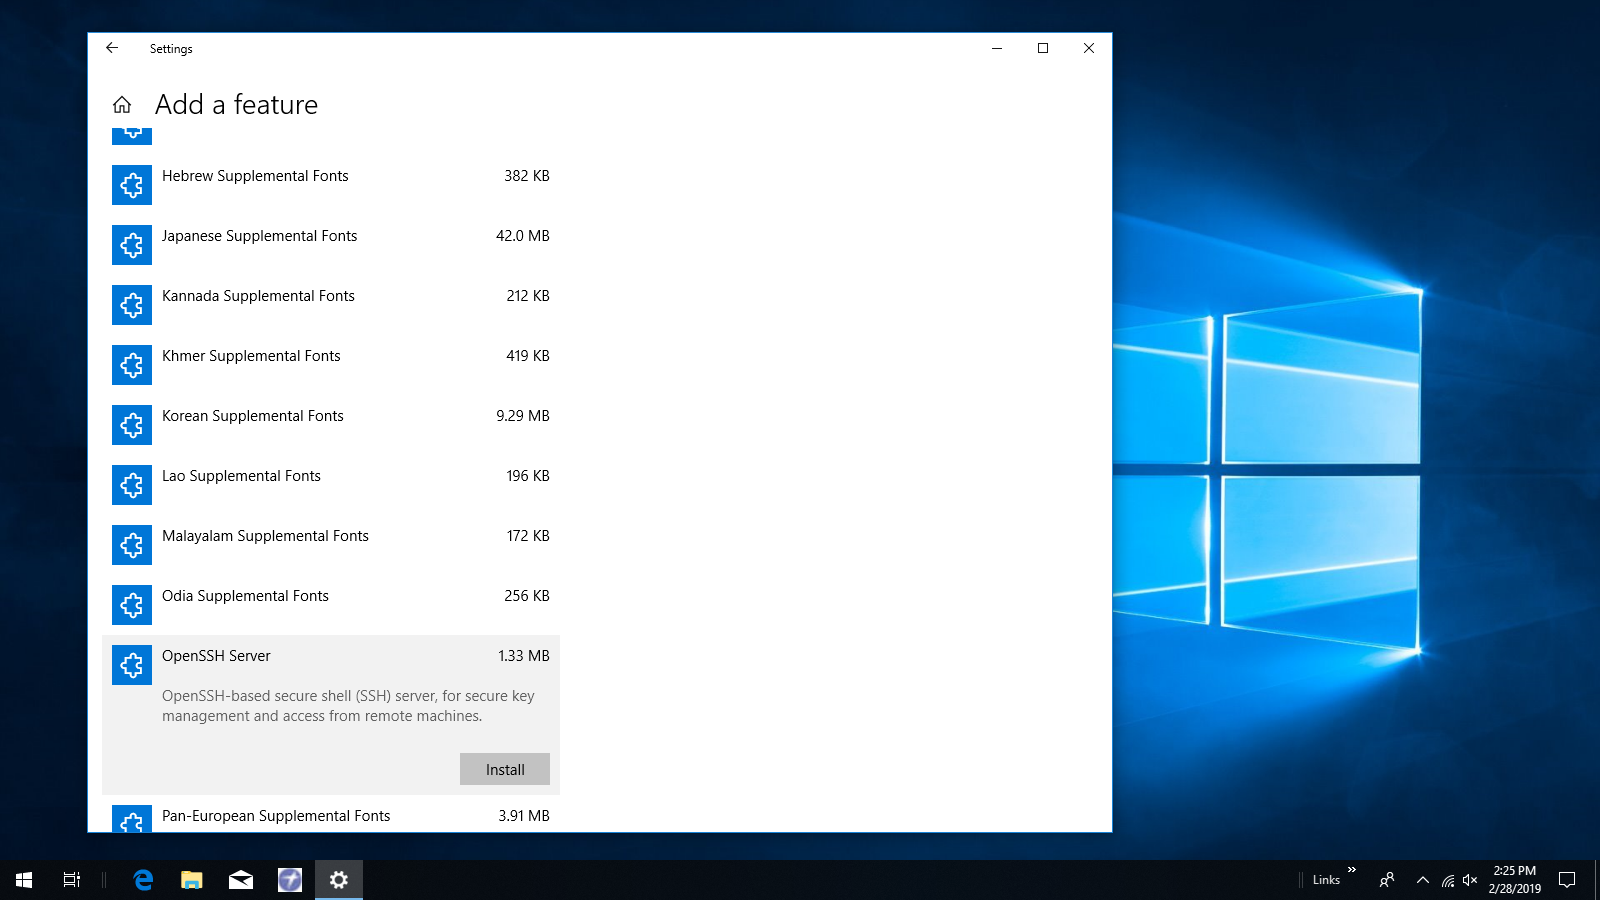
When the Manage optional features window opens click the + Add a feature bar. Be patient as it takes a bit to load the list. When it’s loaded scroll down the list and locate OpenSSH Server (Beta) and click on it and select install from the menu. When the installation finishes restart your computer. See image below:
A few things should have happened during installation: an openssh server and service should be added to Services, an inbound firewall rule for port 22 should have appeared, and a default sshd_config file should have been installed at the path below:
C:\Windows\System32\OpenSSH\sshd_config
To check Services entries hit your windows key and type services and click on the Services Desktop app that appears. See image below:

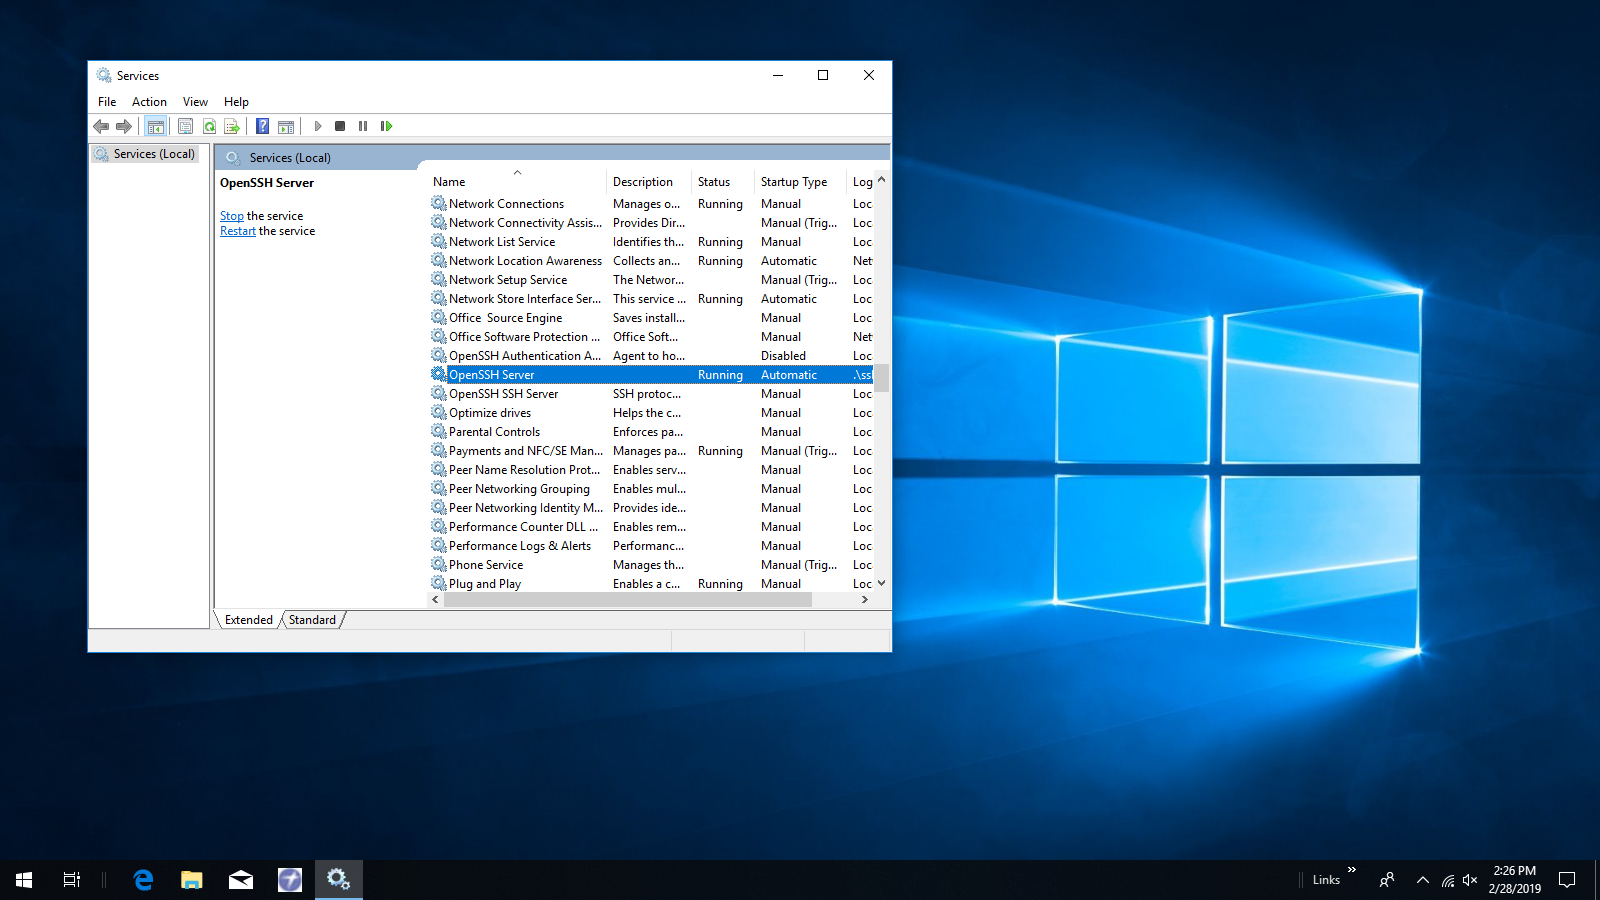
When the Services list file tree appears scroll down to find OpenSSH Server and right click on it and open properties and set startup to automatic. Don’t autostart the OpenSSH Authentication Agent yet if it’s there. Leave it set to disabled. You can enable it later if you intend to use keys with a Windows SSH client. If you have a second entry OpenSSH SSH Server like here (residual configuration from earlier non-featured SSH versions) set it to manual. See image below:
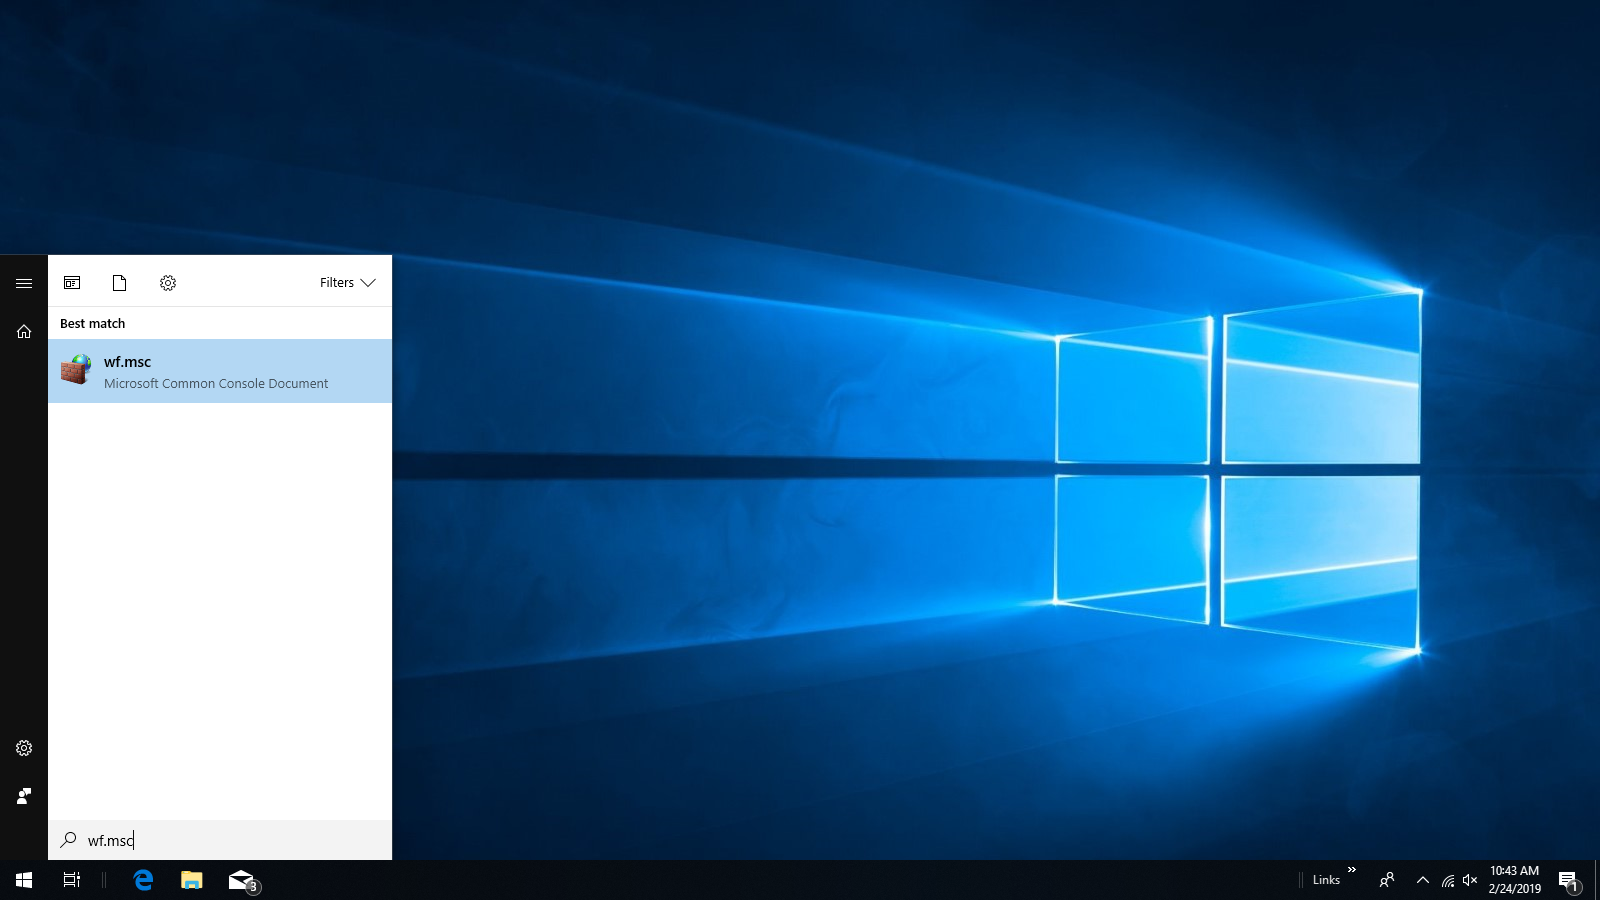
Hit your Windows key and type wf.msc and select it from the menu. See image below:
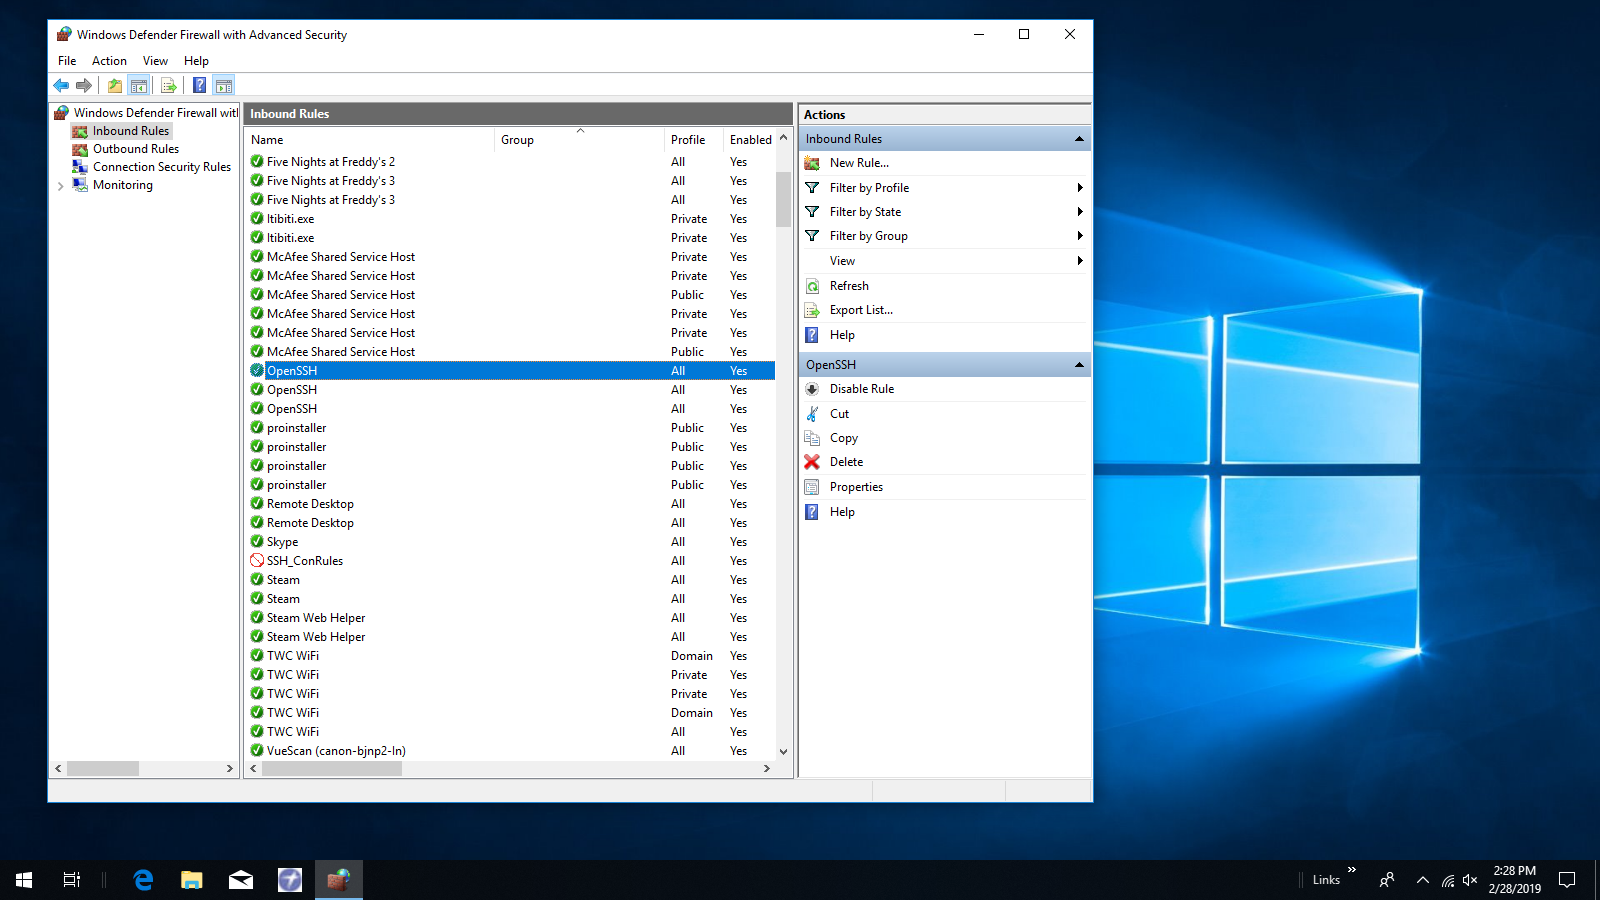
Click on Inbound rules and look for SSH entries. Normally unless you differentiated users/domains there would only be one that allows connections. Make sure all inbound connections are allowed on port 22. You can add an IPv4 address limiting block rule later. See image below:
Open file explorer and go to C:\Windows\System32\OpenSSH\ and verify that sshd_config is there.
It’s been my experience that every version of openSSH server for Windows works out of the box when you connect to it from a Remmina client with Debian 8 or 9, Ubuntu 16.04 or 18.04, or Linux Lite 3.xx or 4.xx. and login with an administrator user account native to the specific Windows 10 machine. However you may have problems with it due to a panacea of previous incompatible network configurations on your Windows 10 machine, and configuration will have more steps if you are connecting to your Windows 10 machine from another Windows 10 machine. The links below are to the official Microsoft documentation on SSH and a decent though earlier subjective tutorial on it from Bleeping Computer with issues I have never experienced, but then I have never used the early Windows client application:
https://docs.microsoft.com/en-us/windows-server/administration/openssh/openssh_install_firstuse
I’ve already discussed installing OpenSSH server & client, and Remmina to Linux Lite 4.xx. See the link below for those simple instructions:
https://www.dbts-analytics.com/ll4ntw2.html
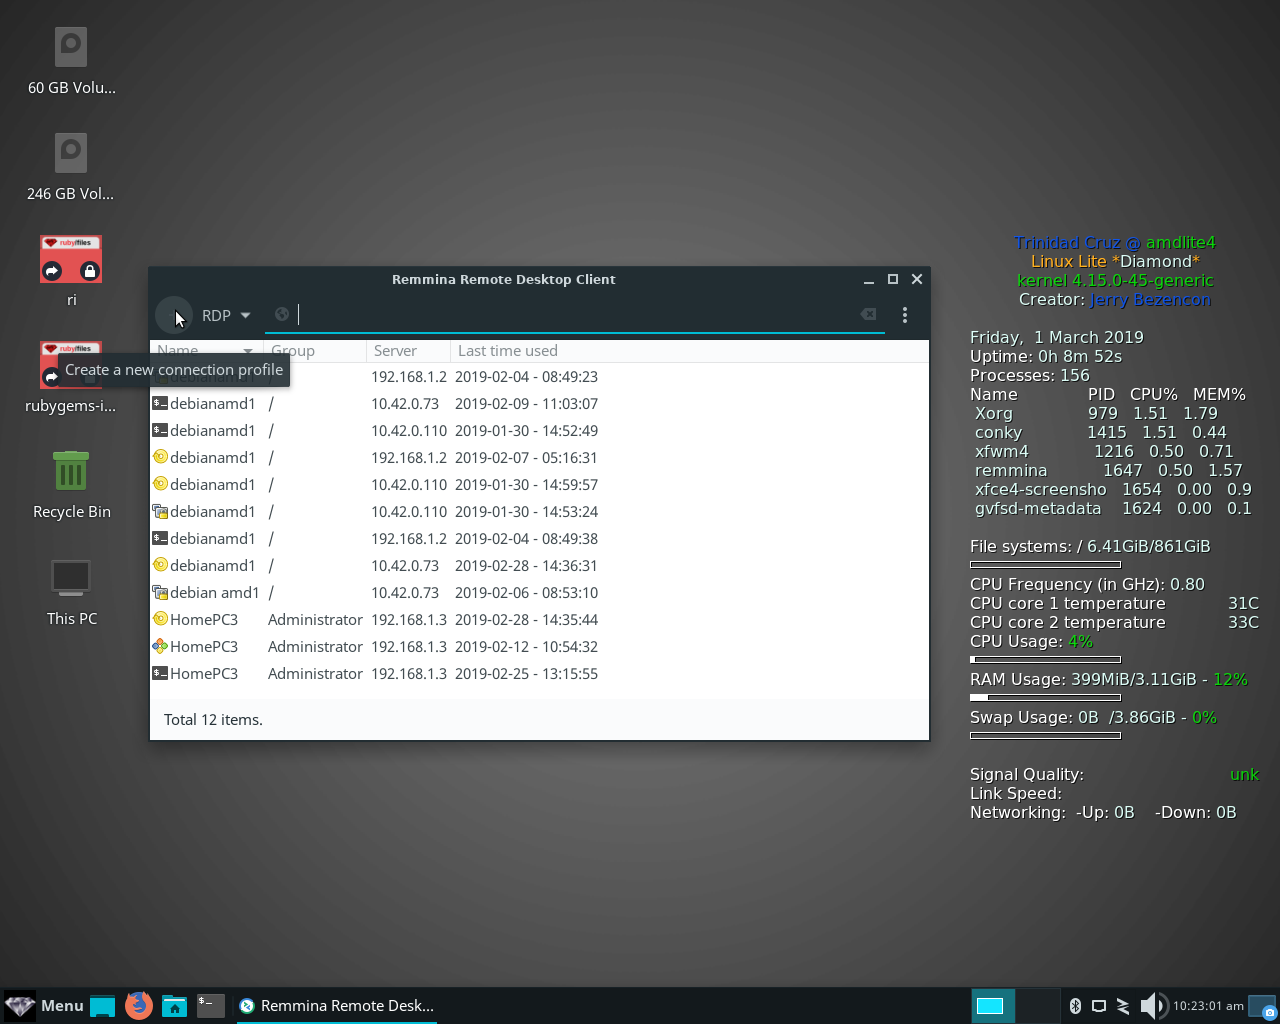
Open your Remmina client on your Linux Lite Diamond 4.xx computer and click the + in the upper left hand corner to add a new connection. See image below:
When the add connection window opens (I’m using the connection edit windows here because my connection already exists): for name type the netbios name of your Windows 10 computer; for Group I use Administrator; for protocol choose SSH Secure Shell; type your server IPV4 address for Server; for User name type your Windows 10 administrator account user name; type in that password; and for Authentication type choose Password from the menu. Click Save. See image below:

The process is the same for adding an SFTP connection. Just select SFTP for protocol. See image below:

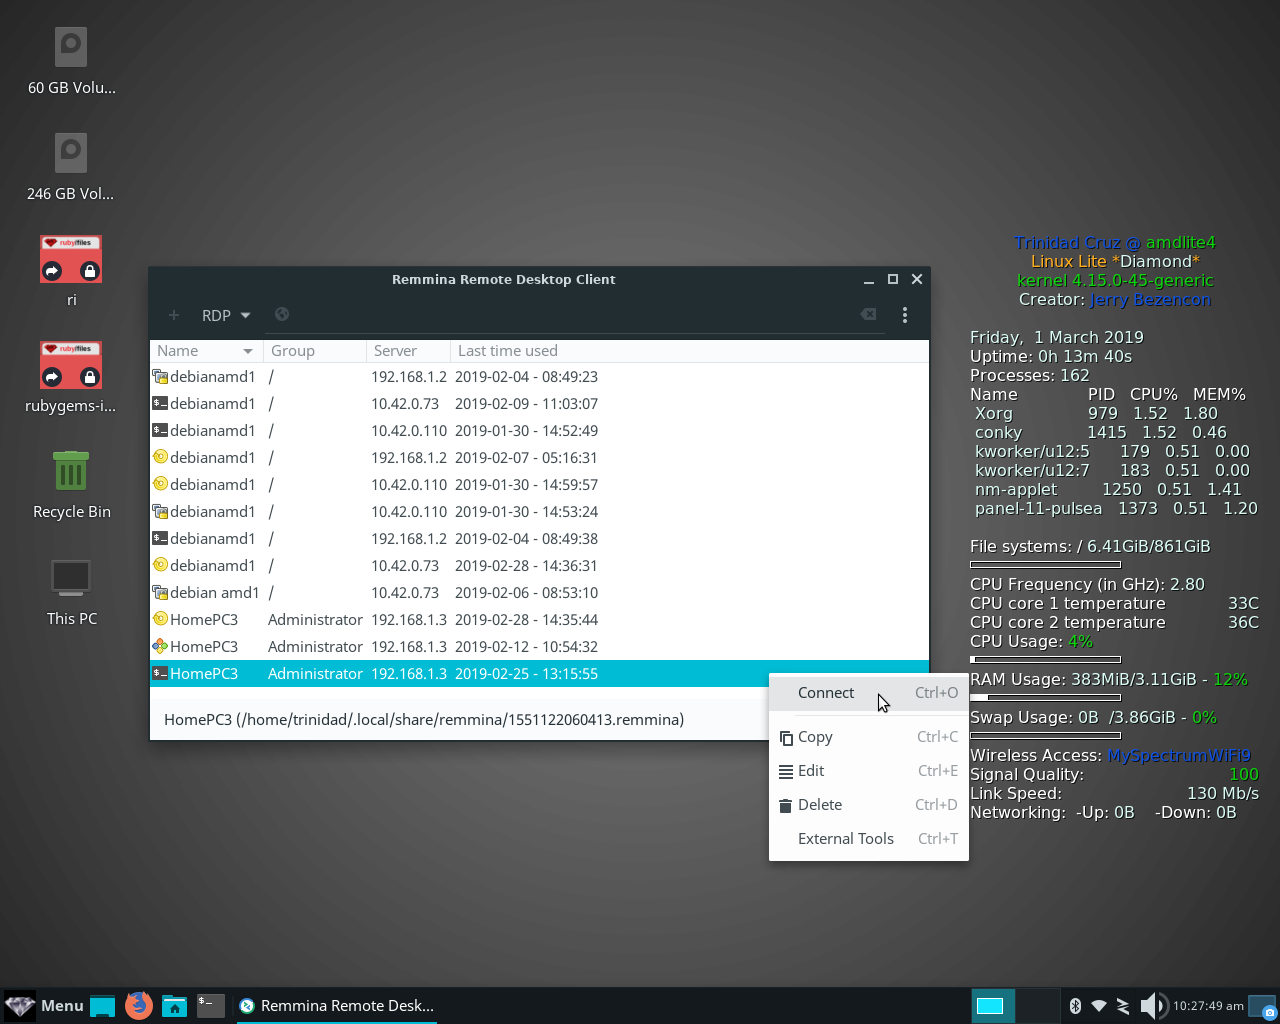
To connect right click on the connection and select connect from the menu. See image below:
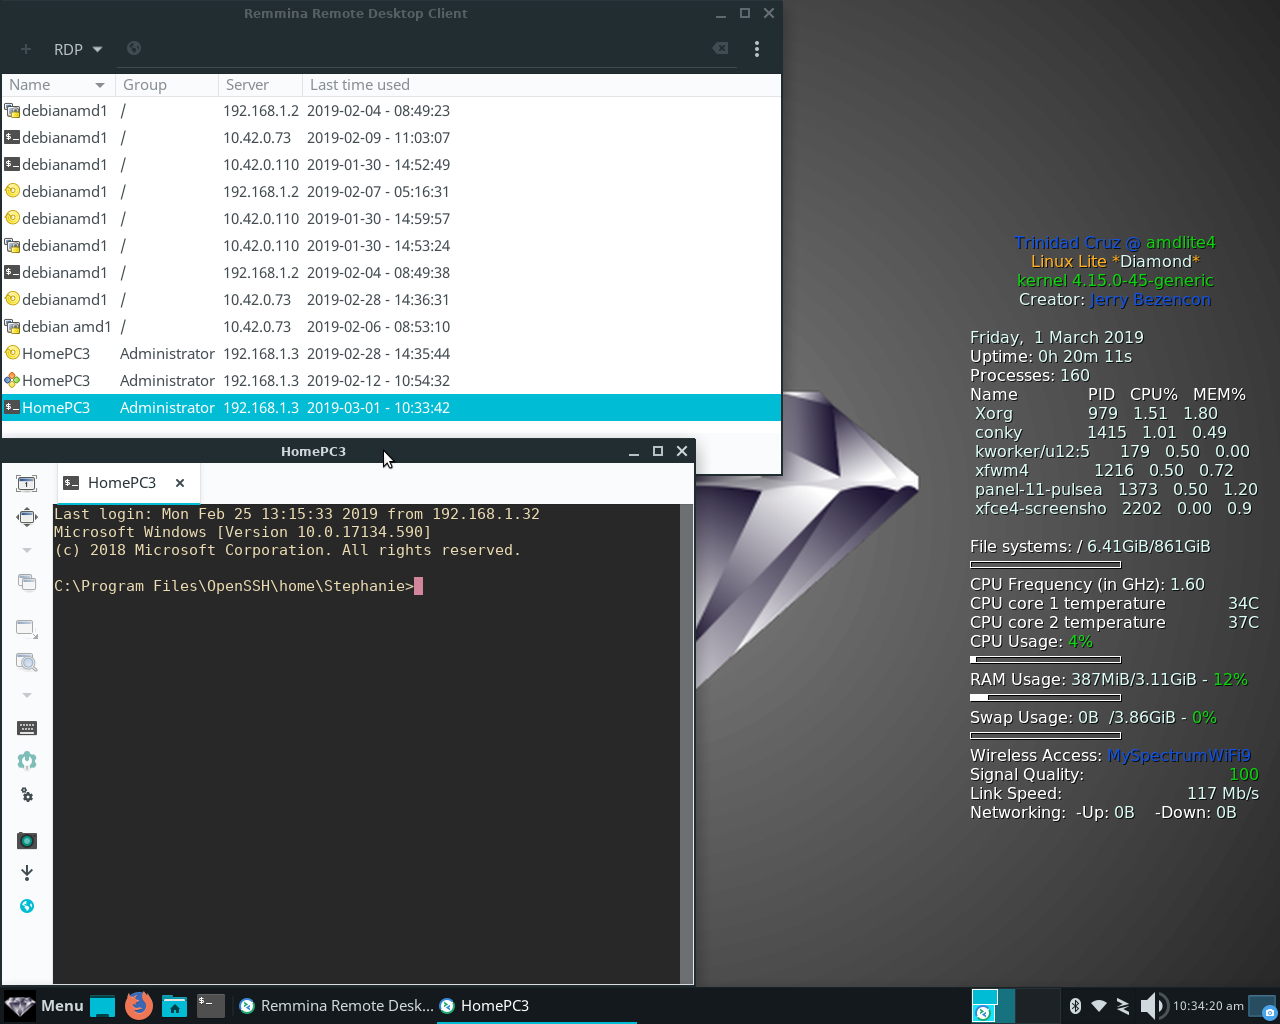
In the image below you can see I have successfully connected to the Windows 10 SSH server and now have a Windows user command prompt:
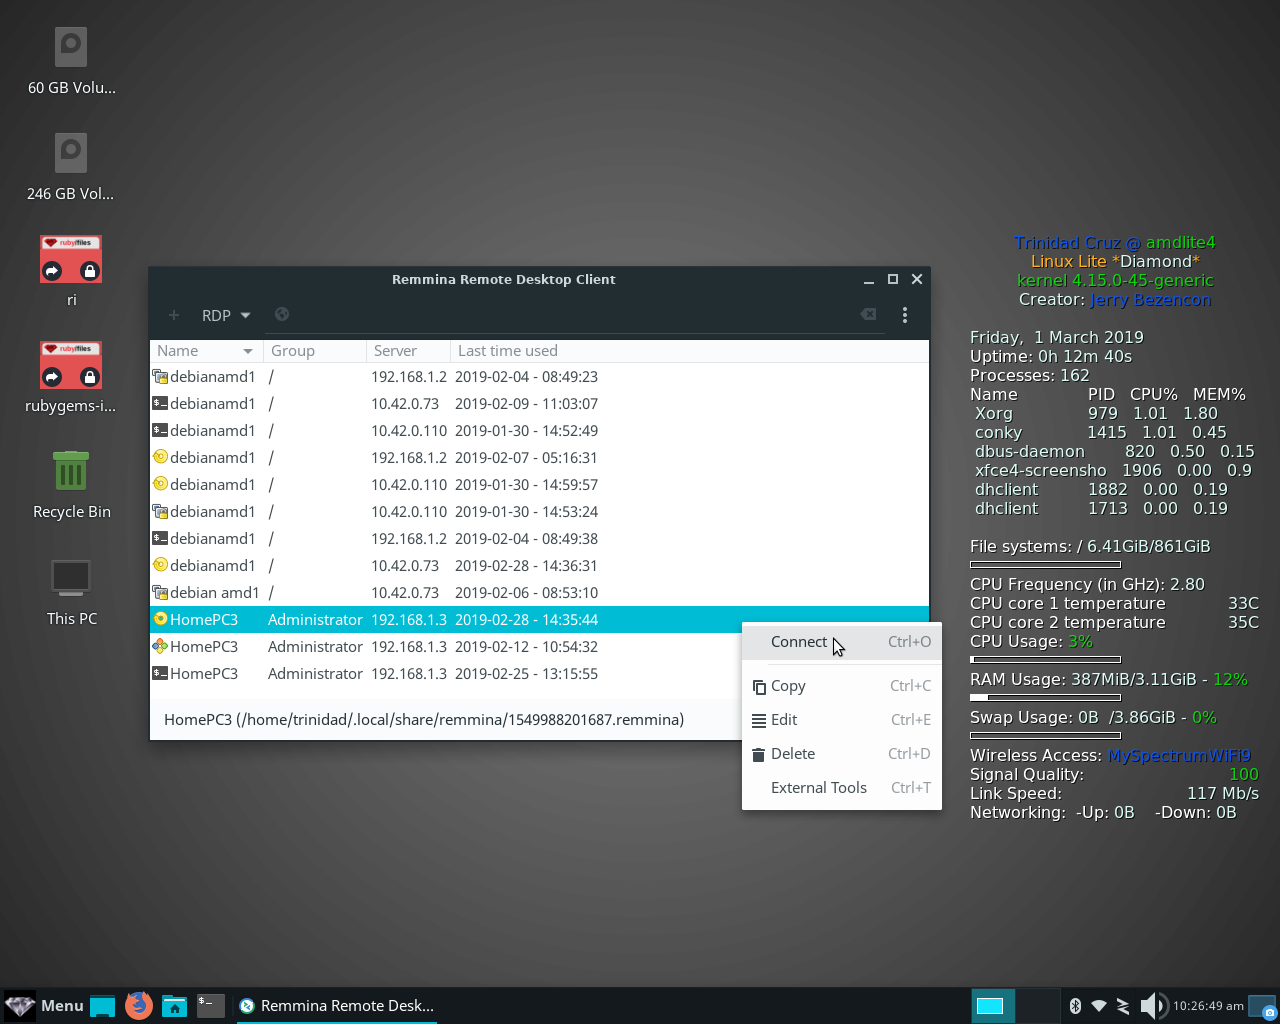
Connect to your SFTP connection the same way. See image below:
When the Remmina SFTP window opens click on Upload to upload files from your Linux Lite computer to your Windows 10 computer. See image below:

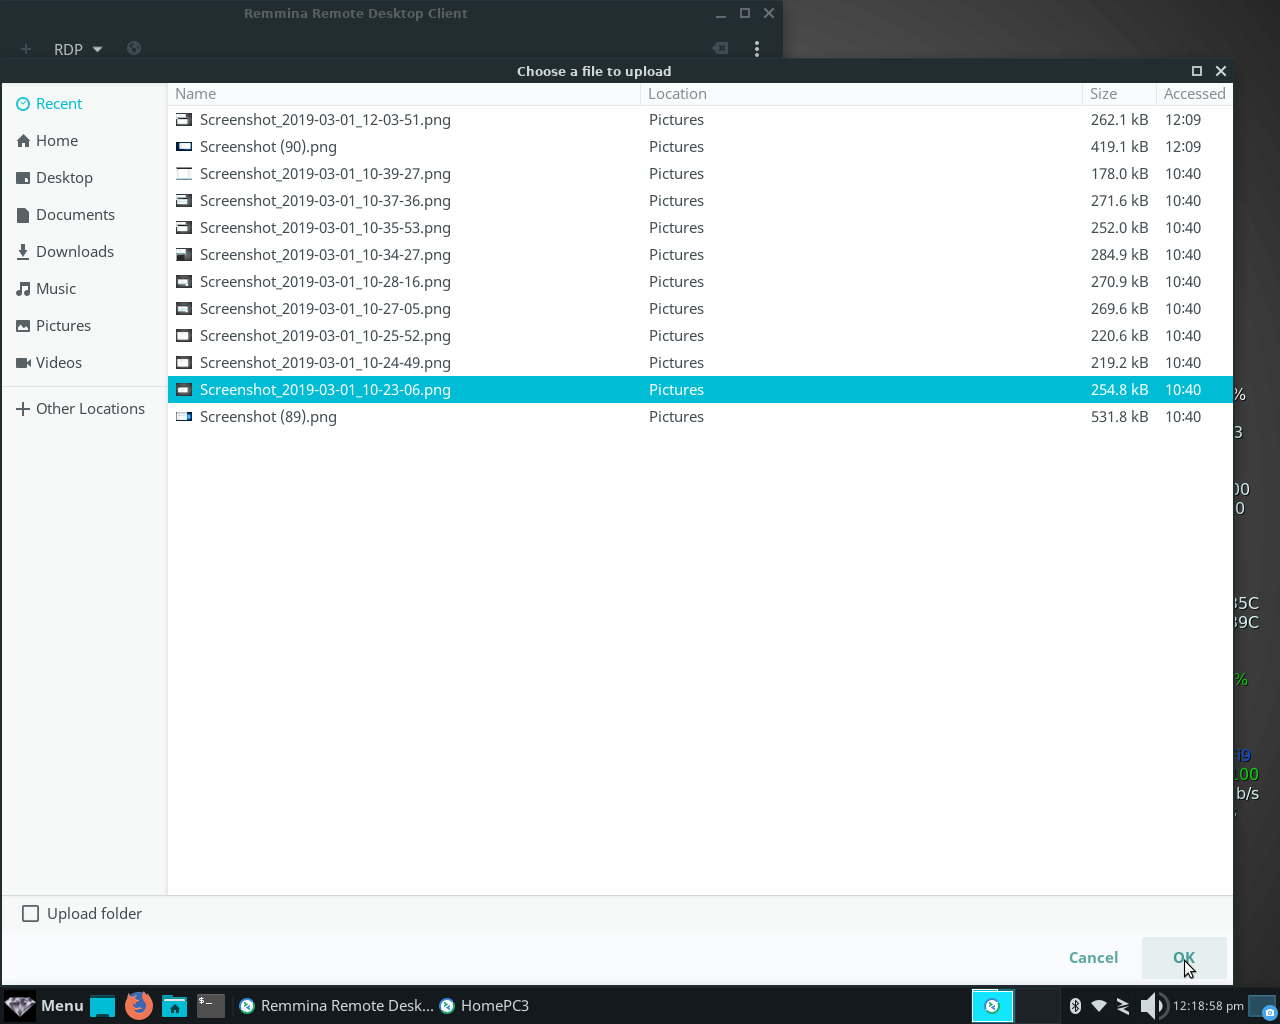
A Choose a file to upload window will appear. Select a file or files to upload to your Windows 10 computer and click OK. See image below:
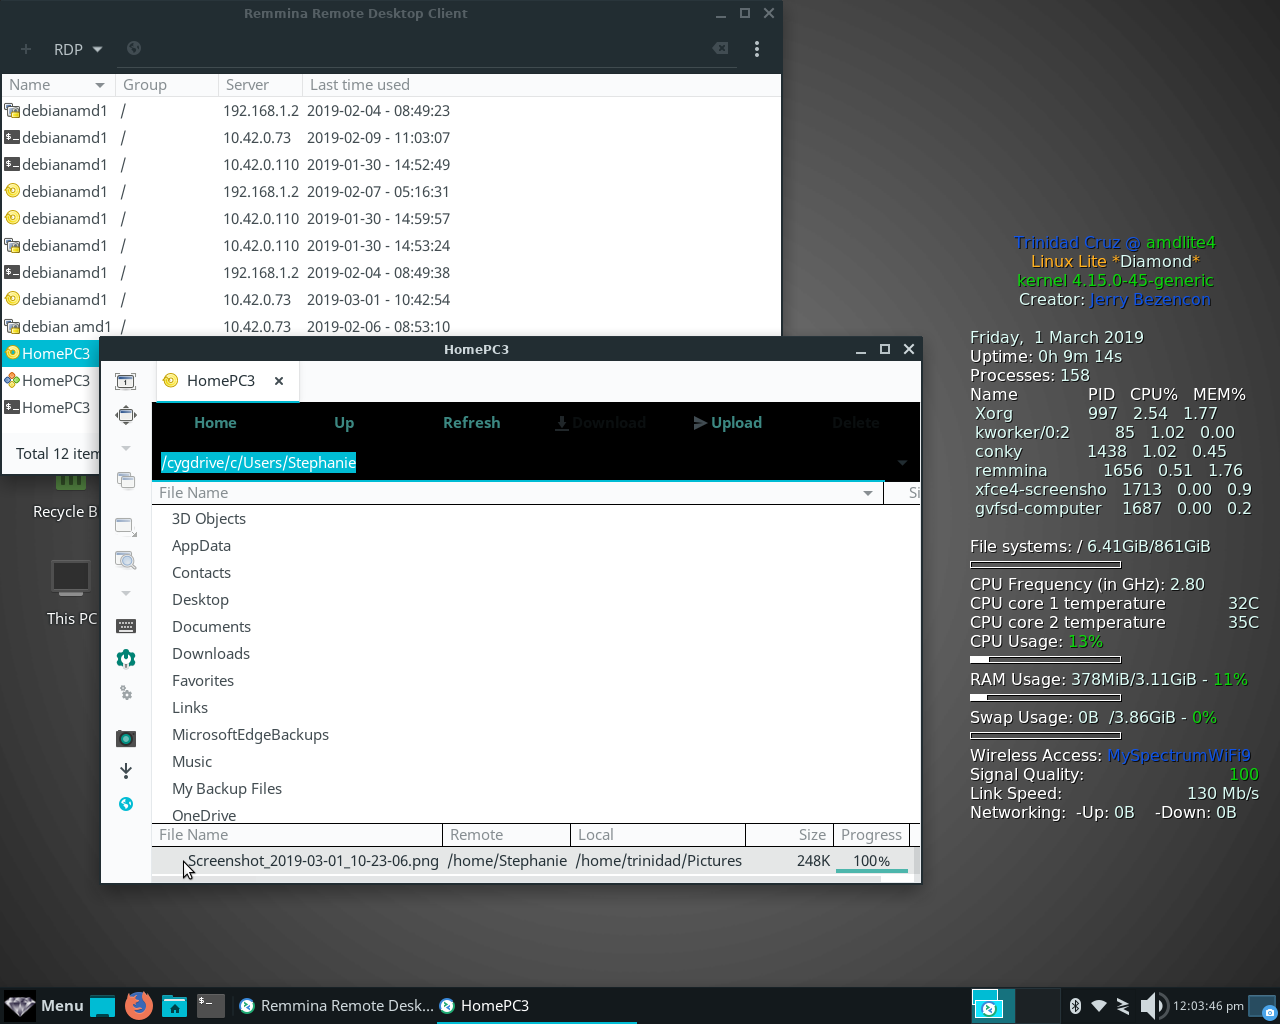
File upload progress bar is at the bottom of the Remmina window. For multiple files scroll the progress bar with your mouse center scroll button to check the progress of each one by name. See image below:
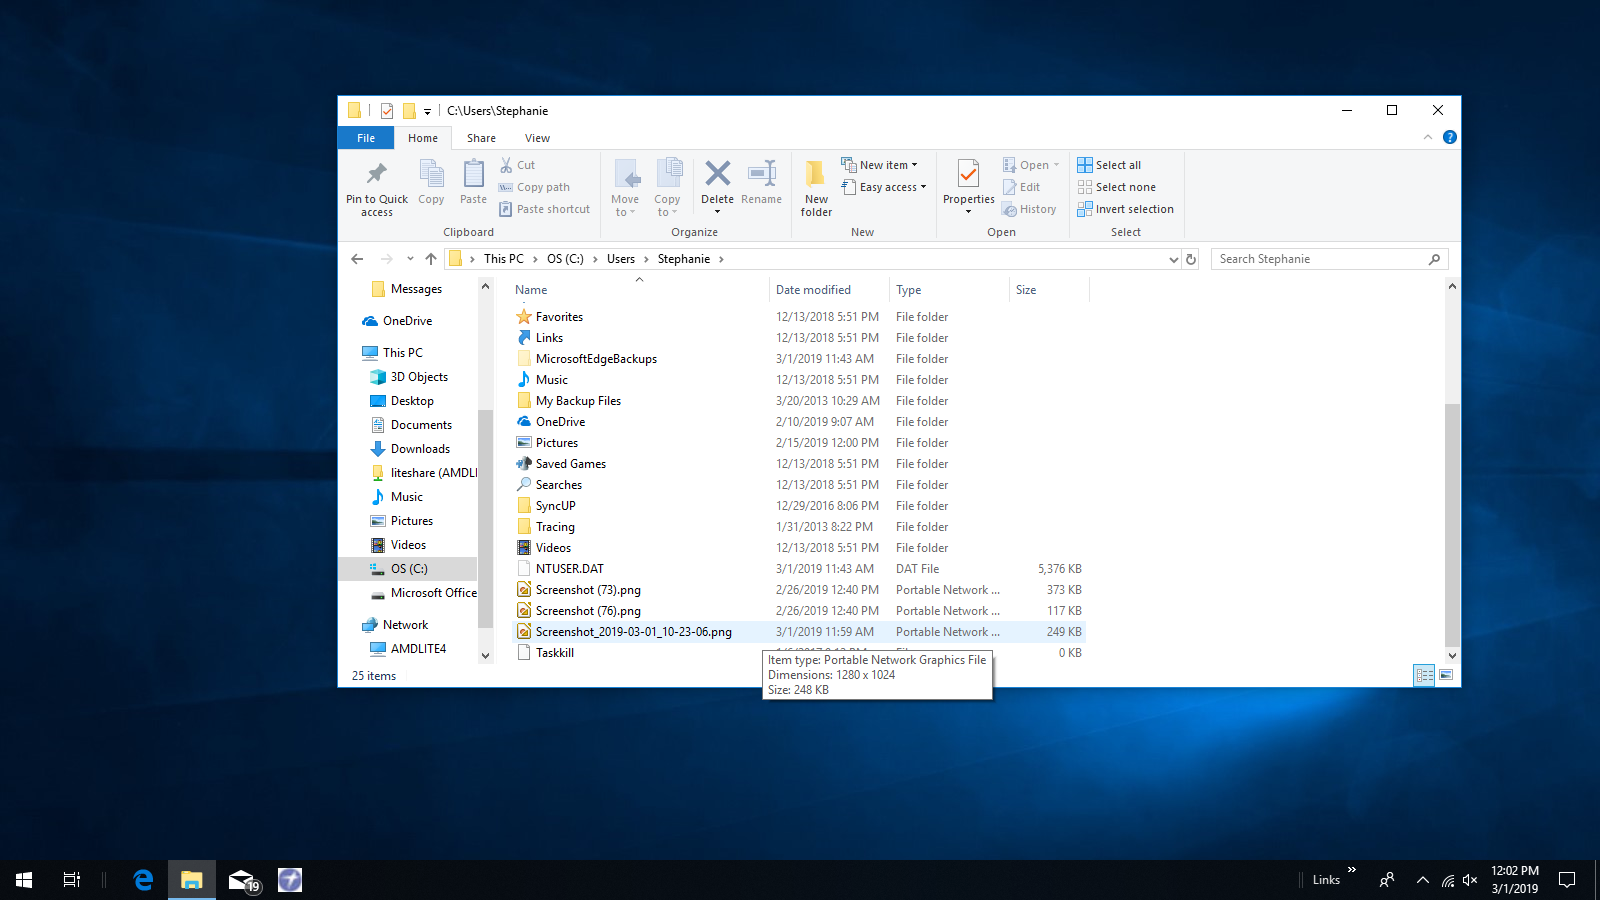
If your upload is successful you can find your files on your Windows 10 machine with file explorer at C:\Users\yourusername\ See image below:
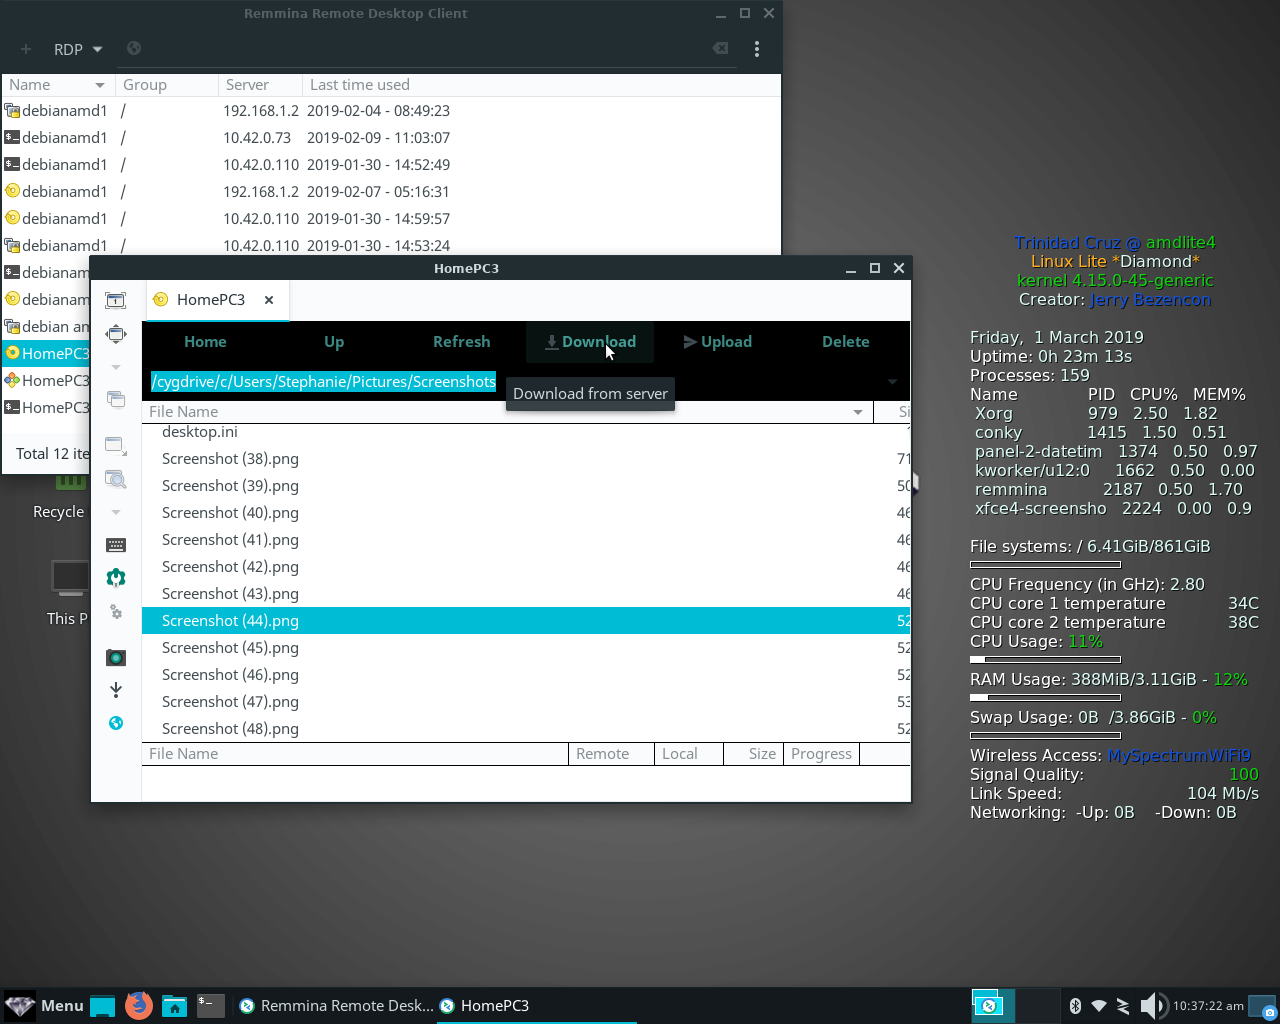
To download a file from the SSH server on your Windows 10 computer just select a file or files by using the file manager window right there in Remmina, and the download button will clearly appear. Click it and your file or files will download from Windows 10 and offer you a choice of folders to download to on your Linux Lite machine. See image below: