Section 6 Autostarting The SSH Gnome Key Ring, Setting Up AllowUser(s) On The Server & Using SCP Syntax
Section 6a) Setting SSH Gnome Key Ring To Run On Startup
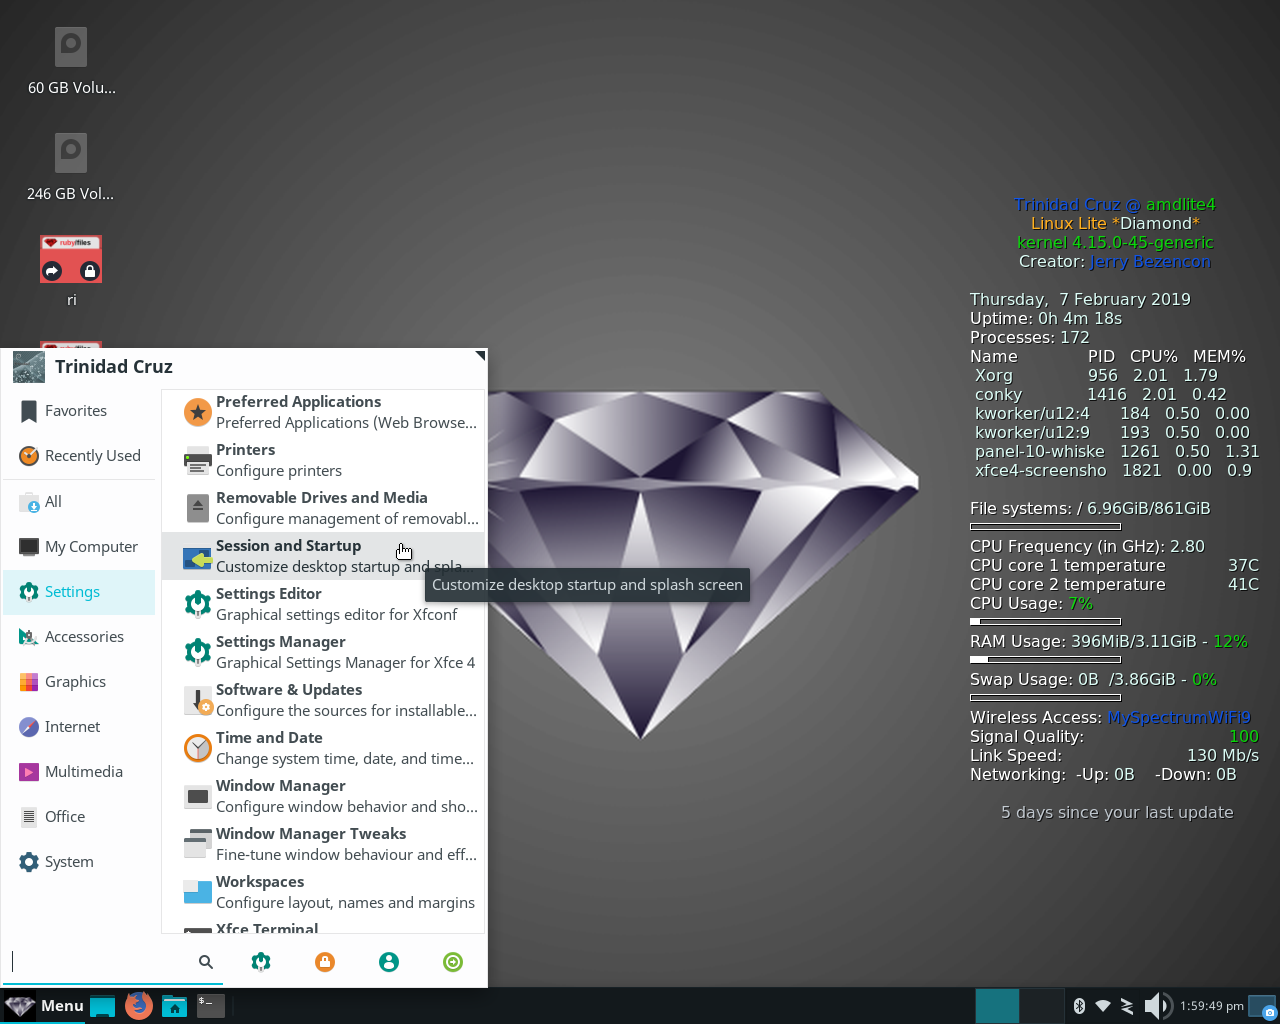
Because Linux Lite uses a modified version of the XFCE desktop environment, and is not a gnome desktop, you will have to enter your sudo password every time you want to connect to SSH after shutting down and booting again, or restarting computer after updates. If you want to eliminate this behavior open the main menu on your Linux Lite computer. Go to Settings > Session and Startup. If you are using Debian gnome this step is unnecessary. See image below:
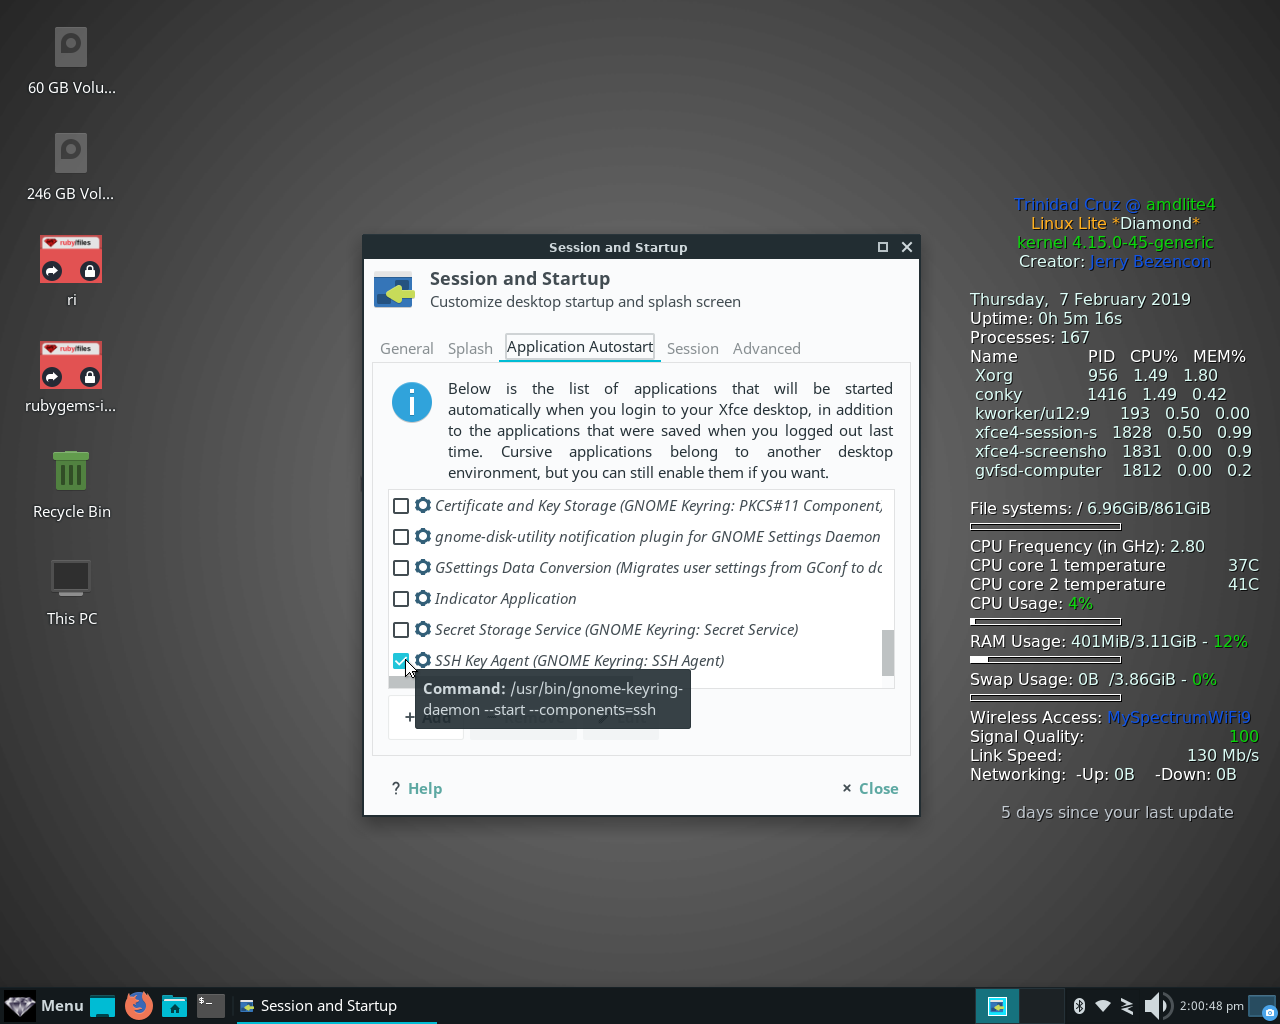
When the Session and Startup window opens click on the Application Autostart tab. Scroll down and check the box for SSH Key Agent (Gnome Keyring: SSH Agent). See image below:
Click Close to close the window. Logout and restart your computer. Now you won’t be prompted for a password to start the key ring when you want to connect to SSH, SFTP, or VNC.
Section 6b) Setting Up AllowUser(s)
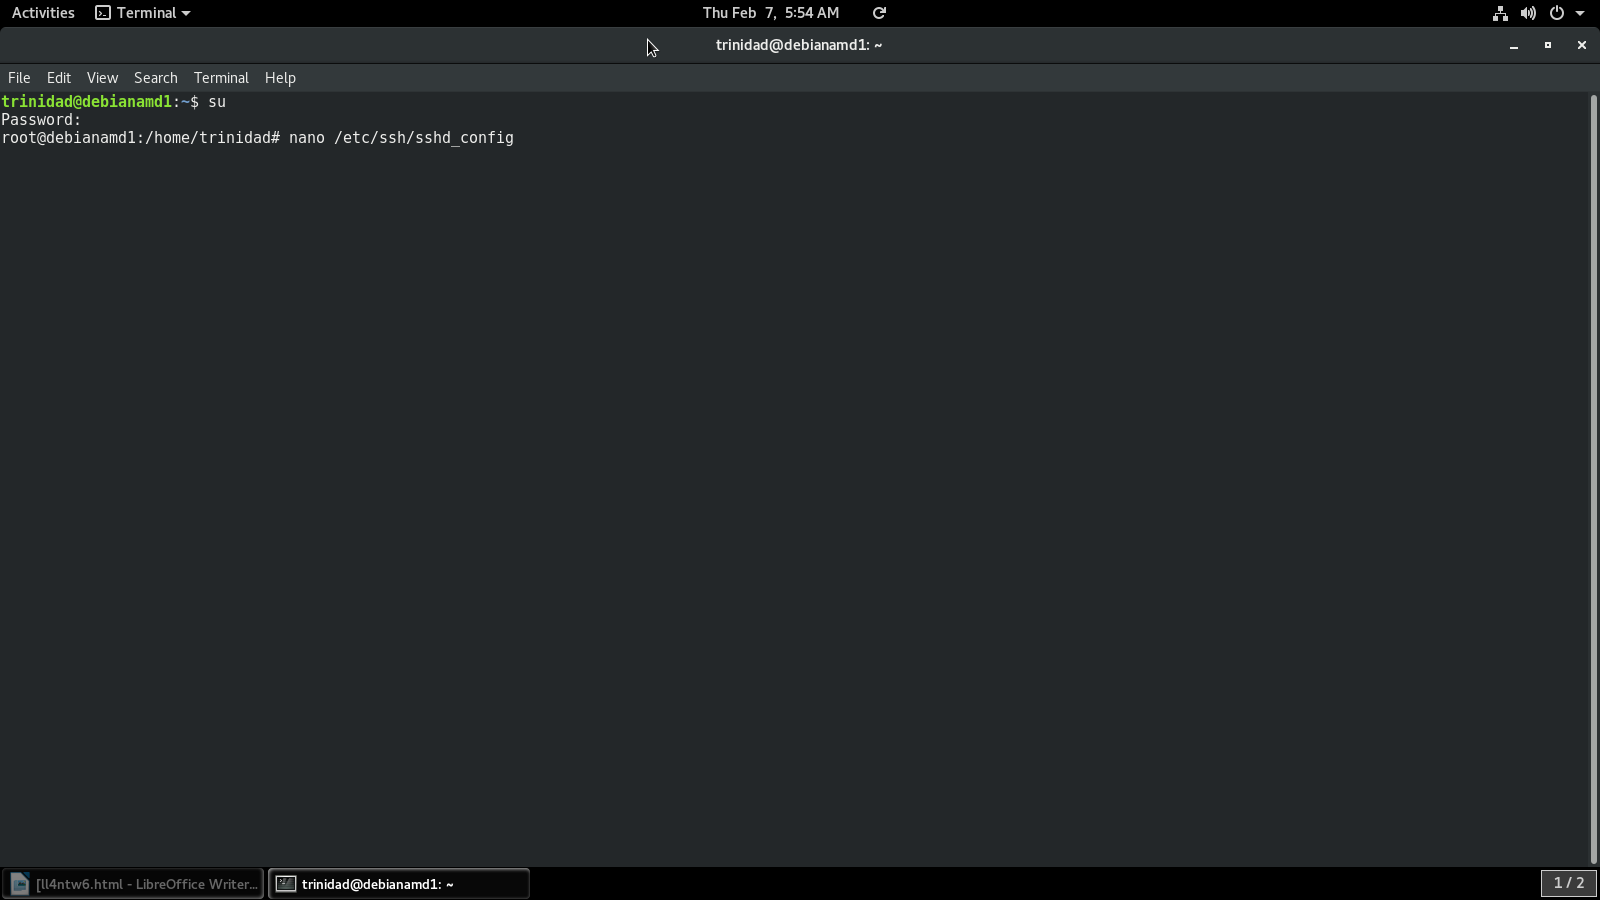
On your Debian 9 computer open a terminal and sudo or su to a root terminal as shown below. Type the command: nano /etc/ssh/sshd_config and hit Enter. See image below:
When the file loads use the down arrow cursor key to scroll all the way to the bottom of the file. If you have previously set the Home profile on your firewalls to allow connections through port 22 on your Wifi interface, and intend to use both ad hoc Wifi and a Wifi connection through router assigned addresses you should add an AllowUser(s) rule to the end of this file. You can use both connections but you will need an IPv4 address for both connections to add the AllowUser(s) rule. The rule is restrictive and will only allow connections to the SSH server from the users at the client IPv4 addresses you specify, so make sure you type correctly and use the syntax in the image below. If you are using a direct ethernet connection the client IPv4 address should be the same as the ad hoc Wifi connection. In any case the important address to add here is the client IPv4 address (Linux Lite) that it connects via Wifi to the Internet with, but if you add one, you have to add the other. The rule is restrictive, not selective. See the image below:
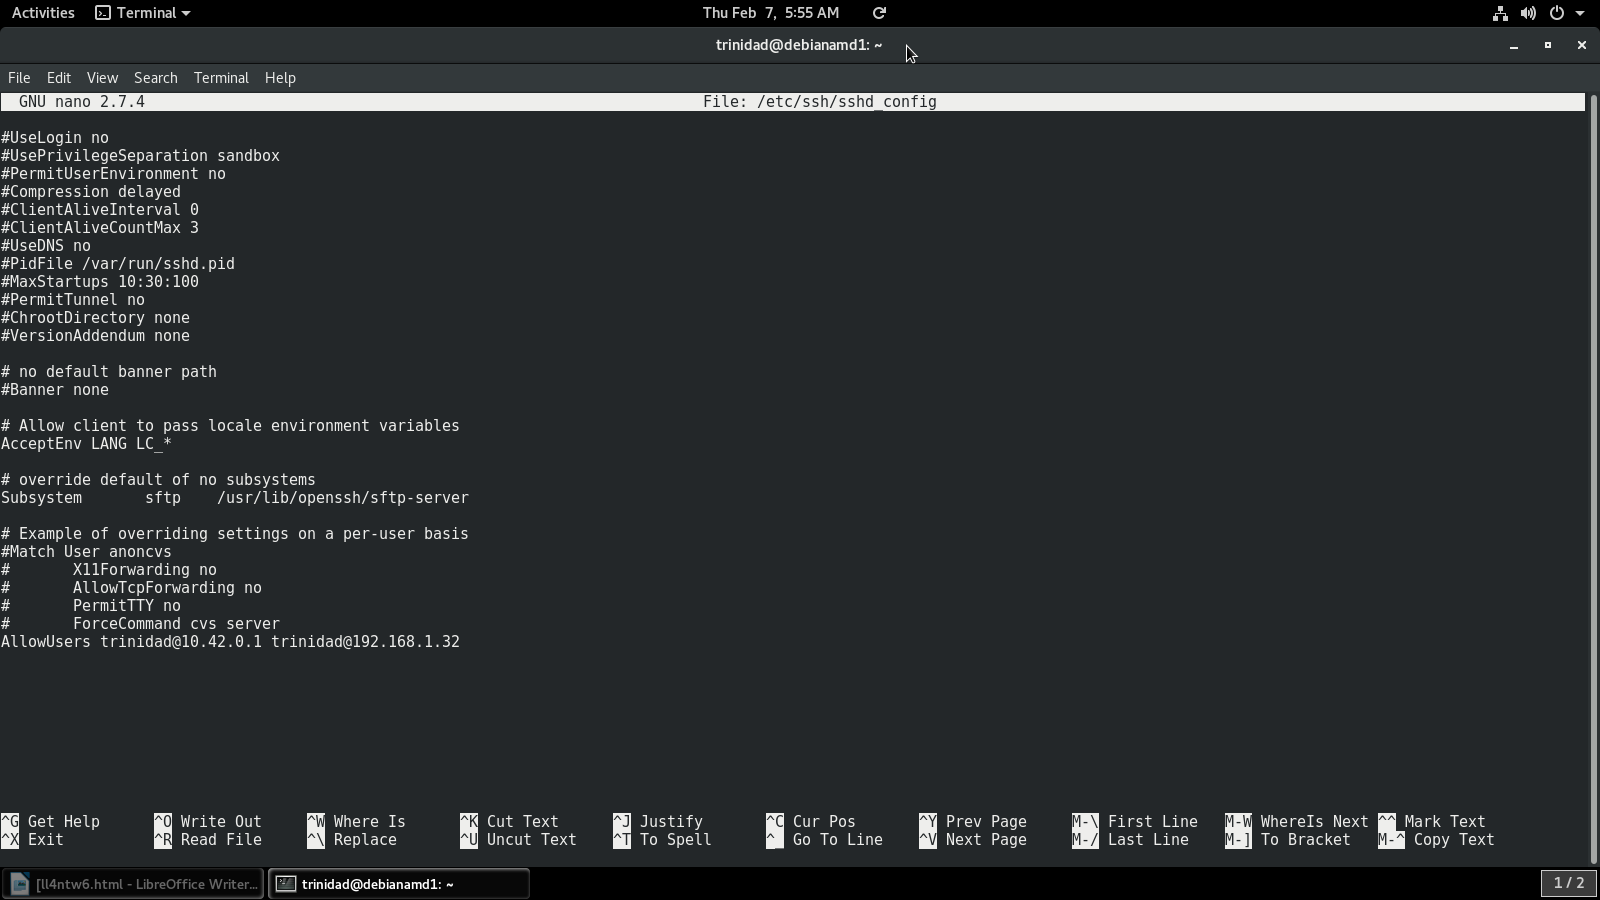
In this case my Linux Lite computer connects to the Internet via Wifi, and my Debian computer does so as well. This means I can use SSH and connect my computers together using those IPv4 addresses. Because I have opened port 22 on my Home firewall profile on my Wifi interface I can connect to my Linux Lite computer by connecting to its ad hoc Wifi IPv4 address. I need to add: AllowUsers trinidad@10.42.0.1 trinidad@193.168.1.32 to safely be connected to the Internet with port 22 open to access from my Wifi interface. 10.42.0.1 is my Linux Lite computer’s Ipv4 address for both my wired connection and my ad hoc Wifi connection, so this will also restrict the users on my ethernet direct connection when I am using my Office firewall profile. After adding your AllowUser(s) restriction at the end of the file as shown above hit Control+x, and then y, and then Enter to save the file.
See the link below for more information on hardening SSH connections:
https://www.ssh.com/ssh/sshd_config/
Section 6c) A Demonstration Of SCP Syntax & Usage For Linux Lite 4.xx
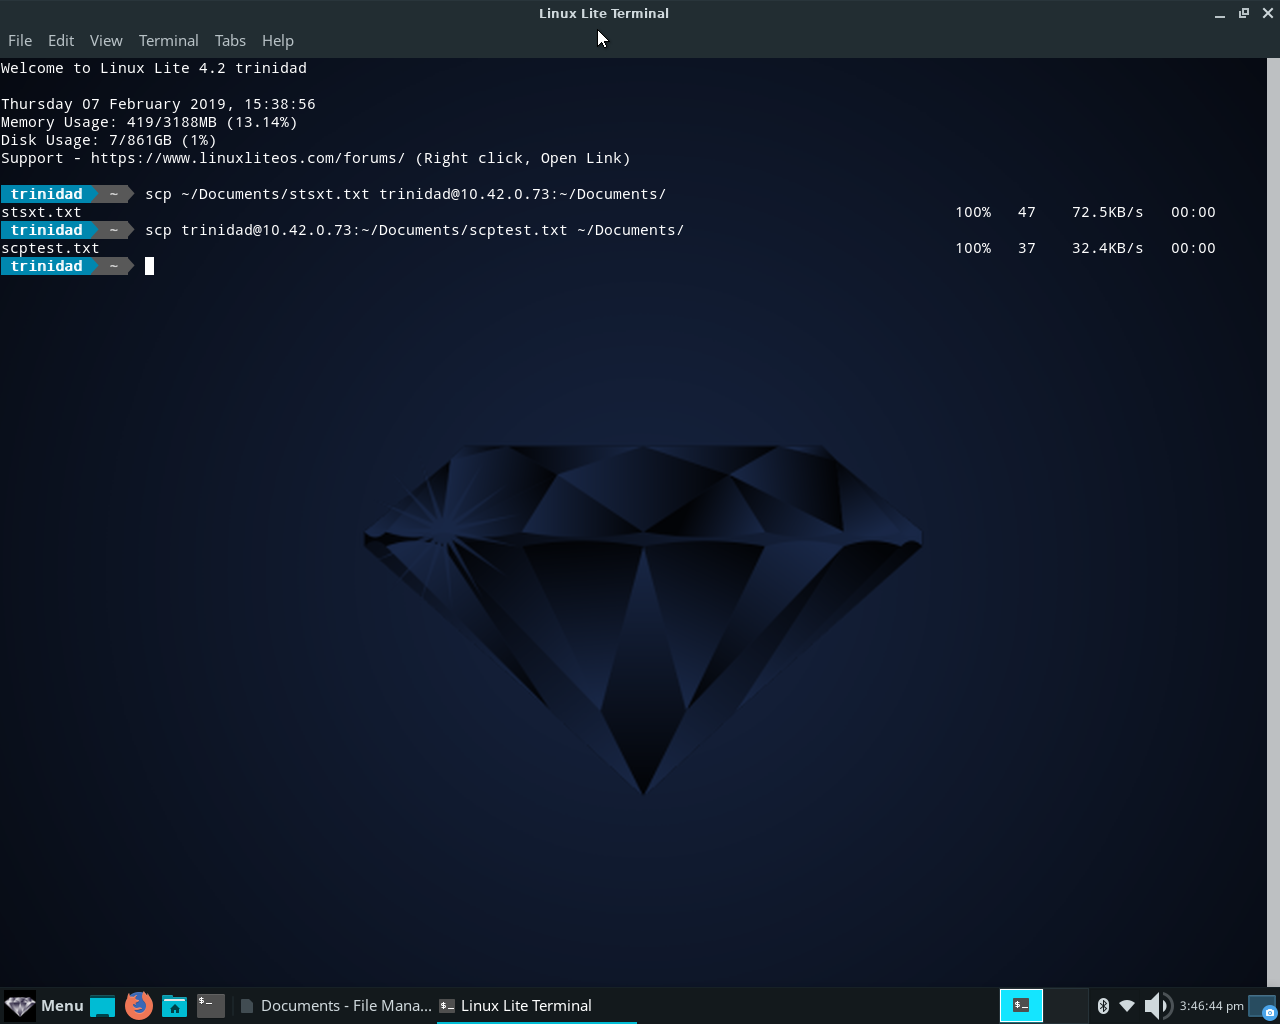
I’m going to briefly discuss SCP here though most new Linux Lite users coming from a Windows desktop environment are probably better off with the SFTP interface of Remmina. It (SCP *an acronym for secure copy) is a convenient way to pass text when using a text editor to a remote or vice versa. All that really matters is using the correct syntax (Unix utility form) and avoiding typos in the terminal. I’m just going to cover the basics here and again use my direct ethernet connection addresses. See image below:
Since I generated and copied/shared SSH keys, and because I am autostarting SSH gnome keyring, SCP does not ask for a password, nor does it need sudo privileges. For this reason people with several users on their computers often use the passphrase I discussed before to protect their SSH keyed connections. You will be prompted for a passphrase if you set one up. You will also be prompted for your sudo password if you don’t autostart SSH gnome key ring from Session and Startup.
In the image above you can see I entered an scp command at the first prompt:
scp ~/Documents/stsxt.txt trinidad@10.42.0.73:~/Documents/
This is the correct workable syntax for copying a file from local to remote, in this case my Linux Lite computer and its terminal CLI copying the file to my Debian 9 machine. The tilde ~ is just the short way of expressing /home/trinidad/ in the file locations. I put the local file location first, then a space, then the user and IPV4 address of my Debian computer, then a colon, then the location on my Debian computer that I want the file copied to. In the terminal below the first prompt you will see the file name just copied and across the screen to the right you will notice the % of completion and size of the file.
In the image above you can see I entered an scp at the second prompt:
scp trinidad@10.42.0.73:~/Documents/scptest.txt ~/Documents/
This is the correct workable syntax for copying a file from a remote to a local machine, in this case from my Debian 9 machine to my Linux Lite machine. First enter the user and IPv4 address of the remote machine, then a colon, then the location of the file you want to copy and its file name, then a space, then the location you want the file copied to.
I’m not going to go any further with this discussion on SCP because I am writing here for new Linux Lite users coming from a Windows desktop environment, and advanced Linux users don’t need a tutorial on it. I included it here to make new users aware of how it is integrated with SSH connections, and how some SSH settings interact with it. I included command examples for simple copying in both directions for new users mainly so they don’t break anything if they decide to explore it, but I don’t recommend it for new users, or even consider it convenient or useful for new Linux users on a local network. The Remmina SFTP interface is much more user friendly for new users coming from a Windows environment.
Well I’m at the end of this discussion about Linux to Linux connections. If you have followed along and succeeded in implementing SSH, SFTP, and VNC connections on your Linux Lite computer; congratulations and welcome to the Linux Lite community.
**This tutorial prepared entirely with LibreOffice writer Web and screenshot tools on Debian 9. Linux Lite Diamond 4.x images via Linux Lite screenshot tool.**